Thread: Built 4t65e - The results are in.

Page 4 of 12 FirstFirst ... 23456 ... LastLast
Results 61 to 80 of 238

Hybrid View

Previous Post Previous Post   Next Post Next Post
  1. #1 Re: Jane's 4t65e - It's tedious 
    Solving problems BrandonHall10's Avatar
    Join Date
    Mar 2014
    Location
    Tucson
    Posts
    3,189
    Thanks (Received)
    10
    Likes (Received)
    146
    Dislikes (Received)
    3
    Thanks!

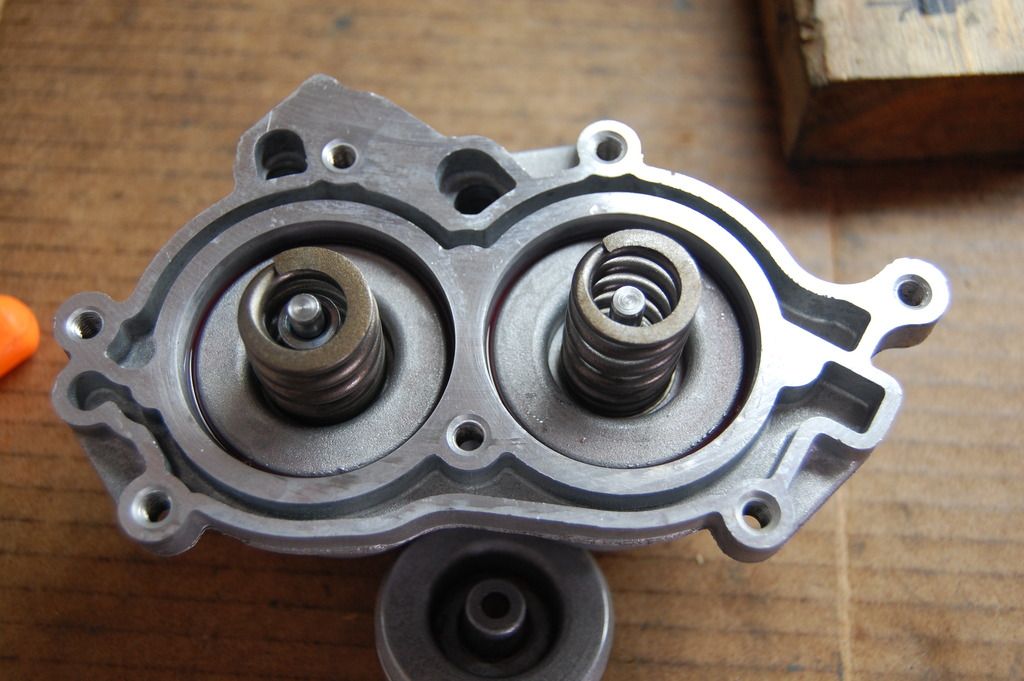
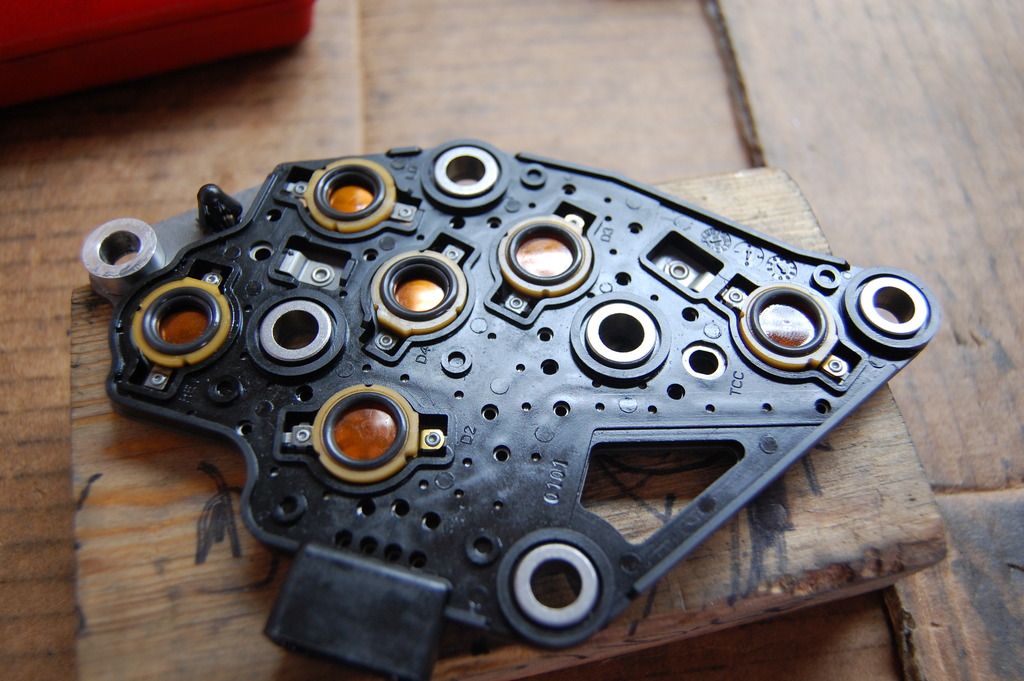
    I used your write up when I put the shift kit in my car. (Accumulator only) That was the most complicated thing I'd done up to that point, and having that as a guide was very helpful. Thank you for that!

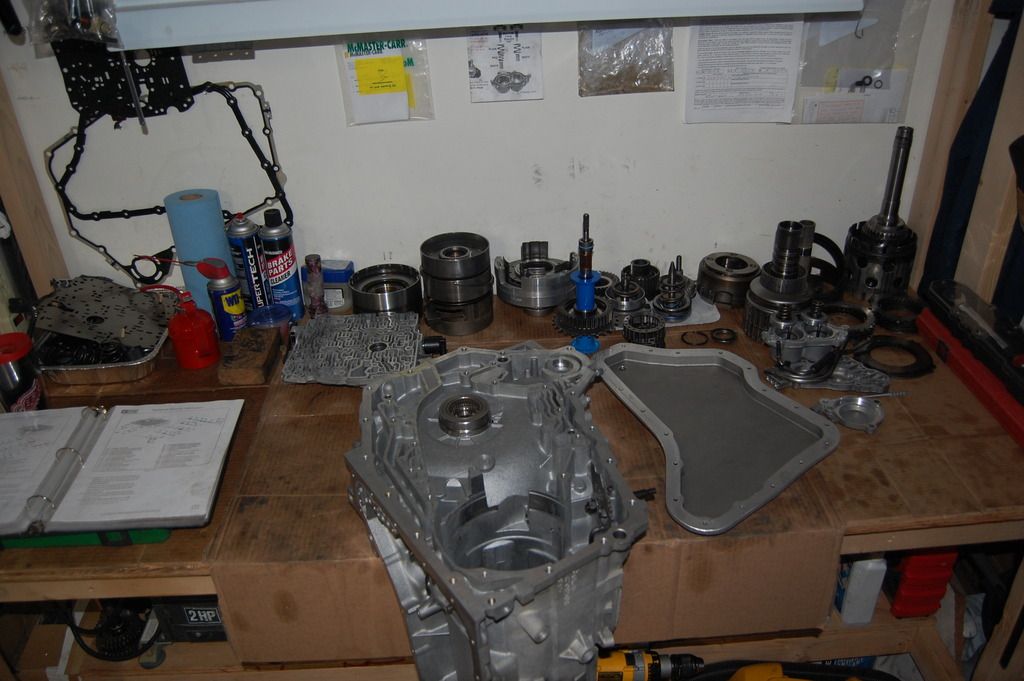
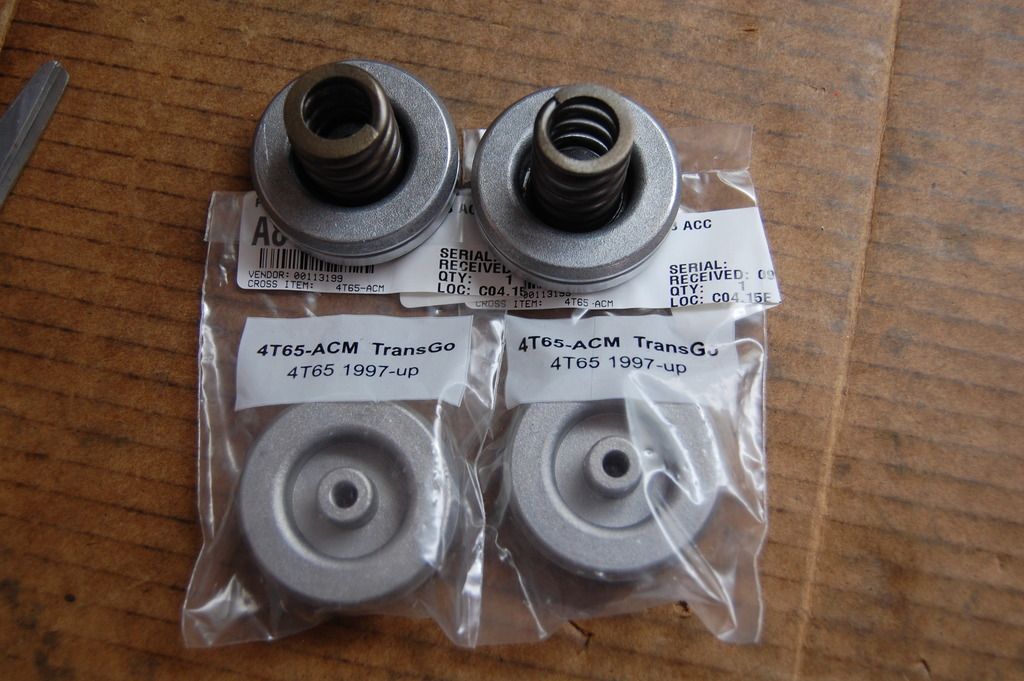
    I thought about putting different springs and spacers in, and I still may at some point, but I figured the standard pieces would be a good place to start. Having a pan with a drain plug will make it less painful when I do.

    If the '06 is boosted, you'll be in there before you think. Haha!
    Reply With Quote  
     

  2. #2 Re: Jane's 4t65e - It's tedious 
    I live here. 02NavyBlue's Avatar
    Join Date
    Dec 2012
    Location
    Where 4T65E's were born
    Posts
    5,067
    Thanks (Received)
    1
    Likes (Received)
    1
    Dislikes (Received)
    0
    Well man you went from new to installing a shift kit to full builds, impressive!
    I like the springs Transgo supplies, all 3 in one bore lol. Some kits just use spacers, which I would think gives a bit of a weird shift feel, like a soft initial apply then a hard bump. Haven't tested that but I like having stiff springs and shims to back them up. At least with my 02 half the reason I put it in was because I had slower shifts as it got warm, I bet my 06 will do more with the standard transgo than my 02 did being the 06 trans works perfectly. And yes it's supercharged. And I hope I don't "have" to go in there at any time, I'm not gonna be too crazy on it. My 02 would take anything you gave it, but that's because it's N/A lol
    2006 Grand Prix GT S/C 109k - Modded Transgo Shift Kit, Gutted Airbox, Dash Cam, and Inlays. Retros soon to come.
    2002 Grand Prix GT N/A 127k - Same as 06 Plus: Trans Cooler, DIY Aux Input, LED lighting, Suspension Upgrades, Tint, Retrofits.
    Sold.
    Reply With Quote  
     

  3. #3 Re: Jane's 4t65e - It's tedious 
    Donating Users GMR Badass's Avatar
    Join Date
    Apr 2011
    Location
    Columbus, OH
    Posts
    879
    Thanks (Received)
    0
    Likes (Received)
    0
    Dislikes (Received)
    0
    Brandon you should have used 3 springs in the 4th accumulator. It varies a little from the instructions but is well worth it. 1 from the new shift kit and re-use the original two.
    Last edited by GMR Badass; 10-29-2015 at 08:37 AM.
    1999 GTP 2dr - Whipple 537whp.....for now
    1998 GTP 4dr - ST2, Cartuning PT61, IC - SOLD
    1999 GTP 2dr - SIX, GenV, Headers, TEP Trans, E85 - SOLD
    1997 GTP 4dr - 3.4, 1.9's, 3" DP, P-log - SOLD
    Reply With Quote  
     

  4. #4 Re: Jane's 4t65e - It's tedious 
    Solving problems BrandonHall10's Avatar
    Join Date
    Mar 2014
    Location
    Tucson
    Posts
    3,189
    Thanks (Received)
    10
    Likes (Received)
    146
    Dislikes (Received)
    3
    Ah-ha! Didn't even think about that. See, this is why I'm taking this build slow, and posting everything. I appreciate the input. I still have the channel plate sitting on the bench. I can toss that extra spring in there, no problem.

    What do you think about shimming (using a large washer) the springs in there. Would the combination of 3 springs AND a shim be too much?
    Reply With Quote  
     

  5. #5 Re: Jane's 4t65e - It's tedious 
    Donating Users GMR Badass's Avatar
    Join Date
    Apr 2011
    Location
    Columbus, OH
    Posts
    879
    Thanks (Received)
    0
    Likes (Received)
    0
    Dislikes (Received)
    0
    I don't add a shim, by doing a total of 3 springs it does essentially the same thing. You can try doing everything but I've never found it to be needed since 4th was never really made to handle any kind of big power. Just quickens it up and gives it a better feel shifting into 4th......Edited my earlier post, it's 2 original springs with the 1 from the shift kit.

    I run the shift kit a little differently. I make the 1-2 accumulators stack up the same in terms of springs so the red one currently in the 4th housing (in your pic) gets moved over to one of the 1-2 accumulators and then it end up being 3 yellow springs into that 4th housing.
    Last edited by GMR Badass; 10-29-2015 at 08:46 AM.
    1999 GTP 2dr - Whipple 537whp.....for now
    1998 GTP 4dr - ST2, Cartuning PT61, IC - SOLD
    1999 GTP 2dr - SIX, GenV, Headers, TEP Trans, E85 - SOLD
    1997 GTP 4dr - 3.4, 1.9's, 3" DP, P-log - SOLD
    Reply With Quote  
     

  6. #6 Re: Jane's 4t65e - It's tedious 
    Donating Users GMR Badass's Avatar
    Join Date
    Apr 2011
    Location
    Columbus, OH
    Posts
    879
    Thanks (Received)
    0
    Likes (Received)
    0
    Dislikes (Received)
    0
    No shim no spacer and move red spring to make both 1-2 and 2-3 accumulator spring setups look identical.
    1999 GTP 2dr - Whipple 537whp.....for now
    1998 GTP 4dr - ST2, Cartuning PT61, IC - SOLD
    1999 GTP 2dr - SIX, GenV, Headers, TEP Trans, E85 - SOLD
    1997 GTP 4dr - 3.4, 1.9's, 3" DP, P-log - SOLD
    Reply With Quote  
     

  7. #7 Re: Jane's 4t65e - It's tedious 
    Solving problems BrandonHall10's Avatar
    Join Date
    Mar 2014
    Location
    Tucson
    Posts
    3,189
    Thanks (Received)
    10
    Likes (Received)
    146
    Dislikes (Received)
    3
    I was just about to ask about moving that "extra" red spring to the accumulator. I'll move everything around tonight and post pictures of the revised setup. Thanks!
    Reply With Quote  
     

  8. #8 Re: Jane's 4t65e - It's tedious 
    Solving problems BrandonHall10's Avatar
    Join Date
    Mar 2014
    Location
    Tucson
    Posts
    3,189
    Thanks (Received)
    10
    Likes (Received)
    146
    Dislikes (Received)
    3
    Alright, I got the shift kit springs moved around per Greg's suggestion


    The valve body is all put back together minus the 1-2 shift valve. It showed signs of flaking/scarred anodization. This must be a fairly common issue. Sonnax offers a drop in replacement valve. Hoping my trans place has them in stock.


    Gratuitous bench shot


    And my $12 organization method


    Going to the trans shop tomorrow. Looking to get new accumulator pistons, a 1-2 shift valve, and pick up the super secret snap ring they ordered for me. Also going to see what they have to tighten up the third clutch pack.
    Reply With Quote  
     

  9. #9 Re: Jane's 4t65e - It's tedious 
    Donating Users GMR Badass's Avatar
    Join Date
    Apr 2011
    Location
    Columbus, OH
    Posts
    879
    Thanks (Received)
    0
    Likes (Received)
    0
    Dislikes (Received)
    0
    Shift kit arrangement looks good. How you have it mounted to a table makes me laugh because that's exactly how I did my first transmission.

    Couple methods for tightening up third clutch pack. One is going to be to use a razor blade to remove all of the friction material off of an outer lugged 3rd steel/friction (used one that you pulled out) or to take one of then.055" plates out and use a mid 80s 440T4 3rd steel which is. 090" and puts it around .030-.040" clearance.

    What is this super secret snap ring they ordered?
    1999 GTP 2dr - Whipple 537whp.....for now
    1998 GTP 4dr - ST2, Cartuning PT61, IC - SOLD
    1999 GTP 2dr - SIX, GenV, Headers, TEP Trans, E85 - SOLD
    1997 GTP 4dr - 3.4, 1.9's, 3" DP, P-log - SOLD
    Reply With Quote  
     

  10. #10 Re: Jane's 4t65e - It's tedious 
    GT Level Member DJNight2k's Avatar
    Join Date
    May 2009
    Location
    Lorain, OH
    Posts
    343
    Thanks (Received)
    0
    Likes (Received)
    0
    Dislikes (Received)
    0
    Quote Originally Posted by BrandonHall10 View Post
    Alright, I got the shift kit springs moved around per Greg's suggestion


    Just for a little more clarification from you/Greg, after moving the springs around, what if any of the spacer sleeves and washers did you use around the servo pins from the kit? I thought Greg mentioned not using any spacers/washers but it looks like you have some in there. Just curious since I will be doing one this week.
    Reply With Quote  
     

  11. #11 Re: Jane's 4t65e - It's tedious 
    Solving problems BrandonHall10's Avatar
    Join Date
    Mar 2014
    Location
    Tucson
    Posts
    3,189
    Thanks (Received)
    10
    Likes (Received)
    146
    Dislikes (Received)
    3
    Quote Originally Posted by 02NavyBlue View Post
    I'm interested to see how a transgo kit works with a trans that has the clutches tightened up. In my mind, both of those will improve shift feel about the same, seems like a pretty performance oriented setup. Should be awesome
    I think so. Before the swap, I'm going back to stock shift times in the tune, just as a starting point. Should still be a pretty good kick in the pants.

    Quote Originally Posted by BillBoost37 View Post
    Since you like tools, I'll suggest another tool.


    Bracket to mount trans on engine stand. HF has four wheel stands on sale at times and a bracket is a piece of cake to weld up.


    Basic 90 degree with a couple of pieces in the angle to give it added support


    A buddy had given me a leftover piece of 1/4" stock. Sure it was way too thick for what I needed, solid though. If you play around with a hoist on it.. you'll find where to grind a slight notch for the perfect balanced lifting spot too.
    Honestly Bill, I really don't mind the bench mount. That could just be because I've never had one on a stand though. The only disadvantages I see to a bench mount is,
    1.) You have to plan ahead for the reverse servo removal/installation
    2.) You have to test final drive end play before mounting it
    3.) You can't test the oil pump drive shaft spin until it's all together and off the bench. Although, I could drill a large hole in the bench if it bothered me that much.

    I may eventually build a rack. Especially now that I know a good inexpensive welder guy, but I would have to be doing a lot more trans work than I'm doing right now.

    Quote Originally Posted by DJNight2k View Post
    Bill, THAT is absolutely Genius! I have one of the GM Kent Moore trans brackets for these trans, but at the moment I don't have a bench and bench mount to attach it to.. The engine stand mount is a killer idea! Wonder if anyone sells one of those pre-made. How much would you charge to make me one? (I don't have access to a welder)
    There is a generic bench mount available. Slightly cheaper then the Kent Moore piece.
    http://www.ebay.com/itm/190743363247...%3AMEBIDX%3AIT
    And for about $60 in lumber and an afternoon, you can have a really nice bench.

    Quote Originally Posted by BillBoost37 View Post
    I don't have a welder or trans either.


    Literally. I took the piece off the stand. Bolted it to the lower back bolt. Then planned a piece up and another across. Including enough room for the fwd band servo to be in and still turn fully on the stand. Which was covered by using that back bolt and the arm from the stand.


    Brandon realizes...I just went into the cases and found a bolt that worked for that. Snapped the other week for him.


    A couple of trans only cases
    I'll get there eventually Bill.
    Reply With Quote  
     

  12. #12 Re: Jane's 4t65e - It's tedious 
    Solving problems BrandonHall10's Avatar
    Join Date
    Mar 2014
    Location
    Tucson
    Posts
    3,189
    Thanks (Received)
    10
    Likes (Received)
    146
    Dislikes (Received)
    3
    Quote Originally Posted by DJNight2k View Post
    Just for a little more clarification from you/Greg, after moving the springs around, what if any of the spacer sleeves and washers did you use around the servo pins from the kit? I thought Greg mentioned not using any spacers/washers but it looks like you have some in there. Just curious since I will be doing one this week.
    Spacer placement was just as the instructions stated.

    The washer I was speaking of was to be in the 3-4 accumulator housing. Decided against that. The 3 spring setup should be sufficient.
    Reply With Quote  
     

  13. #13 Re: Jane's 4t65e - It's tedious 
    GXP Level Member Turbocharged400sbc's Avatar
    Join Date
    Jan 2008
    Location
    hangover park IL
    Posts
    2,714
    Thanks (Received)
    4
    Likes (Received)
    11
    Dislikes (Received)
    0
    put a helicoil in the zzp pan now or youll be doing it later.

    go insane with the magnets, dab or rtv and stick em. every magnet to collect ferrous particles keeps more particles out of the PCS/and bushings.

    i swear im going to put on a spin-on filter on the cooler line
    ~James~ Psychotic Gearhead
    projects: 84 Cressida waGN~ 90 LN3 3800, equal length headers, T70, 89 700r4, misc parts,
    1994 Oldsmobile 442 (462ci-4wd-2 engines) L67/4t80e^2,
    00 Turbo Regal 608 fwhp 575ftlbs at 5500rpm, 98 WhippledRiv, 97 GTP
    Reply With Quote  
     

  14. #14 Re: Jane's 4t65e - It's tedious 
    Donating Users 16MustangVet's Avatar
    Join Date
    May 2009
    Location
    Sh1t hole Afghanistan Currently
    Posts
    5,418
    Thanks (Received)
    0
    Likes (Received)
    0
    Dislikes (Received)
    0
    oooo i like that spin off filter idea and never thought about all that sh1t getting trapped and such....

    love this thread i really need to make a clone of the trans thats in the s1x e85 car and keep it on hand wouldnt be that expensive or hard and save me headaches down the road!!

    would be awesome to have one on stand by instead of jumping through my ass to get something fixed fast.

    ive given my wife permission to go full retard on the house searching now that weve got va approval. most everything im looking at is actually less than my fvcking rent and 2 car garages fvck yeah! this throwing money out the window is about to stop.

    ohh ps what do you and greg require for fancy tool loan/borrow? i has paypal lol !!
    How I treat my car: wreck,fix, repeat.
    Reply With Quote  
     

  15. #15 Re: Jane's 4t65e - It's tedious 
    Solving problems BrandonHall10's Avatar
    Join Date
    Mar 2014
    Location
    Tucson
    Posts
    3,189
    Thanks (Received)
    10
    Likes (Received)
    146
    Dislikes (Received)
    3
    Quote Originally Posted by GMR Badass View Post
    How you have it mounted to a table makes me laugh because that's exactly how I did my first transmission.
    It's pretty convenient. If I had a welder, I'd build the engine stand bracket. This is probably the next best thing. The only thing that sucks is loading the diff and cover UP into the case. But it's not impossible.

    Quote Originally Posted by GMR Badass View Post
    Couple methods for tightening up third clutch pack. One is going to be to use a razor blade to remove all of the friction material off of an outer lugged 3rd steel/friction (used one that you pulled out) or to take one of then.055" plates out and use a mid 80s 440T4 3rd steel which is. 090" and puts it around .030-.040" clearance.
    Thanks for the clarification. I see that TEP also offers a custom 3rd backing plate for $30.

    http://shop.tripleedgeperformance.co...E-3RD-PLT1.htm

    I'll have to see which method gives me the optimal clearance once I get to that point.

    Quote Originally Posted by GMR Badass View Post
    What is this super secret snap ring they ordered?
    It's part of the Alto "New CLearance Kit for 2nd, 3rd & Forward on GM 4T65E..." http://www.altousa.com/images/new_products/np88.pdf

    I'll know more and post pictures once it's actually in my hands. If I actually get it that is. It's supposed to be the last one in the nation, and you know how that goes. Supposedly it came all the way from Arkana Arkansas. I may not even need it with the 10pc. input clutch setup, but for $10, and it being the last one available, I wanted it!

    Quote Originally Posted by Turbocharged400sbc View Post
    put a helicoilin the zzp pan now or youll be doing it later.


    Haha! It already needs one. I bought it with a stripped hole. I got it pretty cheap and that's the only reason I bought it. From my experience in machining and manufacturing, something like that should come with a helicoil from day one. I'm sure you'd agree... A helicoil in an aluminum pan isn't a "repair" it's an upgrade.

    Quote Originally Posted by Turbocharged400sbc View Post
    go insanewith the magnets, dab or rtv and stick em. every magnet to collect ferrousparticles keeps more particles out of the PCS/and bushings.


    I got 4 new generic squares and 2 old GM squares. I'm thinking I'll stick the GM squares to the metal part of the filter. I wasn't sure how to secure the others though. You're saying a dab of high temp RTV will survive inside the pan and hold the smaller squares in place?

    Quote Originally Posted by MyNameBlows View Post
    ohh ps what do you and greg require for fancy tool loan/borrow? i has paypal lol !!
    A trans tool loaner program? Hmm...
    Reply With Quote  
     

  16. #16 Re: Jane's 4t65e - It's tedious 
    Solving problems BrandonHall10's Avatar
    Join Date
    Mar 2014
    Location
    Tucson
    Posts
    3,189
    Thanks (Received)
    10
    Likes (Received)
    146
    Dislikes (Received)
    3
    My magnet collection

    Reply With Quote  
     

  17. #17 Re: Jane's 4t65e - It's tedious 
    Solving problems BrandonHall10's Avatar
    Join Date
    Mar 2014
    Location
    Tucson
    Posts
    3,189
    Thanks (Received)
    10
    Likes (Received)
    146
    Dislikes (Received)
    3
    Well, the special snap ring was a no-go. Not a huge loss. I should be able to tighten up the input clutch clearance using the clutches and assorted steels I have on hand. They also didn't have my 1-2 shift valve in stock, but it's on order. Should have it next Friday. I did get the new accumulator pistons though


    So I was able to wrap up the accumulator assembly


    Ready for final assembly


    I stopped at a couple local machine shops. Nobody had the HeliCoil kit I needed, and I wasn't about to buy a $65 kit to fix one hole. Figured I'd give this a shot:

    http://www.ebay.com/itm/M5-M6-M8-M10...Htwl5l7-MakL2Q

    Currently working on putting new o-rings on the MPS...
    Reply With Quote  
     

  18. #18 Re: Jane's 4t65e - It's tedious 
    I live here. 02NavyBlue's Avatar
    Join Date
    Dec 2012
    Location
    Where 4T65E's were born
    Posts
    5,067
    Thanks (Received)
    1
    Likes (Received)
    1
    Dislikes (Received)
    0
    Did the new pistons solve the extra slack issue? Good choice on the shift kit spring orientation. I'm going to do the same thing. I didn't think to leave the stock springs in the 4th when I did my 02.
    2006 Grand Prix GT S/C 109k - Modded Transgo Shift Kit, Gutted Airbox, Dash Cam, and Inlays. Retros soon to come.
    2002 Grand Prix GT N/A 127k - Same as 06 Plus: Trans Cooler, DIY Aux Input, LED lighting, Suspension Upgrades, Tint, Retrofits.
    Sold.
    Reply With Quote  
     

  19. #19 Re: Jane's 4t65e - It's tedious 
    Solving problems BrandonHall10's Avatar
    Join Date
    Mar 2014
    Location
    Tucson
    Posts
    3,189
    Thanks (Received)
    10
    Likes (Received)
    146
    Dislikes (Received)
    3
    Oh yeah. the old piston pin bores were oblong. You could wiggle the pin side to side a bunch. The bores on the new pistons are a nice slip fit.

    New o-rings on the MPS and checked function of all the switches. All check good.


    I finally got to build the input/3rd clutch packs. Couldn't do anything till I got this. It came today. The Sonnax 3rd clutch piston kit. PN 84965-01K


    Pictures of the assembly progress


    Once that was in, I could check the clearance on the 3rd with the standard kit components. I stopped checking after 0.085" went in.


    I knew if I was over 0.085" a shaved outer splined 3rd clutch would get me pretty close. The steel part measures just under 0.050"


    Here it is de-clutched


    That put me right where I want to be. Picture shows a 0.035" feeler, but it's actually closer to 0.040"


    On to the input clutch pack. It's loose


    My solution was to replace one of the 0.050" steels (used in the 10pc stack) with a 0.078" steel (used in the 8pc stack). This put me around 0.045" and that was close enough. Another thick plate would have made it too tight. From what I've read, the clearance on the input clutch assembly is less critical. It's not a "shifting" clutch.


    Now that all clearances have been checked, the clutches can soak.

    Last edited by BrandonHall10; 11-02-2015 at 09:02 PM.
    Reply With Quote  
     

  20. #20 Re: Jane's 4t65e - It's tedious 
    SE Level Member
    Join Date
    Apr 2015
    Location
    NJ
    Posts
    140
    Thanks (Received)
    0
    Likes (Received)
    0
    Dislikes (Received)
    0
    fantastic work so far, wanted to ask what brand clutches are you using? TEP always recommends the borg warners which is what i have in mine from his kit, but I know borg warner makes like 20 different styles of clutches with varying degrees of friction.
    Reply With Quote  
     

Page 4 of 12 FirstFirst ... 23456 ... LastLast

Similar Threads

  1. A Stray cat ripped open my screen and welcomed himself into my home
    By acidcrashdburnd in forum Off Topic Discussion
    Replies: 7
    Last Post: 06-13-2012, 08:48 AM
  2. Taz's Offical Summer/Fall build list.
    By Taz Magister in forum 3.8L V6 Supercharged (L67)(L32)
    Replies: 321
    Last Post: 12-13-2011, 01:23 PM
  3. my build, need opinions
    By nascartech in forum General Tech Discussion
    Replies: 6
    Last Post: 10-03-2011, 10:53 PM
  4. ScreamsOfTheSouth Build / Need Opinions
    By z3r0 in forum 3.8L V6 Supercharged (L67)(L32)
    Replies: 21
    Last Post: 07-22-2011, 10:24 AM
  5. Lookin for opinions here.. Engine build
    By TorqueAutoMotiv in forum 3.8L V6 Supercharged (L67)(L32)
    Replies: 2
    Last Post: 06-19-2009, 08:11 AM
Bookmarks
Bookmarks
Posting Permissions
  • You may not post new threads
  • You may not post replies
  • You may not post attachments
  • You may not edit your posts
  •