I can't believe how much hell one must endure just to remove the oil pan on a 3.8 Grand Prix. I did it by myself, and in the pouring rain. With that said, this is what I did to accomplish this feat--
Tools I needed:
3/8" drive ratchet
1/2" drive impact gun or ratchet (I'm sure a 3/8" drive would do just fine)
Medium/long 3/8 drive extension
Large screw driver
15mm standard depth socket
15mm wrench (ratchet wrench would have saved me an hour and 987 swear words)
18mm 1/2" drive socket
16mm wrench -- I'll explain later
3/8" socket
medium/long 3/8" drive extension
2" x 4" long enough to go from fender to fender, atop the engine
tow strap
bottle jack
floor jack
Preface
This is how I saw it best to remove the pan. It may not be the only or even the best way, but it worked well for me. If you have suggestions or input, feel free to post them.
1) Break lug nuts free on passenger front wheel-- obviously not necessary if you have an impact gun
2) Using your floor jack, jack vehicle up as high as you can, support with jack stands
3) Remove passenger front wheel
4) Remove serpentine belt
5) Lay the 2"x 4" from one fender to another, directly over the crank pulley-- I placed two small pieces of 2" x 4" underneath the long 2" x 4" so it rested on them, instead of the top part of the fender
6) Hook one end of the tow strap to the rear engine hook, wrap it around the 2" x 4" a few times times, then wrap it around the crank pulley, then wrap it around the 2" x 4" a few more times, then hook the other end also to the rear engine hook-- ensure the strap is taut, since it will help support the engine once you've dropped the cradle (sub-frame)
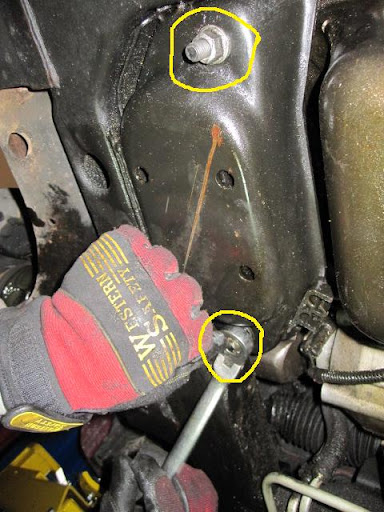
7) Remove the two 15mm nuts on the bottom of the passenger motor mount-- I had to use a 16mm wrench to secure the top of the front motor mount bolt as I loosened the 15mm nut on the bottom, since it was a through-bolt and would spin unless I held the top still. I'm not sure if this is factory, but it's what I had to do on my car.
8) Remove the two 15mm nuts on the top of the passenger motor mount
9) Disconnect harness clip from the sensor in the oil pan
10) Place floor jack under front lateral bar on cradle, barely touching it.
11) Loosen the rear driver side 18mm cradle bolt until it's almost all the way out, but not so much that it unthreads entirely
12) Loosen and remove the rear passenger side 18mm cradle bolt, and loosen and remove both front 18mm cradle bolts-- allow the floor jack that you placed underneath the cradle to slowly lower; this will cause the front part of the cradle to dip downward. If your tow strap/2" x 4" contraption works correctly, the engine will remain up as the cradle dips. My engine dropped a little as the tow strap tightened, but it held up nicely. I noticed the 2" x 4" bowing a bit, which concerned me because I was about to go underneath the engine and preferred it not drop on my head, so I took a bottle jack and placed it below the transmission oil pan. Between the jack and the pan, I put a 3/4" thick piece of wood in order to disperse the stress throughout the pan rather than in a single spot.
13) Remove the 15mm bolts that secure the AC compressor to its mount, set the compressor aside. You do not have to disconnect the lines!!
14) Remove the front 2-3 15mm bolts that bolt the motor mount bracket to the block
This is the passenger motor mount and the motor mount bracket I'm referring to:
Uploaded with ImageShack.us
15) Remove the rear 15mm motor mount bracket bolts (2-3 bolts on the rear)-- this is where your 15mm ratchet wrench comes handy, it's a VERY tight fit!!!
16) Remove the motor mount bracket
17) Remove the 2-3 flex plate inspection cover bolts with a 10mm socket and extension
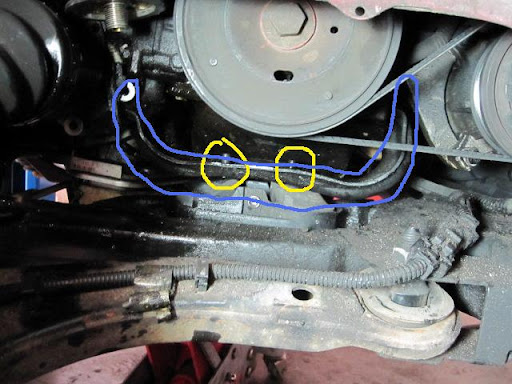
18) Remove oil pan bolts using a 3/8" socket and extension
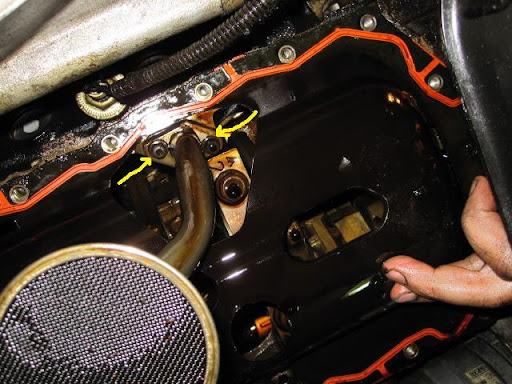
19) Drop oil pan-- I needed a pry bar to separate the pan from the engine. Becareful not to gouge either the pan's mating surface or the block's, and of course don't damage the pan by beating on it. Also, be aware the pick-up tube routes into the oil pan through an oil baffle and can be tricky to manipulate.
---------------------------------
To reinstall, perform the reverse of the above-mentioned steps. However, when aligning the cradle, you may need to use your large screwdriver to manipulate the cradle side to side or front to back in order for the cradle bolts to align properly; there are holes in the cradle that allow you to stick the screwdriver through and prop against the body of the vehicle to help you with this task. Remember: the rear cradle bolts are shorter than the front.
I used the impact gun to remove the lug nuts, to loosen and tighten the cradle bolts, and to remove the oil pan bolts. When installing the oil pan bolts, I recommend NOT using an impact-- if you do, you run a higher risk of stripping the threads.
You may also want to loosen the driver side motor mount, but I chose not to. When the cradle dipped, I noticed the mount streetttccchiiinggg like it was a go-go gadget motor mount, but it didn't rip.
Conclusion
Now that I've done this once, I'm certain I could do it a second time in half the time-- especially if it's not raining-- and with help, it could probably be completed within a single hour. Not fun, but thankful for the experience.


