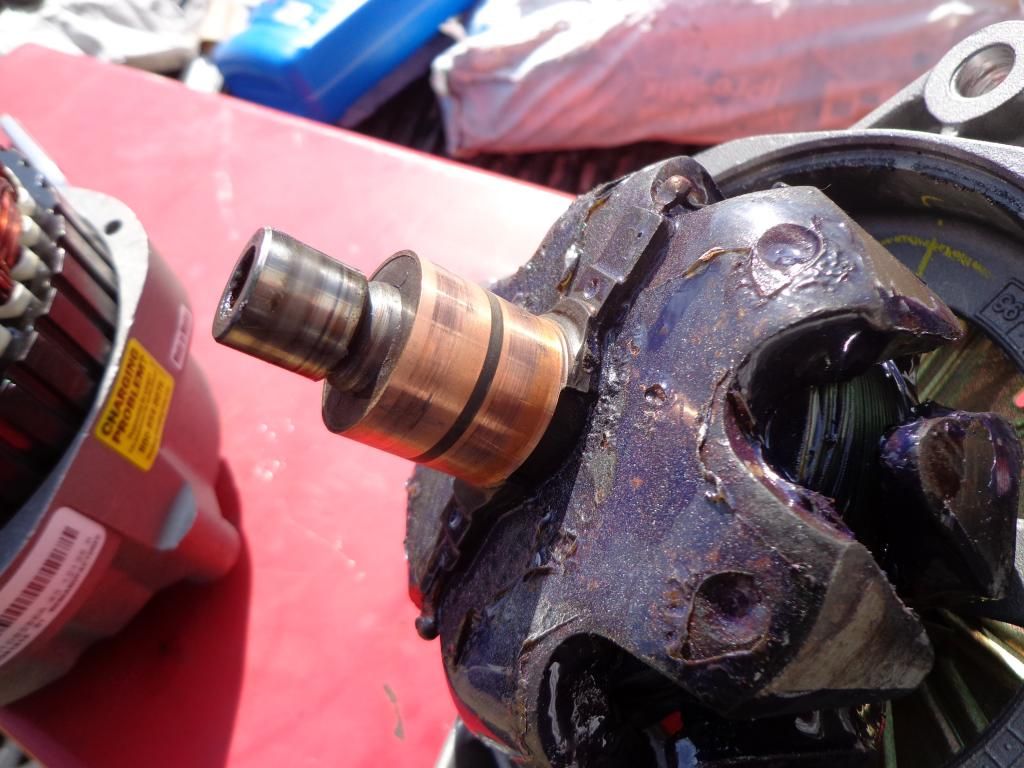
Okay so pics have uploaded. Very easy upgrade, no really, VERY easy to do. I just had bad luck and my new rectifier decided to take a ****, lol. So you start by taking out the 4 bolts around the case, which I didn't get a picture of. After that you basically smack on of the ears with your hand to knock the front of the alternator loose and it pulls right apart. Front half, the rotor, shaft, housing, etc:
Other side of the coin, you can see the stator (winding of wire), rectifier (heatsink), voltage regulator (black thing at the bottom), capacitor (little black thing in between the rectifier and regulator), and the brushes (springs and grey things hanging in the middle). DON'T LOOSE THE BRUSH'S SPRINGS, THEY CAN AND WILL FALL OUT.
Naturally, you have to take EVERYTHING out to get to the rectifier safely. I guess I didn't get any pics of this, but you'll get the idea on reassembly. To disassemble, take the 3 nuts off that connect to the 3 wires of the stator, then pull the stator out. This may or may not be gentle, sometimes they are stuck in the case a bit. Here's the stock stator on the right, upgraded 200amp stator on the left:
You'll end up with something looking like this, this picture is actually during reassembly, but you get the idea:
Take all that out. The brushes and voltage regulator have 2 screws holding them in. The one on the left is NOT isolated, the one on the right IS isolated (plastic sleeve). From there, remove the screws holding everything else in, noting what is isolated and what isn't (the "top" 2 screws holding in the rectifier aren't...), and take everything out. Capacitor first, then voltage regulator\brushes, then finally the rectifier. Here's the pile of it all, note the screw with the longer isolator, it's goes into the right hole of the rectifier, and holds the capacitor and rectifier down :
Empty:
This alternator was a piece of SH*T. Look at the rectifier. These connections are very crucial, and there are broken into 2 pieces. WHY?
Upgraded:
Remove the charging stud from the stock rectifier (10mm nut you see in the above pictures) and move it over to the new rectifier and tighten down (snug). Then install the rectifier. It goes right in for the most part, just make sure the plastic of the charging stud goes all the way through.
Then, you have to reassemble the brushes. I used a paper clip bent straight, worked great. The brushes have little holes in them that line up with holes in it's "case?" to hold them in for reassembly. It's as easy as putting the spring in, putting the brush in, and holding it down in there while you stick the paper clip through the hole. Picture:
Then set the voltage regulator back in, put the capacitor back in. Make sure the regulator is on top of the capacitor. This is wrong:
This is right:
This plastic will face the alternator:
See the paper clip sticking up in the middle? Push it down with your thumb. Don't push it OUT, just push it down flush with the top of the brush's "case." Don't worry, there is a hole in the back of the alternator so you can pull it out after it's all back together, see:
Here's everything all back together, before I put the 2 halves of the alternator back together:
I don't have a picture of it, but you basically set the top half back in the bottom half, making sure everything is clocked right (you can make a mark before dis-assembly if you wish). It will almost fit all the way together, but the 4 outer bolts will pull it together a bit more (less than 1\8th of an inch, nothing major). Tighten the bolts a little at a time, going in a criss-cross pattern. Once those are all tightened, pull the paper clip out of the rear of the alternator to release the brushes, and your done!
This kit did comes with new brushes, but mine had PLENTY of life left in them, and they were soldered to the regulator. Not a big deal, I can handle desoldering them, but there was no need. IF YOU REPLACE THE BRUSHES YOU WANT TO SAND (GENTLY\LIGHTLY) THE COPPER RINGS AROUND THE ROTOR (THING ON THE FRONT HALF OF THE ALTERNATOR). Lay the sand paper in your hand, wrap your hand around the copper rings like you are opening a bottle of beer, then turn the alternator pulley back and forth a few times to sand it. Wipe them off and keep going with the install. You can see the copper rings in this pic: