Just the tranny mount.Originally Posted by GTPrix


|
|


Just the tranny mount.


ok thanks!

what are the advantages of solid motor mounts?
Less engine movement and they don't leak the fluid and collapse later.

Hey Abrasive, I just wanted to say thanks for the great post. I have been searching for my possible clunking issue with no luck till I came across your how to. I quickly ran out to my car and grabbed a hold of my alternator bracket and found I could rock my engine back and forth substantially. I got the solid motor mount from autozone (they actually had it in stock) and put it in today with the help from your instructions. I got a couple tips that might help others.
1. Make sure you unscrew the little plastic screw in the middle of the plastic retainers for the shield. I was a little anxious and pryed the first one off with the grommet remover and snaped the back off of one.
2. I had problems getting the new mount to fit in the bottom holes because they were flared out a little. I took 2 small 2x4's, one laying on the ground and one my dad held, next I oriented the mount vertically so the side of one screw rested on the lower 2x4 and the other my dad held on the side of the upper screw, then I gave the upper block a good couple wacks with a sledge. This angled the bolts just enough to get them to line up perfectly and the wood protected the threads.
3. When lowering the motor back on the mount my dad was able to see the upper mount bolts from above the engine and guide the engine onto the bolts using the sledge handle. I slowly lowered the jack and it glided right onto the bolts.
I also took a couple pics to share some before and afters because who doesn't love before and after pics.
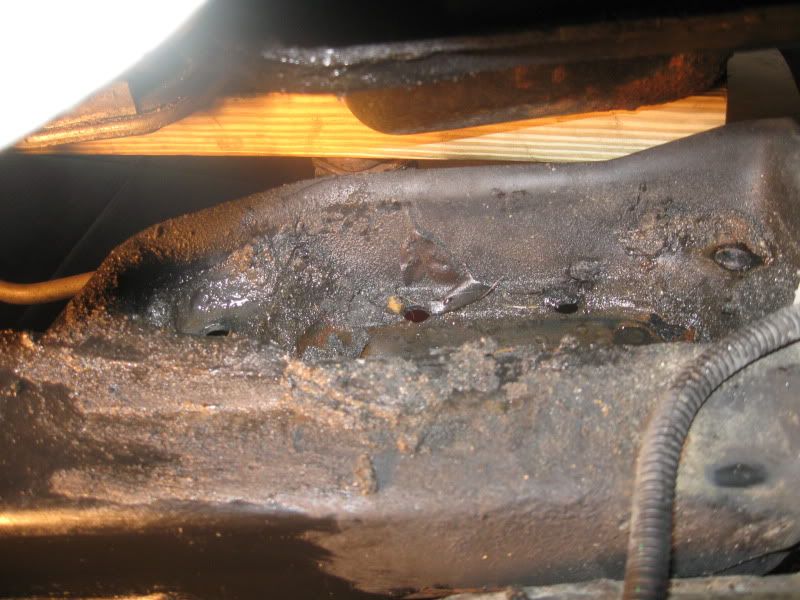
Old Mount (143k Miles)
New Mount
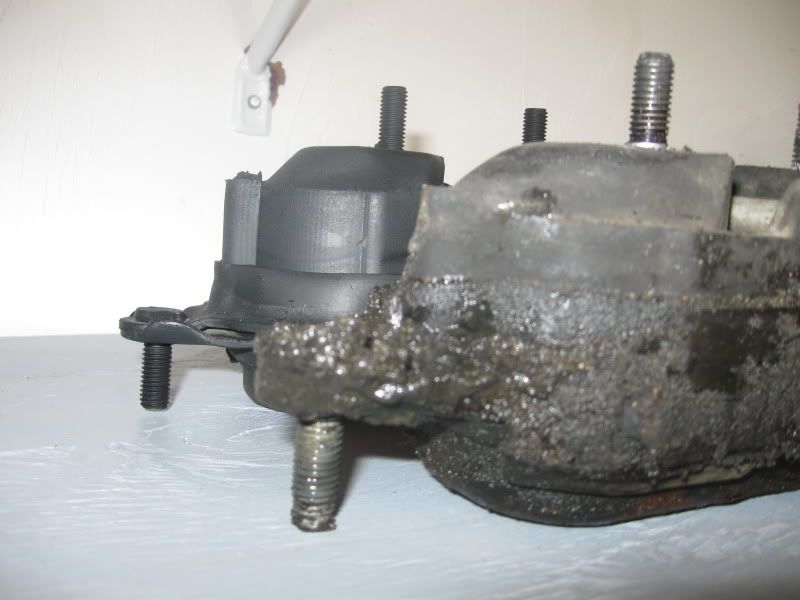
Side by Side
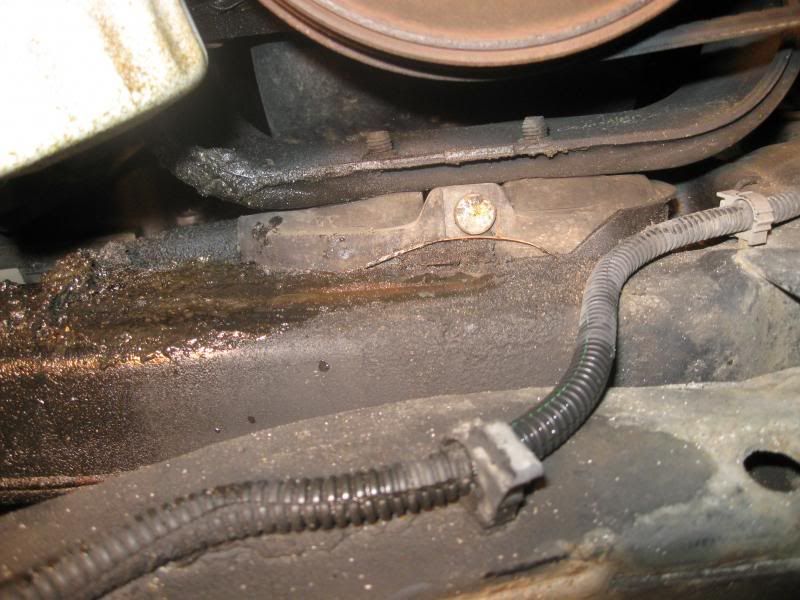
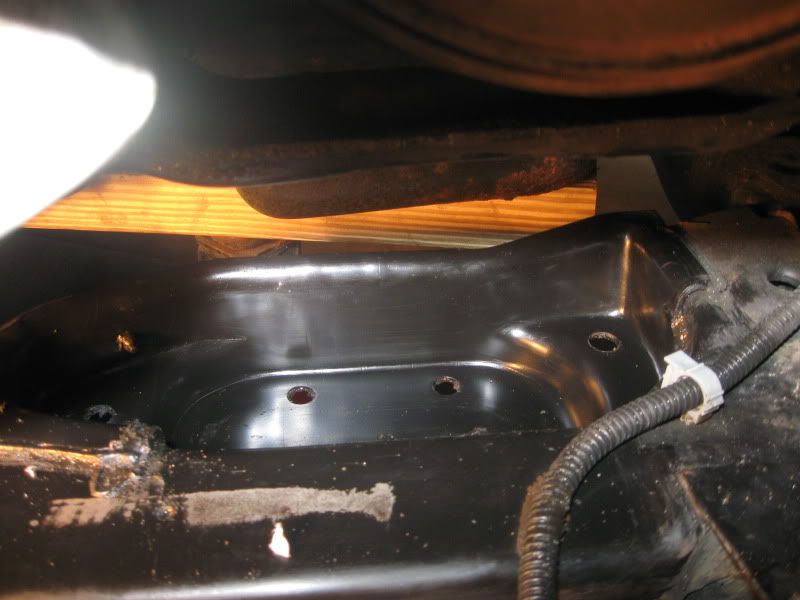
Mount Pan before
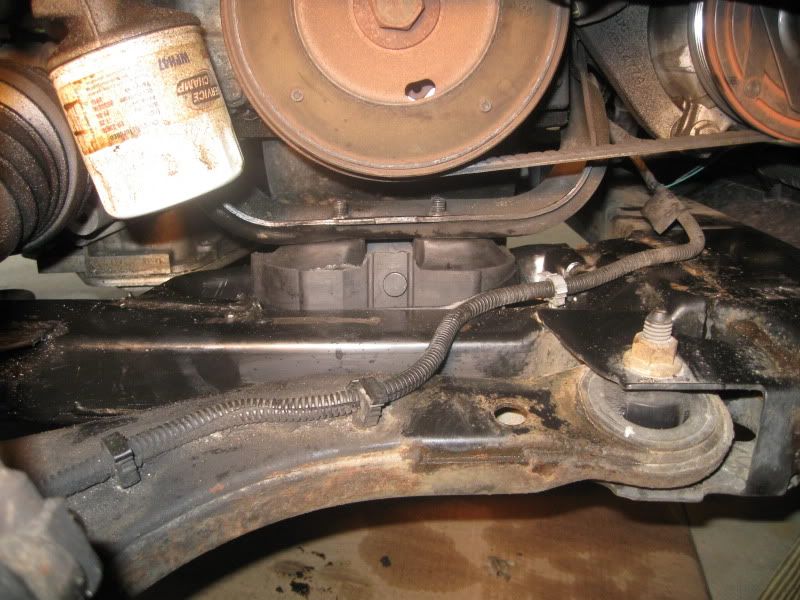
Mount Pan after

Last edited by Sykkel; 06-04-2009 at 09:25 AM. Reason: add pics
THX Abrasive. Your post on the mount replacement worked like a charm. It took 45min. i've looked all over for that info.
BTW my gtp was vibrating and that worked a lil. any tother ideas of vibration sources?

does anyone have a picture of a bad tranny mount?
what was your reason for replacing the mount, did you have excessive vibrating when stopping


Good job, nice pics!
Tell me, when and where were you hearing this clunking noise?

guess i know whats making mine shake and act stupid off takeoffs. will be getting a solid mount next paycheck. and my dogbones are the offset ones for lowered vehicles, im going to junkyark to swap to reg lenght dogbones.
Per the motor mount replacement..... I did the passenger mount and am having trouble with my dog bones aligning as well. The engine is swaying way toom much front to back. even at a slow take off i can feel it moving. ?????????? Should i go ahead and change the tranny mount to.
Thx Abrasive btw for the mm replacement thread easy to follow instructions. It was a real bi^atch to remove the rivets tho.
lol rivets quote was wrong thread

Click picture to enlarge
This is the motor mount on my 06 GP GT - As you can see the motor mount to motor bracket different and has much tighter clearances for the bolts to the motor mount red circles - I wasn't even able to get an end wrench in there.
So when you reach the point on an 04+ where you're stumped follow these. I may have gotten carried away on the detail, and sorry for the lack of step by step pictures. But this is in addition to the existing how-to it is not a complete how-to.
First Remove the locking nuts connecting the motor mount to the cradle.
Note for removing the old mount i removed the bracket from the motor before releasing the motor mount from the cradle - this is very bad for the threads on the horizontal bolt connecting the bracket to the motor.
Then Apply enough pressure to make the motor mount come free from the cradle.
Then remove the nuts circled in yellow to drop the bracket off the motor.
You now have clearance to remove the nuts from the top of the motor mount that connects the bracket, i did this after removing the motor mount from the car, which requires jacking the motor up for more clearance.
Re-assembly with ZZP Poly Motor mount - The motor mount is bigger and caused a clearance issue with the rear bolt that mounts the bracket to the motor while the bracket is torqued down onto the motor mount.
So In order to get the assembly back into the motor with a zzp poly motor mount(without taking a chunk out of it)
Place the motor mount without the bracket into the cradle
Then place the bracket over the studs for the motor mount and barely thread the nuts on.
Loosely put the vertical bolts attaching the bracket to the motor in.
Fully tighten the nuts to tighten the bracket to the motor mount - I had to get a 15mm Bent end wrench for clearance - my straight 15 would hit the boot and didnt have enough clearance to torque it.
Mostly tighten the vertical bolts from the bracket to the motor
Adjust jack height to align center hole put the center horizontal bolt into connect the bracket - I had mine on a floor jack and had to pull the floorjack to move the motor trans forward to get alignment.
Fully torque down all the bracket bolts - i had to tighten the rear one with an open end wrench, a thin closed wrench may get onto it though.
Lower the engine all the way
Put the nuts onto the cradle / motor and torque them down.
Last edited by GeeBee; 03-19-2010 at 03:33 PM. Reason: Tweaked end of procedure after actually doing it.
Very informative write up. I have a 99 gtp .To make a long story short while doing intake and oil pan gaskets i fiquired i would change the front motor mount becacause it had a rip in it. i ordered a hydraulic one online and after i put it in it seemed that the passenger side dipped a little lower than the drivers side. Ive seen inoperable parts come off the shelf before so i thought maybe i bought a bad mount. then i decided to replace both engine and tranny mounts with solid rubber mounts and now it seems the motor shifted over a little to the passenger side because there is a very short clearance to the coolant resovoir. any ideas?
How come when I click here nothing comes up


the how to's haven't been swapped over to the new format yet.
i too wish they would work.


I just wrote a how to on this in someones thread. Please search for a recent question on this.


they arent going to be either.
this is the how-to section.


| « Previous Thread | Next Thread » |
| Tags for this Thread |
| Bookmarks |
Bookmarks |