thanks losn its like night and day now with the new plugs and wires and pcv valve its amazing i feel accomplished haha muuuuhahaha

|
|


thanks losn its like night and day now with the new plugs and wires and pcv valve its amazing i feel accomplished haha muuuuhahaha
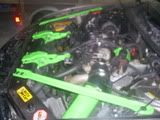 hogan 3inch DP u bend delete ,180*tstat, autolite 104s, LED interior, 4" FWI, 2000watt system, bullitt rims, zzp pistons, pems, alt rewire, thrush muffs, 3.4 zzp mps, transgo shift kit, triple edge performance trans. autometer triple pod :SOON: urlosn HPT PCM tune, HEADERS, 1.9's

**** scared of the evil laugh!!!
I recentlly did the lower intake manifold gaskets, new lifters & new roller rockers. I posted this at GTP world forum and maybe it will help. Sometimes the quick answers sound like anyone can do a repair or mod in 2 hours. I'm very meticulous and it takes me 4 times as long as estimated. Anyway here it is:
LIM, ROCKERS, AND LIFTERS REPLACEMENT
Purchase the following: NAPA: FEL-PRO Head gasket set (P/N HS9089PT-2: $309); 3/8” Fuel line disconnect tool; Header wrap $50; 2ea-2.25” hose clamps; Permatex High Perfomance thread sealer $15; 180 degree thermostat and seal;
GM Dealer: Yellow O-Rings for drivers side intake next to EGR holes: Note: does not come in the gasket set! (P/N 24501563 SEAL-THRO: 2ea $12.40); Heater Pipes (90 degree) for alternator / water pump bracket: (Front P/N 24503423 $12.84; Rear P/N 12565082: $4.12); Heater Hose O-Rings: (P/N 24502375 SEAL-HT: 2ea $8.26)
I suggest marking each electrical connection and vacuum line using wire markers. Mark the connector and the location disconnected from; likewise for vacuum lines. This will take the guess work out of reconnections.
Remove the thermostat and flush the cooling system before starting the repair. You’ll need a flat gasket if you expect to seal the housing without the t-stat installed.
Remove the engine cover.
Disconnect the negative battery cable. Remove the gas cap.
Remove the strut tower brace (if you have one).
Remove the dog bones and tie off the drivers side with a ¼” diameter rope through the holes from the dog bone bolts, pulling the engine forward to the same location as with dog bones installed.
Disconnect the coolant temp sensor, wiring harnesses, and power brake hose (mark harnesses). Inspect hose for deterioration and hardness/cracks.
Disconnect the throttle linkage.
Disconnect the plug wires (mark wires) and remove the plug wire guide at the front valve cover.
Remove the coolant reservoir. Drain and flush for later install.
Remove the evap solenoid (mark harness), connector bracket, and components.
Remove the accessory and supercharger (S/C) belts.
Remove the coil pack wiring harness (mark harness) and note the routing of the wiring harness.
Remove the alternator (mark wires). Leave the top bolt installed, the alternator is slotted for this bolt and the bolts won’t get installed to wrong location which could punch a hole in the rear valve cover. The top bolt is longer.
Remove the rear bank fuel injector harnesses (mark harnesses). The clips are removed by squeezing the sides of the wire clip while pulling the connector.
Remove the evap hose/tubing as one unit. Inspect the rubber ends.
Remove the coil packs and bracket.
Remove the MAP sensor bracket (10mm 6-point socket).
Disconnect any remaining sensors.
Disconnect the front fuel injector harnesses (mark harnesses). The clips are removed by squeezing the sides of the wire clip while pulling the connector.
Remove the fuel rail bolts (10mm 4 ea), then disconnect the fuel lines. Remove the stainless clips from the connections. Release the fuel pressure. There is a black cap at the bottom of the fuel rail, remove it and press in on the tire valve to relieve the pressure. The lines are disconnected by setting the tool around the line and inserting into the fitting, then press in on the tool to release while pulling the lines apart. Place a rag under the fittings to capture fuel which will dribble out. Have two soft ear plugs ready to place inside of the fuel line connectors, then tie them back to the windshield wiper. This will prevent fuel vapors from releasing.
Remove the fuel rails with the injectors. You will probably have to gently pop each injector up. Using a small pry bar and a small block of wood strategically placed near each injector pry up on the fuel rail tubing popping the injector out. Be gentle so as not to damage the fuel rail or injectors.
Remove the S/C bolts. Don’t forger the bolt under the snout!
Move the main harness to the passenger side of the engine.
Remove the S/C. Remove the heater hoses/fittings from the alternator/water pump bracket. Note: Check the water pump for any looseness at the pump shaft. Now is the ideal time to replace the water pump! This will also drain most remaining coolant in the engine. I put in Zerex GO5 instead of Dex-Cool, therefore draining as much coolant as possible is required. Now is also a great time to replace worn heater hoses. (dealer items, so buy in advance!)
Remove 3ea 15mm alternator bracket bolts, one at top and two at bottom.
Remove the alternator bracket. Try not to break the heater pipes.
Remove the EGR tube bolt and nut at each end of the tube. Remove the intake manifold bolts and remove the intake while making sure the EGR tube separates from the intake.
Inspect gasket for failure areas.
Remove valve covers and set aside to clean before reinstalling.
Remove rocker bolts, rockers, and pushrods if you are replacing them with new ones.
Remove lifter retainers and the lifters. Cover the lifter bores for cleaning the galley.
Clean galley area. Absorb the oil in the rocker bolt holes with cotton swabs. Oil in these holes will give a false torque if not removed. Clean the intake gasket mating surfaces at the heads and the engine block. A utility knife blade works well for this. Run a tap in the intake bolt holes to clean out any old sealant. Clean the injector bores in the heads. Install header wrap to the crossover pipe. Cut a piece long enough to complete the wraps with at least a ¼ overlap of each lay. I measured one wrap of the tube and multiplied by 15. I had just enough. Fold it over in 4” lengths and then it will pass under the tube.
Lube each lifter bore and lifters and install lifters. Install lifter retainers.
Install new pushrods. Lube tips of pushrods with cam lube or engine assembly lube prior to installing. Install rocker arms and finger tighten the rocker bolts. To find zero for each valve before tightening rocker bolts for lifter pre-load, manually rotate the crank shaft until the adjacent valve in the same cylinder is at max lift. While moving the pushrod up & down snug the rocker bolt until there is no more vertical movement in the pushrod. Now perform the appropriate preload torque to the rocker bolt. Work your way through all valves in the same manner.
Clean valve cover and install new valve cover gasket and bolt retainers. Use a little RTV at four spots to hold the gasket to the cover. Install valve covers.
Follow the Fel-Pro instructions for this procedure. Place RTV to the four corners where the intake manifold will sit. Install front, rear, left and right intake gaskets. Place RTV to the four corners on top of the installed intake gaskets. The RTV below and on top will seal the seams of the four gaskets. Install the EGR tube to the EGR valve and snug the nut.
Place intake manifold in place. Guide the EGR tube while lowering the intake in place. This can be a little tricky since the tube is rather stiff.
Coat the intake bolt threads with Permatex High Perfomance thread sealer and install the bolts. Tighten initially to 85 in/lbs using a crisscross pattern from center to outboard. Tighten to a final torque of 132 in/lbs (11 ft/lbs). Recheck the final torque. Next install the thermostat, seal and housing.
Install the alternator bracket w/new heater pipes, or old ones with new seals. Install the heater hoses/fittings with new seals.
Install coil pack assembly. Route front plug wires and install plug wire guide to front valve cover. Install the yellow O-rings to the intake manifold.
Clean the bottom of the S/C. Install the S/C gasket and the S/C. Torque the S/C bolts to a final torque of 204 in/lbs (17 ft/lbs). Perform the first torque at 120 in/lbs in a crisscross pattern starting at the center moving outboard.
Remove the injectors from the fuel rail. There is gas still in the fuel rail so be aware. Remove old O-rings and clean the injectors. Do not use carb cleaner or similar product as it may damage the electrical circuits. Install the new O-rings supplied with the gasket set to the injectors. I used “SYL-GLIDE” brake lube for the O-rings instead of motor oil. Install the injectors to the fuel rail.
Install the fuel rail assembly to the intake. Connect the fuel lines and injector harnesses. Fuel lines simply snap into place. Reinstall the stainless clips to the fuel line connectors.
Connect various sensors and secure the wiring harnesses where previously removed.
Install MAP sensor bracket and sensor. Connect wiring harness to MAP sensor.
Install and connect the alternator.
Install the coolant reservoir.
Install the S/C belt tensioner and idler pulley. Note: The ground wire goes to the rear stud.
Do not connect the coil pack harness yet. The engine will be oil primed before starting.
Install and connect the evap solenoid and bracket.
Install the evap hose/tubing.
Install the accessory and S/C belts.
Install plug wires to the brackets at the S/C snout.
Install plug wires to the coil pack.
Reconnect the throttle linkage.
Connect the coolant temp sensor harness.
Install the dog bones. Attach the intake boot to the throttle body.
Install the strut tower brace. (If you have one)
Connect the battery negative cable.
Tighten radiator drain plug and fill radiator with 50/50 mix coolant and install the gas cap.
Turn the ignition to “ON” for 10 seconds then back to “OFF”. Check the fuel injectors and the fuel line connections for leaks.
Crank the engine for 10 to 15 seconds, then let sit for 5 seconds, then crank engine for 10 to 15 seconds again. This oil primes the engine and valve train.
Connect the coil pack harness and start your engine!
Perform final fuel and coolant leak checks.
Top off the overflow tank as needed.
Install the engine cover.
Congratulations!
P.S. I also have pics at my profile page. Forgot I put them here also. These forums are great for research, how-to, and encouragement. Good luck!
TMC

they're for a lot of things...Originally Posted by Curtis

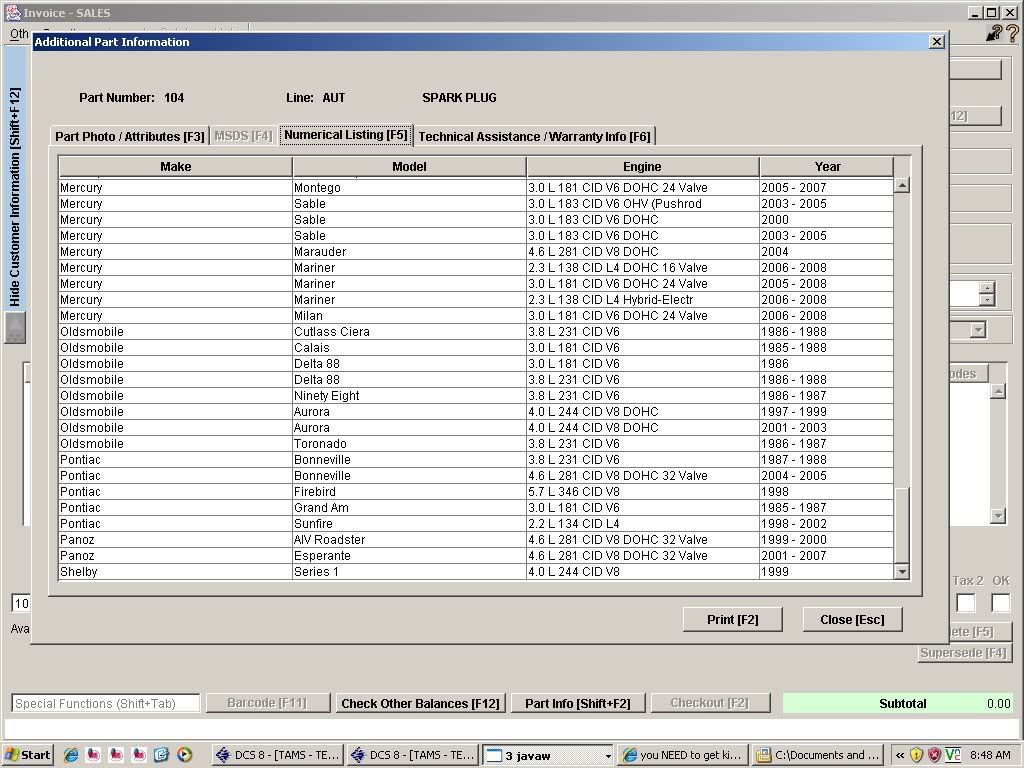
And thats not even half of the cars it fits.
Same here on changing plugs, i have only put 10k on the car and i decided to change plugs. Wires fell apart when pulling the off, electrodes were burnt completely off the tip of plugs. Oh and did i mention the car has 145 and are original plugs and wires???BLUH
Few questions, are 605s also a colder plug or are they more standard. i bought these last month but havent checked my KR since. Are 105's better.
Last edited by 98GT3800; 02-21-2009 at 11:37 AM.

^^^ The 605's are are colder.
hey im talking to you on another thread lol.. Is a 605 the same as a 105 and a 604 a 104??

105? 604?
Random numbers...I'm lost there...
The Autolite's come in 606, 605, 104, 103...from hottest to coldest in that order IIRC...
The NGK's are either the TR55, or TR6...
IMO I'd get the Autolite 605's, or if you want a colder plug than spring for the 104's...but since you just have a GT I wouldn't worry about it...605's are a great plug if you have bolt-ons I'd guess.
I meant 103 and 606 lol. oops. wel i got better mileageot of the 605s, well anything is better than a burnt plug i have a few more mods coming so i thought itd be better to throw them in now.
| « Previous Thread | Next Thread » |
| Tags for this Thread |
| Bookmarks |
Bookmarks |


