Story:
I’ve been looking at doing this mod since about a month after I got the car, but for a lot of reasons couldn’t/shouldn’t do it until now. I definitely did my homework and mostly knew what I was getting into, so I took a half day on Friday and went to the auto parts store and the hardware store to get everything I needed. By Friday night I had the VLOM modified, the DOD connector modified, and the intake down to that last %$#@!*& bolt under the alternator bracket. I got the engine apart and cleaned up Saturday morning, then made the adapter plate, modified the LS6 intake, and then panicked when I saw how bad the fuel rail situation was going for me. The LS6 fuel rail just won’t fit, and requires totally different injectors. It is much much taller. The LS4 fuel rail doesn’t fit the LS6 intake, and it is off by almost 1/2”. So I got good at getting the injectors in and out and spent the rest of Saturday and most of Sunday massaging the LS4 fuel rail to get it to fit. I’ve heard that fuel rails are fragile, but mine might as well have been made of titanium. Sunday night I swallowed my pride and told my wife that I needed a ride to work, and then finished up by mounting the MAP sensor and doing a final mockup of the parts. Monday after work a friend came over and we cleaned everything up and bolted everything together. The fuel rail didn’t leak (thank you God) and she started up the first try. No trouble codes. I’m not mechanically inclined, but I do know how to use tools. All in all, I think that most people could do this mod, especially if you have done a head or cam swap on this engine. That looks even harder to do, minus the fabrication.
Parts List:
LS6 Intake and Fuel Rail, Crate Engine Take-off: $350 (skip the fuel rail and save the $$$)
VLOM: $200 New (Same part is on all cars and trucks with DOD, get one used and save $$$)
~3/16” Thick Plate of Aluminum (Intake to TB Adapter Plate, chosen cause I couldn’t bend it at all with my hands): $10
Miscellaneous:
Gasoline Safe Gasket Material
Auto-grade Wire (I used 18 Gauge)
Metal/Plastic Epoxy
Metal/Plastic Fuel Resistant Epoxy Putty
Heat Shrink
Split Loom (1/4”)
3/8” Vacuum Line Tee
3/8” Vacuum Line Inline Connector
1/4” to 3/8” Vacuum Line Adapter
3/8” to 1/2” Vacuum Line Adapter
3’ 3/8ths Fuel Line
2’ 1/4” Fuel Line
2 M6x1 70mm Bolts (65mm would work too)
1 M6x1 50mm Bolt
1 M6x1 45mm Bolt
1 M6x1 20mm Bolt
4 M6x1 Nuts
Assorted Washers, some will be cut up
Electrical Tape
Blue Lock Tite
Total Misc. Price: About $70, $100 if you don’t have anything.
Total: $630, although you could probably trim a lot more if you reuse your VLOM or buy a used one (which will make welding more difficult, but not impossible) and if you skip the fuel rail and buy a more heavily used intake. If you have a lot of the misc. stuff lying around, then you can save there too. I tried to make a complete list. A friend did the welding on the VLOM for me (thanks Alex!).
Pictures: (sorry about the quality, but I only have a cell camera)
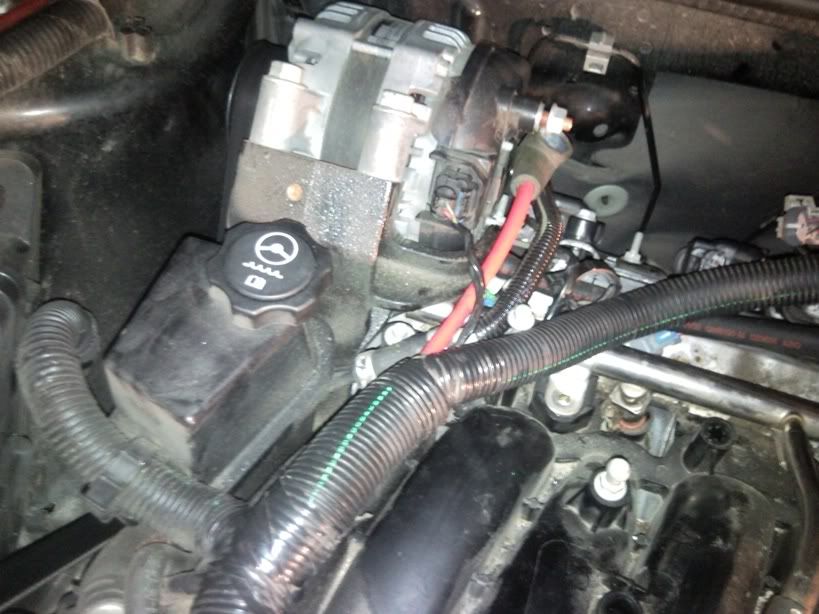
1) A pic of that stupid bolt. It’s locktite’d, a 6mm (9/32 works) head, it took forever to get out.
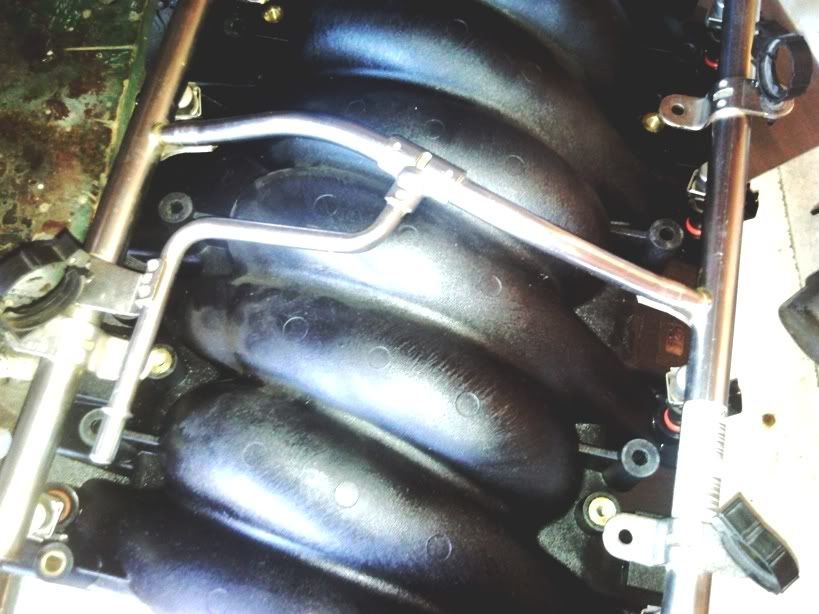
2) LS4 fuel rail mocked up. The fuel injectors don’t even come close to being seated and the mounting points to the manifold are different.
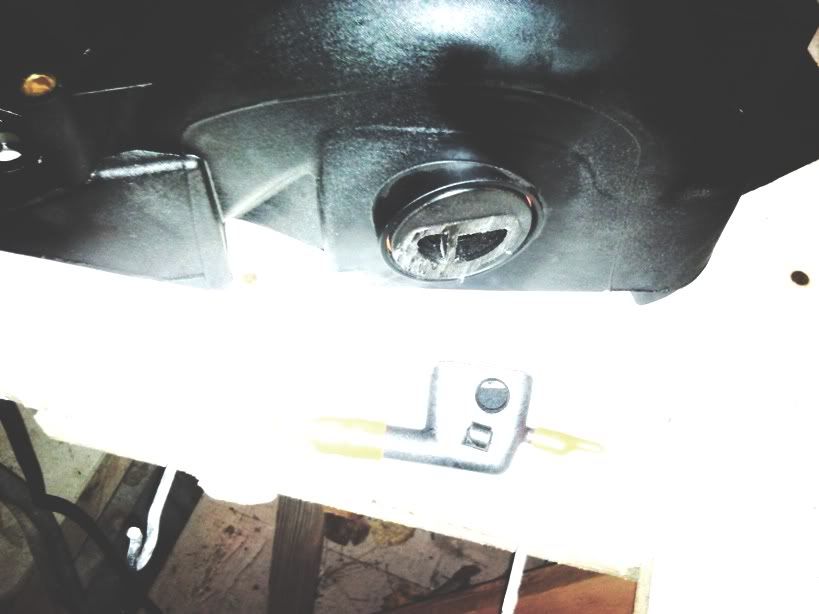
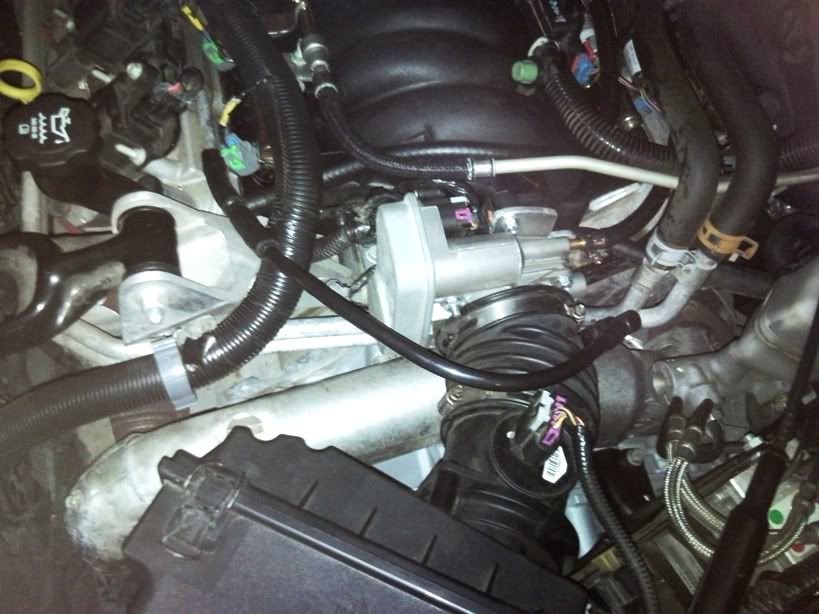
3) The LS6 MAP sensor mounting point runs right into the power steering pump, and needed to be cut off and capped. Don’t mount the LS4 MAP to that point, cause it won’t fit either. (I tried it…)
4/5) Cutting up the LS6 to make room for the LS4 TB wiring harness. I needed to clear it up some more after this photo.
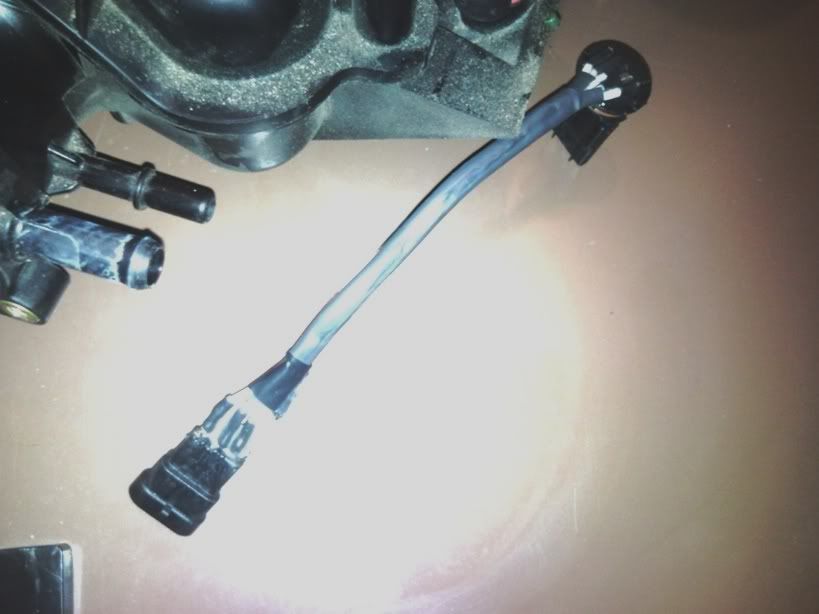
6) Modified DOD connector. I used a sawzall split the connector, then carefully peeled back the plastic to expose the conductors. I little soldering and heat shrink later, I thoroughly coated both ends in epoxy to provide additional strength. Notice the 1/2” vacuum fitting for the brake booster on the left: I had to step up the 1/4” LS6 vacuum fitting first to 3/8” then to 1/2”. I’m not completely satisfied with this, so I’m taking suggestions.
7) A pic of where the fuel rail clearance goes wrong.
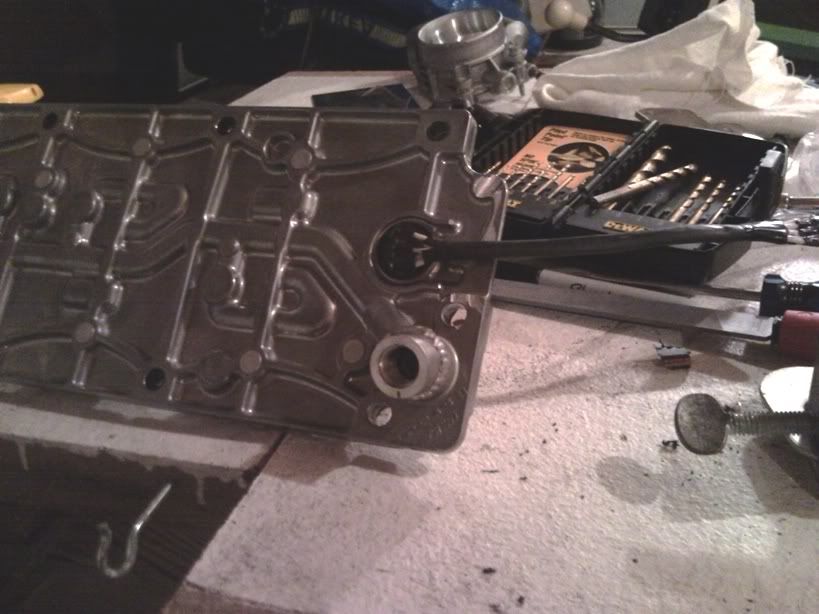
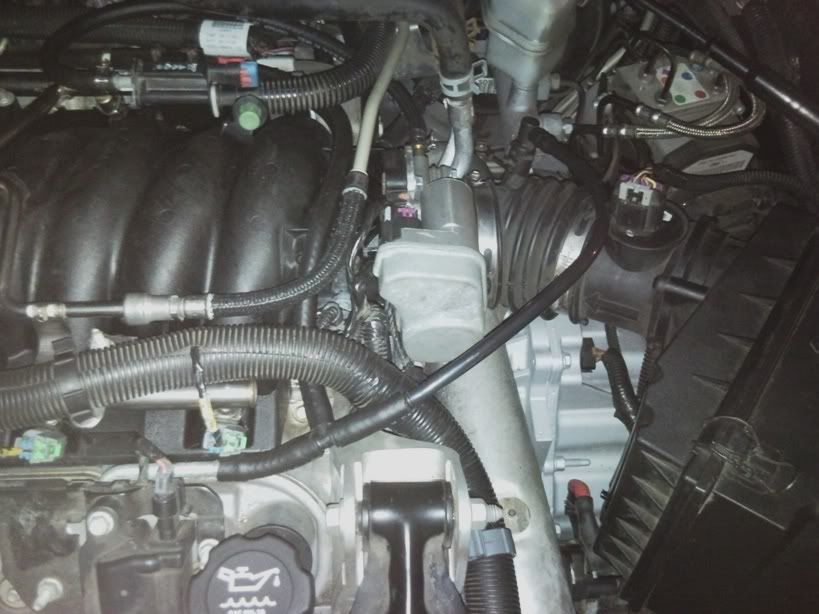
8) Completed modified VLOM. THANKS TiredGXP for the idea!!!
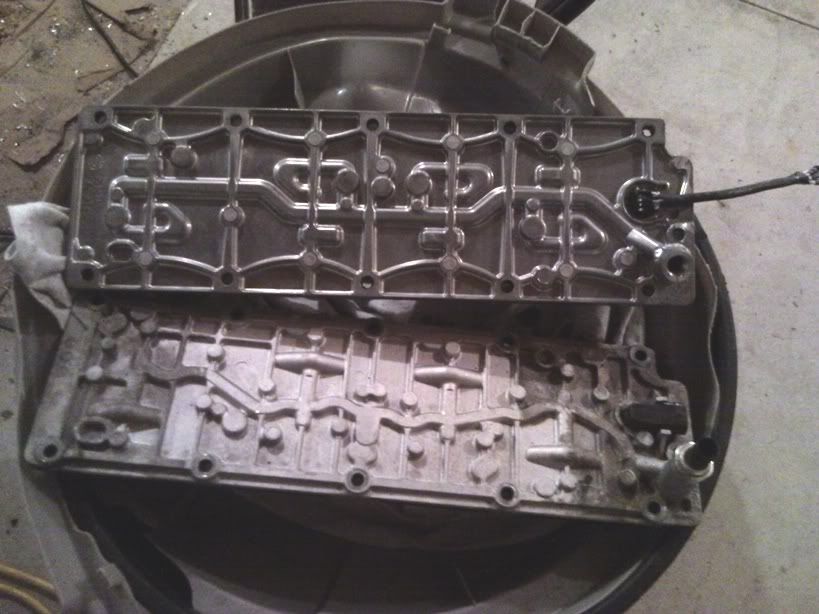
9) The two VLOMs side by side. The official stock replacement part is thinner than what came on the car, and after I ordered it I checked and it is the same part number as the G8s and DOD trucks. Bolted in with no issues (107 in-lbs).
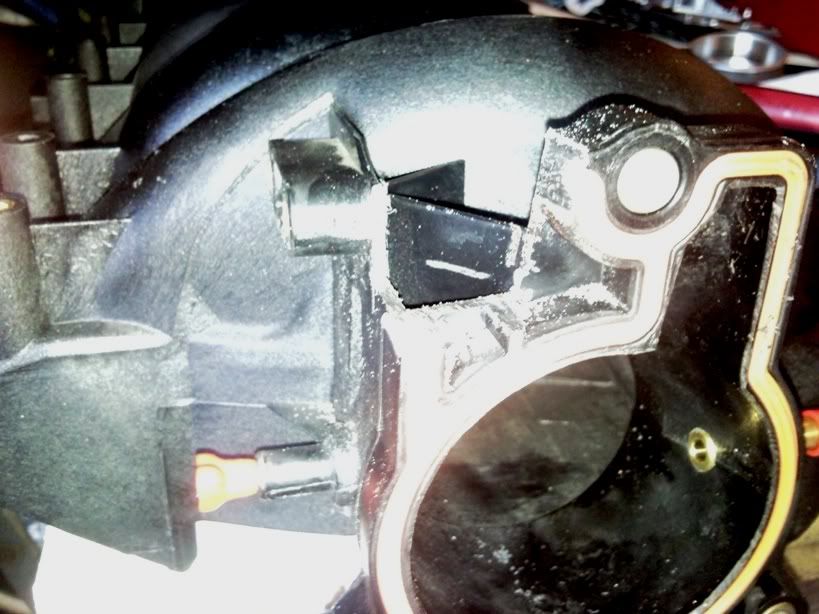
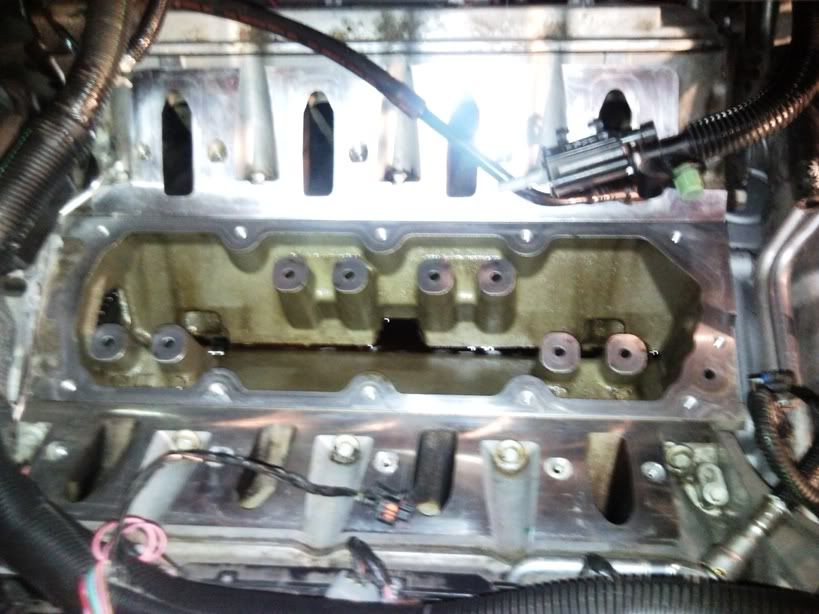
10) A pic of the Gen IV cast-in provisions for DOD.
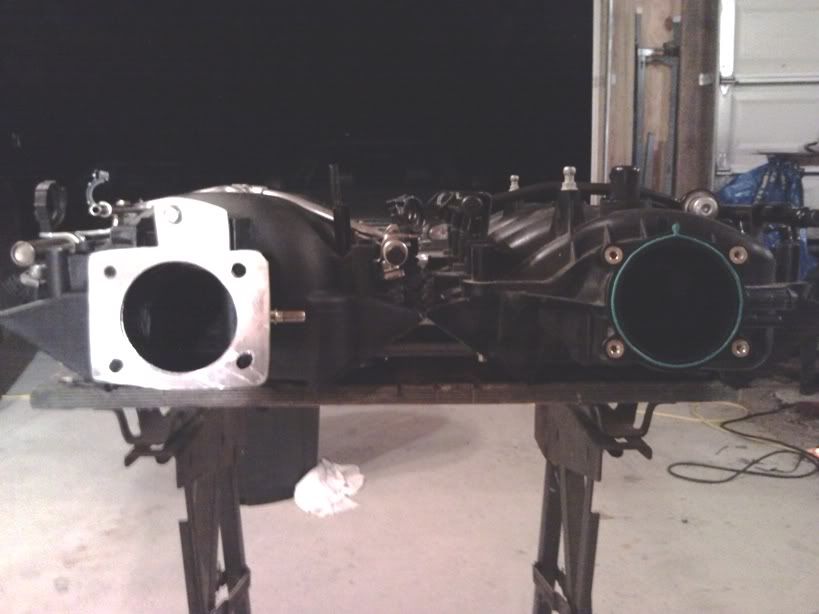
11) The LS6 is a really tight fit, and if the power steering pump outlet was 1mm bigger this thing would not fit.
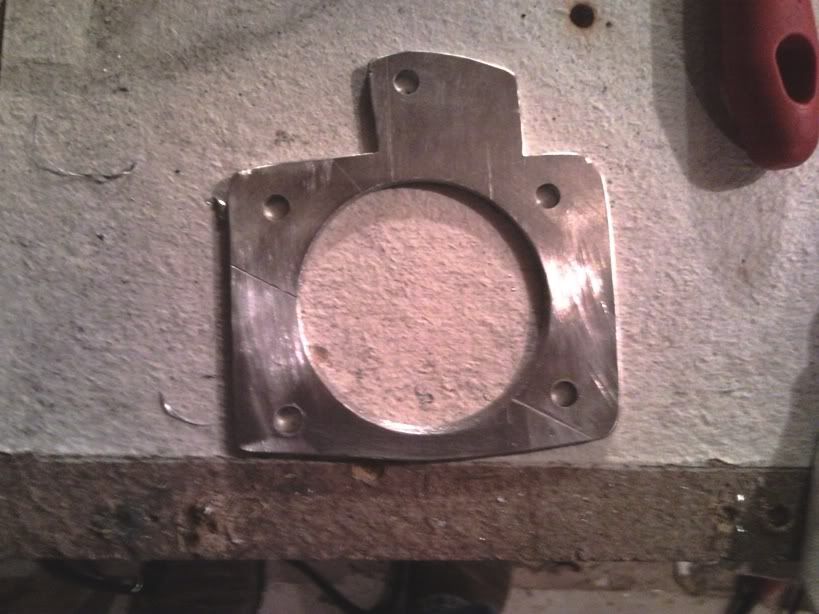
12) My adapter plate. I bolted the top hole to the stock LS6 location. I popped out the stock metal “nuts” from the LS6, and drilled it accommodate the LS4 bolt locations. They are not the same unfortunately. I then used the middle two holes to bolt the top of the LS4 TB to, and clearance the nuts by grinding the LS6. I still got 3 of the 4 holes in the wrong spots and had to hog those holes out. Should be a version 2.0 someday.
13) Grinding up a $300 intake… I was scared to go any further, but every little bit helped get the fuel rail on.
14) Plugged the LS6 hole and mounted the MAP sensor. Yes, it was a hack job, but I guarantee that sucker won’t be a vacuum leak. It just better never break. You can also see the mounting tabs that hold down the fuel rail. (87 in-lbs, lok-tite)
15) LS6 and LS4 side by side. The LS4 just looks weak. See the differences in the fuel rails though? No way that LS6 fuel rail will fit.
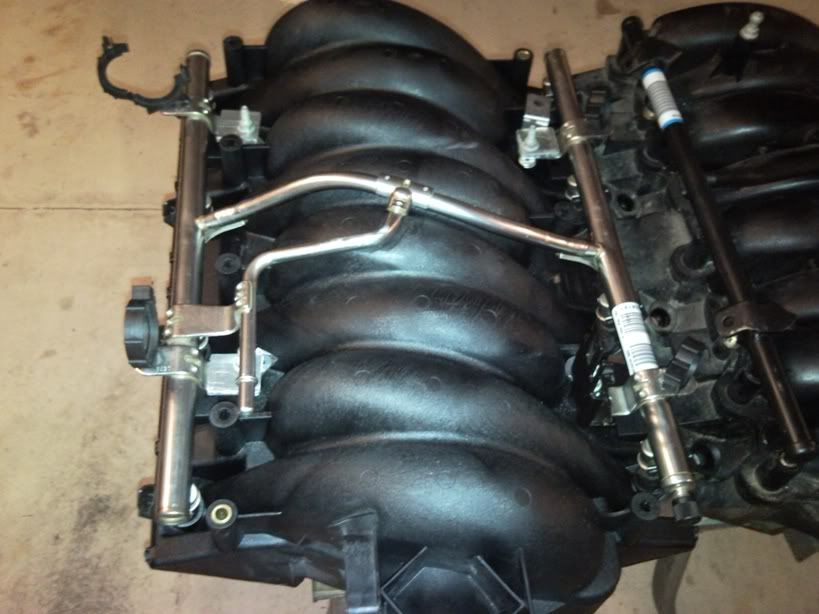
16) Better view of the Fuel rail mounting tabs. Yes, I shimmed them with washers, but that will get cleaned up later. I reused the EVAP Canister’s mounting bracket by drilling a new hole (front right).
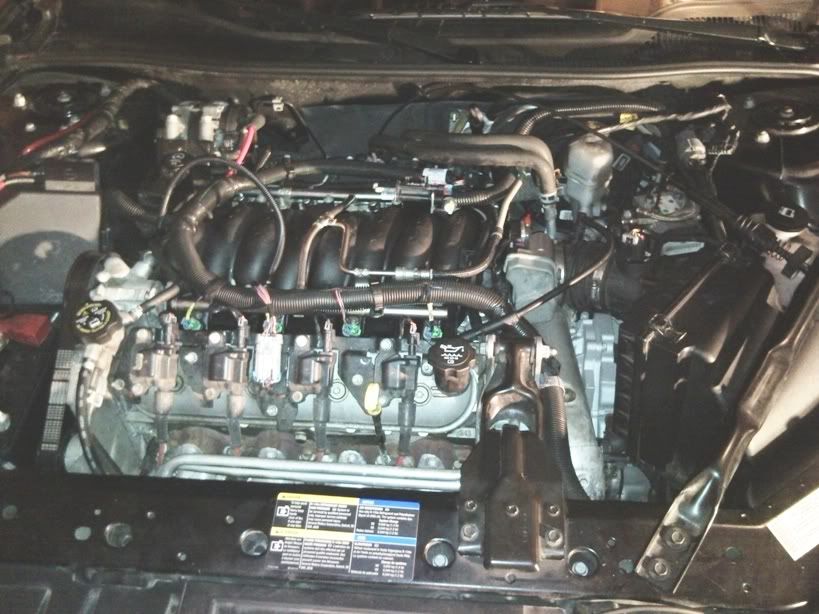
17) Bolted Up! (87 in-lbs, lok-tite)
18) Notice how I routed the rear bank PCV hose to a T near the front PCV provision, and brought both in through a massaged stock fitting. Just personal preference. You can also see the that I had to make a new EVAP Canister vacuum line because I didn’t leave enough clearance for the stock quick disconnect. Oh well.
19) Another view, here you can see the OPSU hiding away as well.
20) Final view of vacuum lines and mounting tabs.
Easily the hardest part was getting the LS4 fuel rail to fit. I won’t promote or condone the violence I visited on mine, but a vise, a rubber mallet, and C-clamps were involved.
As for results, I really need to do a lot of tuning. It feels like I picked up a ton of low end torque and about 2MPG at light throttle. Other than that, sometimes it feels like a rocket and sometimes like a dog (as in no change, not slower), especially on the top end. This is such a drastic change that I feel like I should get tuned before I render a verdict. I’ll make it to the track as soon as I can after tuning.
PS – Yes it is the stock airbox, but I did take a sawzall to it.