Can't you zing the nub off the water pump to give you more room?
You aren't use the clutch fan.

|
|


Can't you zing the nub off the water pump to give you more room?
You aren't use the clutch fan.

I remember back in the day, everyone was using the fans out of some 80s Bonneville iirc. That might have just been for the first gen s-10 though.

Originally Posted by Scottydoggs

Eh... I don't think so. Probably less than 1-1/2" between the condensor and radiator. Plus they work better as pullers. That way the shroud directs all the airflow (in theory) through the entire radiator. When using pusher fans, you only get airflow through the area directly under the fan. An 11" circle, or two 11" circles.
Maybe. I'd have to research the CFM #'s. It'd have to be offset to miss the W/P snout.
but you'd have to buy one
Yeah. Not looking to spend more on this. I'm already in too deep compared to everything else. Plus, I'd have to fab a new shroud. Something I could surely do, but really don't want to.
I know if you can find like a volvo fan or ford fan, they are 2 speeds and rather skinny.
We'll see what happens with my current Engineered Cooling Products fans. I'm working through some QC issues with them right now. How they handle it will determine what I post...
If only I had that kind of room. The sacrifices we make to shed two tons of steel.
I don't think so. I'm pretty sure that "nub" is where the pulley presses onto the pump shaft. Even the cars with e-fans have that same nub. It's just not threaded.
I've seen people mention Taurus, Camaro, Mark VIII.... Just depends on how creative you are I guess. I'm not sure any of those factory fans will flow enough air for me though.
Last edited by BrandonHall10; 12-05-2016 at 12:58 PM. Reason: Typo
I did a tad more looking into it, people who seem to have issues with the pulley coming off will weld the pulley to the shaft.
So I guess in theory you could weld the pulley on and remove some of the left over shaft to give you room but we aren't talking alot of room here.
You may be better off just moving the radiator in slightly like you already said.
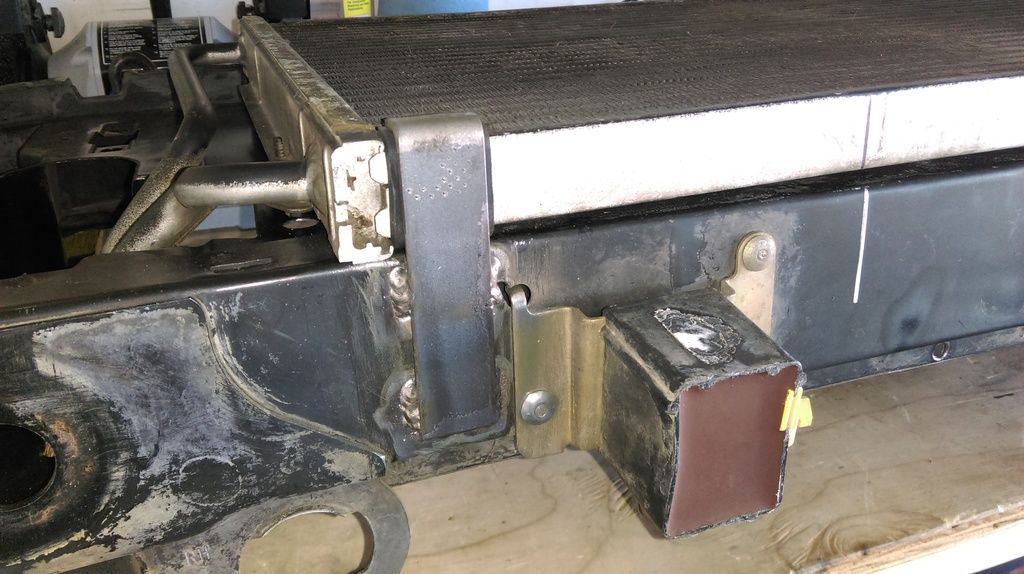
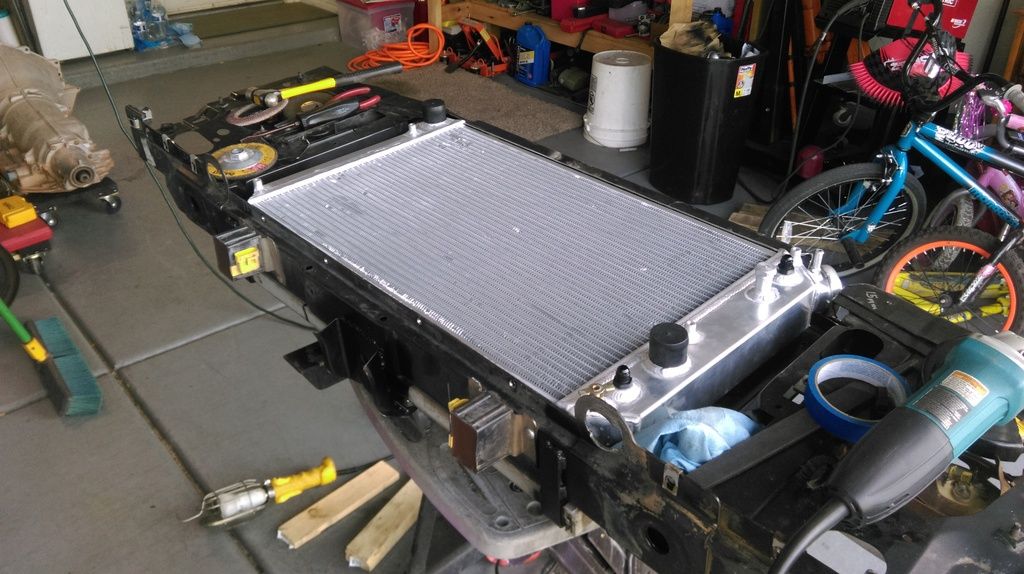
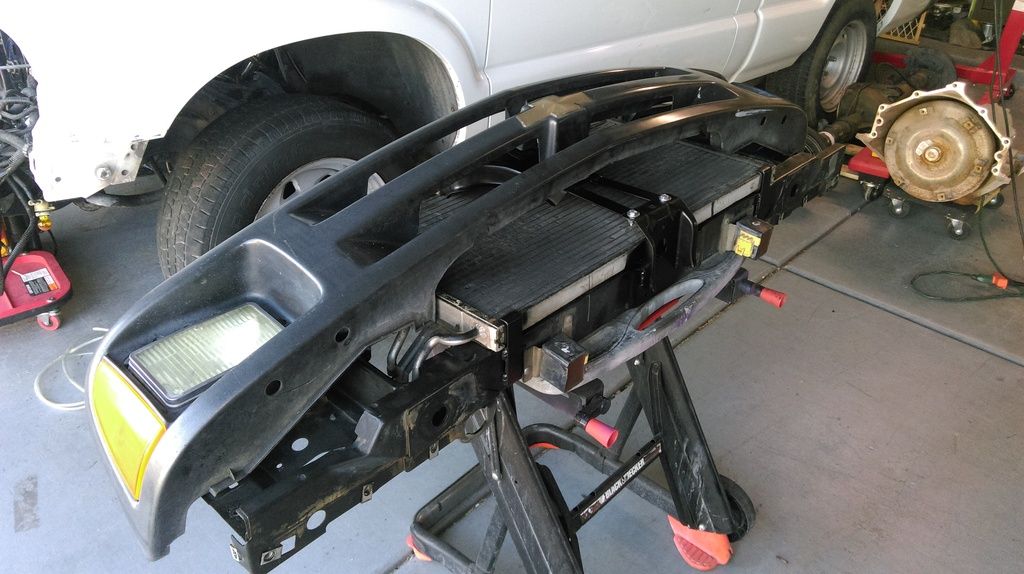
Yup. Little bit of cutting to make room for the lines to pass through, and the condenser was right at home on the front of the core support. Mounting it should be pretty straight forward. A couple little shelves, or feet welded to the bottom of the support with a ledge to hold it up and in. Then I'll rework the latch bracket to hold it down and in. A pair of tabs on the left and right will locate it side to side.
Might involve a trip to Industrial Metal Supply to grab some thinner gauge sheet stock. Or a trip to the junkyard. Maybe I can find something that's close to what I need and just rework it a little. Be a whole lot easier and quicker than building something from scratch.
Gonna have to pull a rabbit outta my hat here...

A few thoughts come to mind but I may have missed something along the way. Electric water pump? Smaller condenser? Is the engine as far back as it should be? Blah blah not much help. As a body man I gotta throw a flag on your vertical support... careful how you mod that. The latch position must stay intact and you mustn't lose any rigidity there. Needing to replace a smashed windshield and hood plus hinges would be quite a buzz kill. The point where vertical hood latch supports meet core supports is often overlooked but there's a lot of stress on that area during normal usage. Just bear that in mind.
More money.
More money.Smaller condenser?
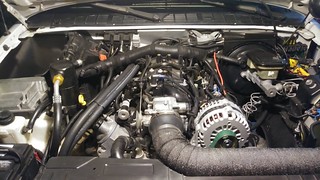
Pretty much. There's really no adjustment in the BRP mounts. Even if there was, the right head would be into the AC box.Is the engine as far back as it should be?
Not true. The comments get me thinking, and I like the input from guys with experience.Blah blah not much help
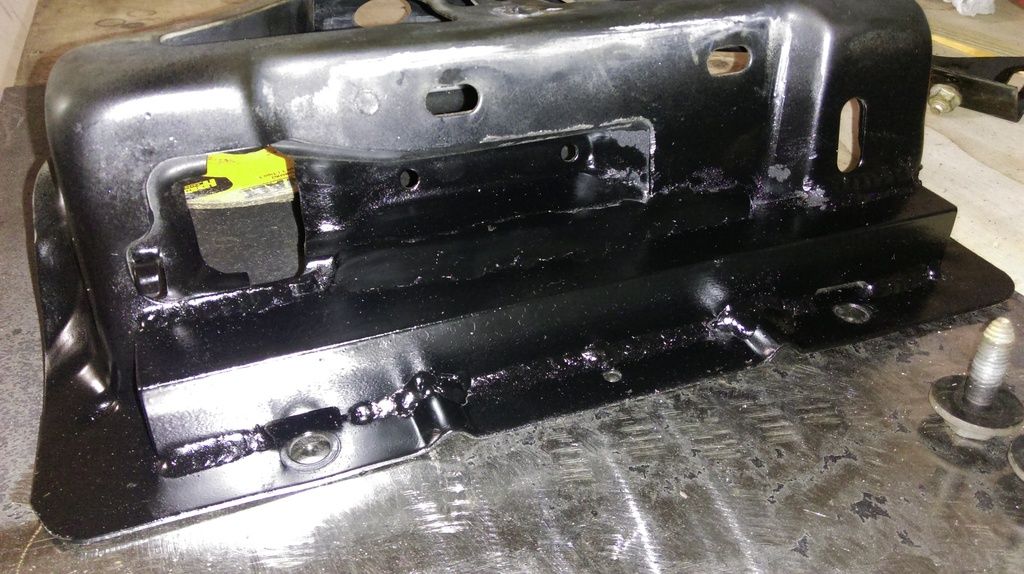
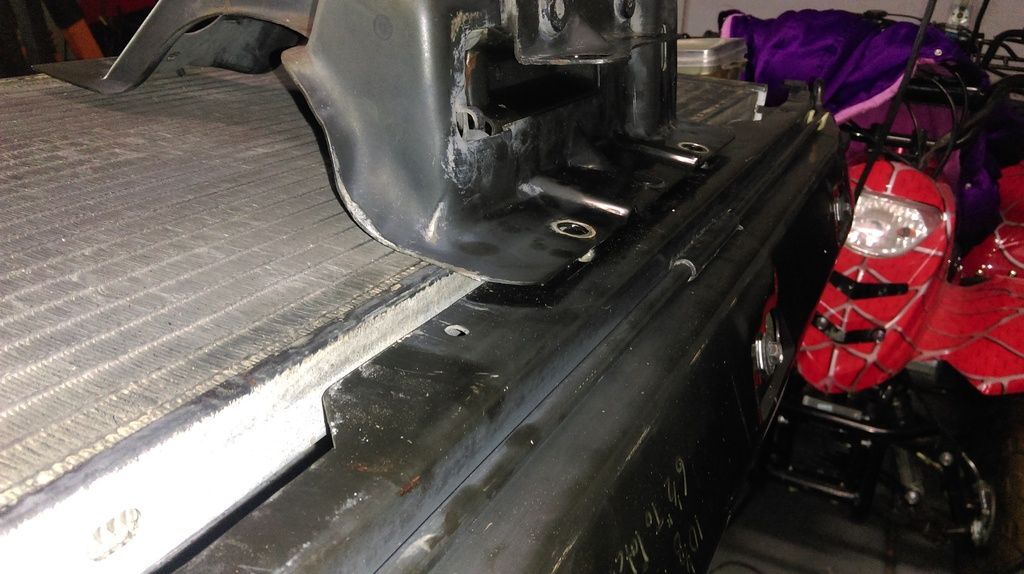
I appreciate your concern. It would be very easy to just hack away on that bracket to get the needed clearance, and not give it a second thought. I have a rough idea of how to add to bottom of the latch bracket so it reaches all the way around the bottom of the condenser to attach to the bottom flat of the core support. Should be at least equal in strength to how it was before. I think you'll like it. If you look closely in the last pic, you can see where I wrote down some reference measurements I took before disassembly. I tried to plan ahead so I'd have something to come back to.As a body man I gotta throw a flag on your vertical support... careful how you mod that. The latch position must stay intact and you mustn't lose any rigidity there. Needing to replace a smashed windshield and hood plus hinges would be quite a buzz kill. The point where vertical hood latch supports meet core supports is often overlooked but there's a lot of stress on that area during normal usage. Just bear that in mind.
As far as getting a different WP or condenser... It would be far easier, but I'm trying to avoid "custom" components simply for the cost. The stuff I have works, I just need to make it work. If I was running car accessories OR didn't want AC, there wouldn't be an issue, but I want my cake and to eat it too. I have a cut off wheel, a welder and Google. Anything's possible!
On a side note; Progress will probably come to a full stop for the next couple of days. My mom and dad are coming down from Michigan to visit. Pretty stoked to hang out with the people that gave me life.
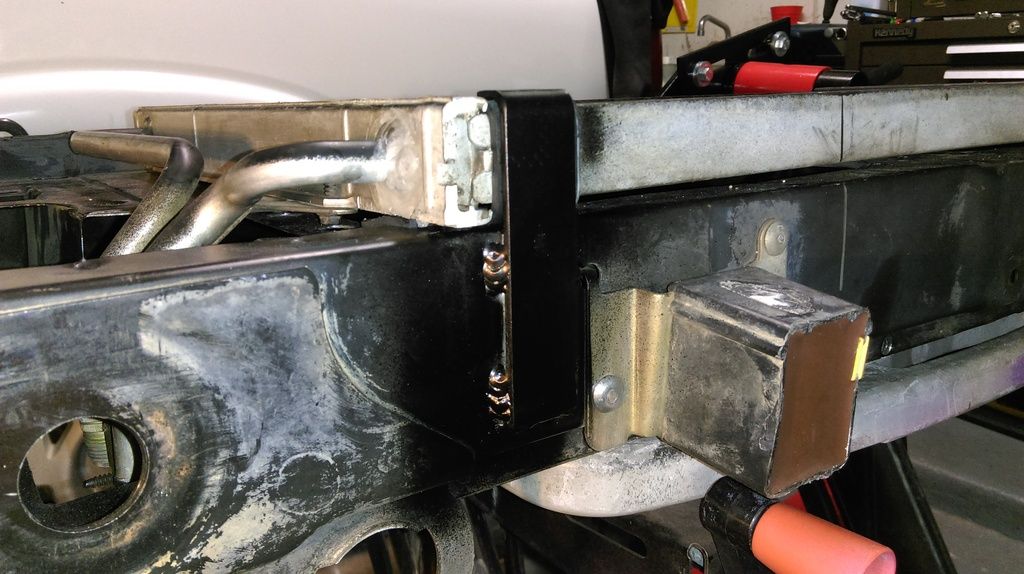
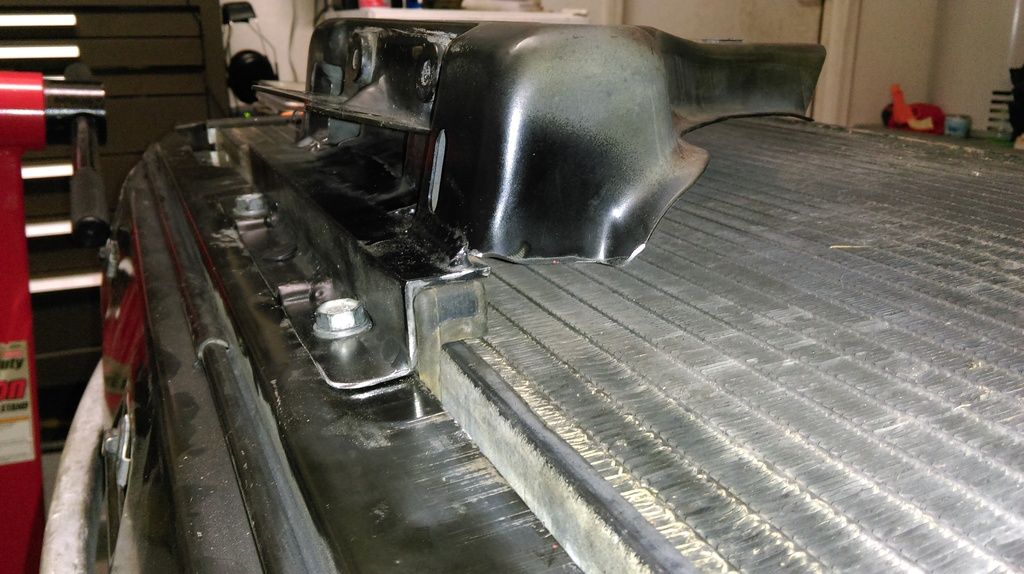
Well, their flight was delayed a bit so I got some garage time this afternoon. Here's what I came up with for the condenser support. Just some 1" flat stock welded to the bottom of the core support.
It looks a little better with some paint.
Working on the latch bracket
Next step is to chop out the section that hits the condenser.

I would be slightly concerned with strength, not in the resistance to breaking but in the resistance to torsion, if that makes any sense to you...
I know it's tight down there, but can you fit some form of triangulation on that angle iron, to keep it from flexing back and forth or twisting? It wouldn't need an insane amount, just maybe one next to the large cutout, a decently sized triangular support could fit on the right side, at a 45° to the portion that sticks out slightly. Then it would just be small triangles on either side of the bolt holes on the top portion.
You might not see it yet, but I know how much that piece will flex once you cut that offending section out. There's a lot of differently angled bends in that piece, most of the ones that lend it rigidity along the bottom are in the way of your condenser. There needs to be the same level of rigidity after the cut, which is why I'm telling you now that it needs lots of little triangles. It won't be as pretty and sleek and smooth as everything else, but if it stays like that the hood latch will twist out of that support, or just rip that entire support apart if it's given a chance to flex and bend. You really don't want to have to come back to this.
You did make it much easier on yourself by putting two 90° angles where the new metal joins the old stamped sheet steel.
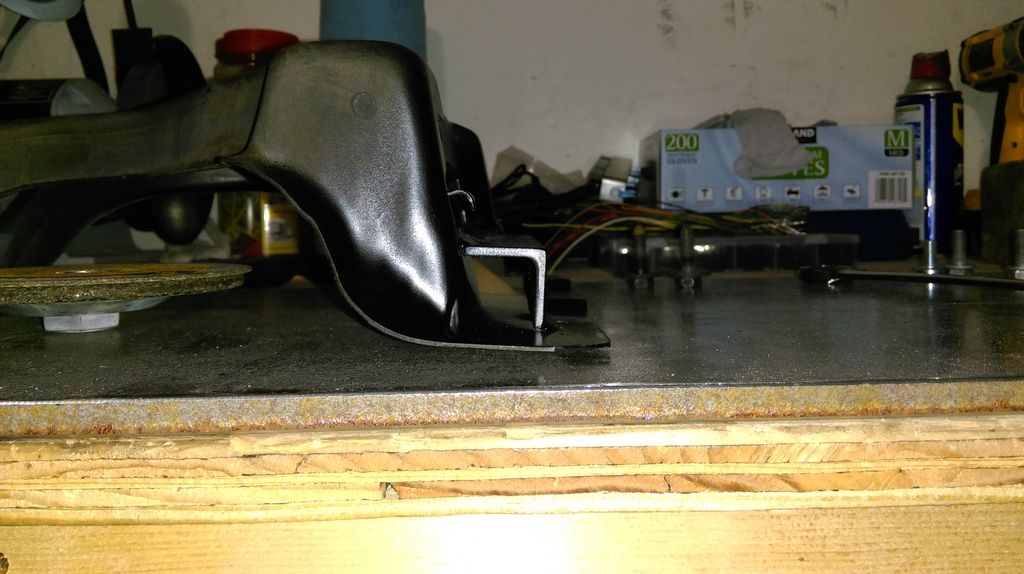
EDIT: I took another look at the pictures you posted, particularly the side profile of that support. In my mind I drew a line between the top edge of it on the left, and the edge of the angle iron you have welded on. Include the space between the edge of the angle iron and the top mounting holes.
If, IF you can go over top of the latch mechanism, DO IT. get as much material there as you can fit. I may seem a little crazy right now, but I've seen 10g steel twist and crumple like it's tissue paper, just by being put under torsion.
Ok.I think I've expressed my concern sufficiently. I would hate to see this majestic beast of a project meet an untimely end.
Last edited by WarStryker13; 12-12-2016 at 09:02 AM.
Don't over think it brother. It'll be fine.
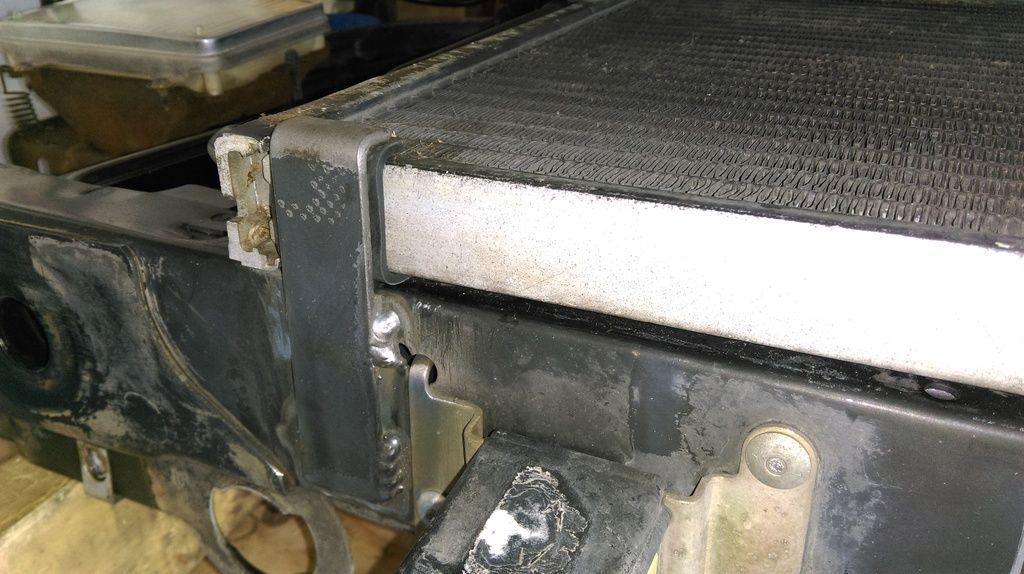
Okay. Now I'm satisfied with how the condenser is mounted/secured. It's held in top to bottom and left to right. Next step is securing the bottom of the grill/hood latch bracket.
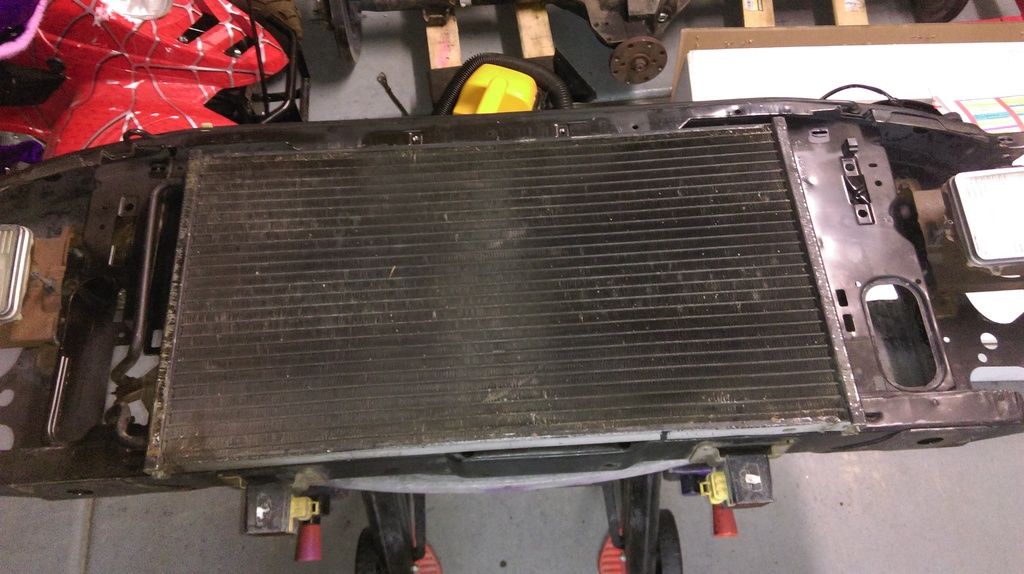
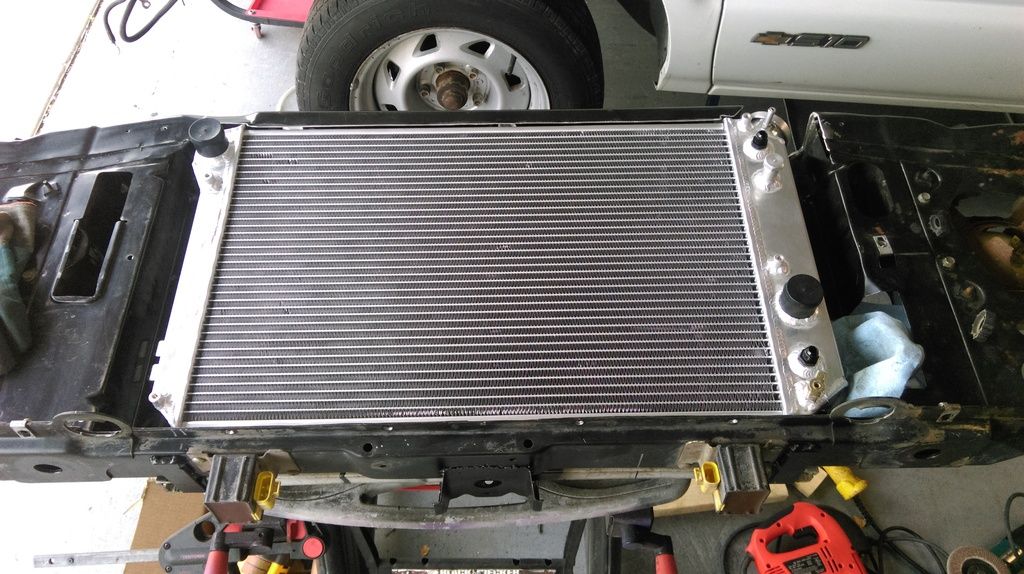
Condenser is mounted and everything clears. Now I can try to wedge the radiator in the back side.
Radiator is recessed. Now I need to figure out how to support/secure it.


i got faith in ya. or idj will show up and tell ya how he'd do it lol


the gp just has 2 rubber feet on the bottom and top corners have 1 bolt and a arm keeping it from flapping. Cant get any easier than that.
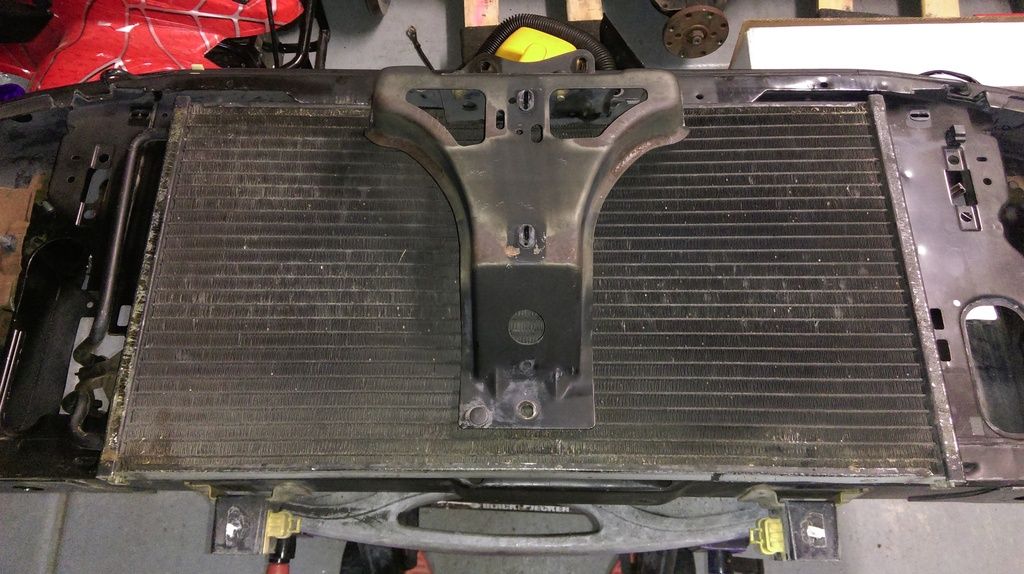
I think I have it pretty well figured out. The bottom of the radiator has kind of an upside down "U" shape, so it'll just need some sort of post with a rubber pad to sit on. That will locate it front to back and side to side. I should be able to re-work the old shroud to hold it in on the top.
This thing ain't no Grand Prix.LOL
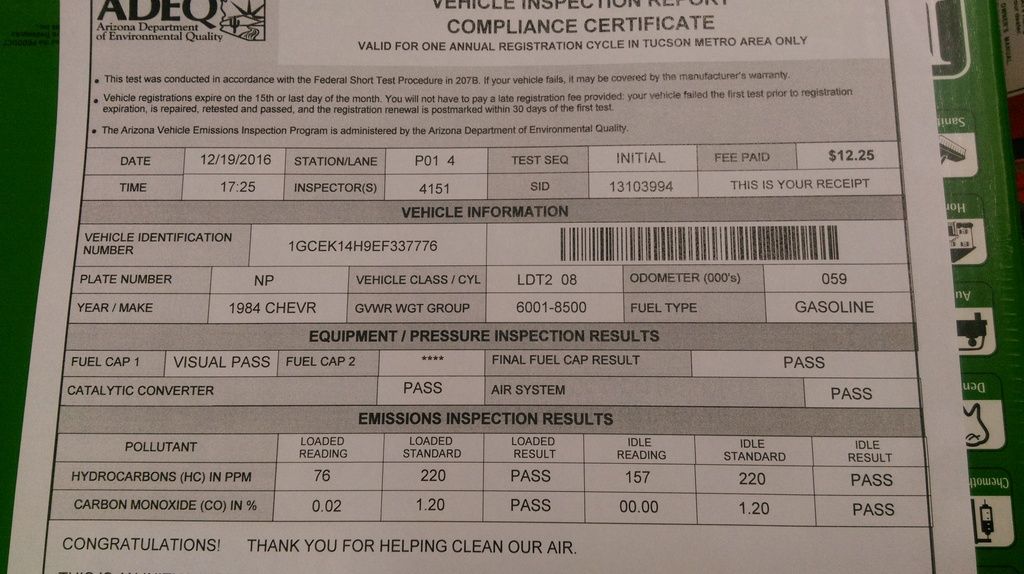
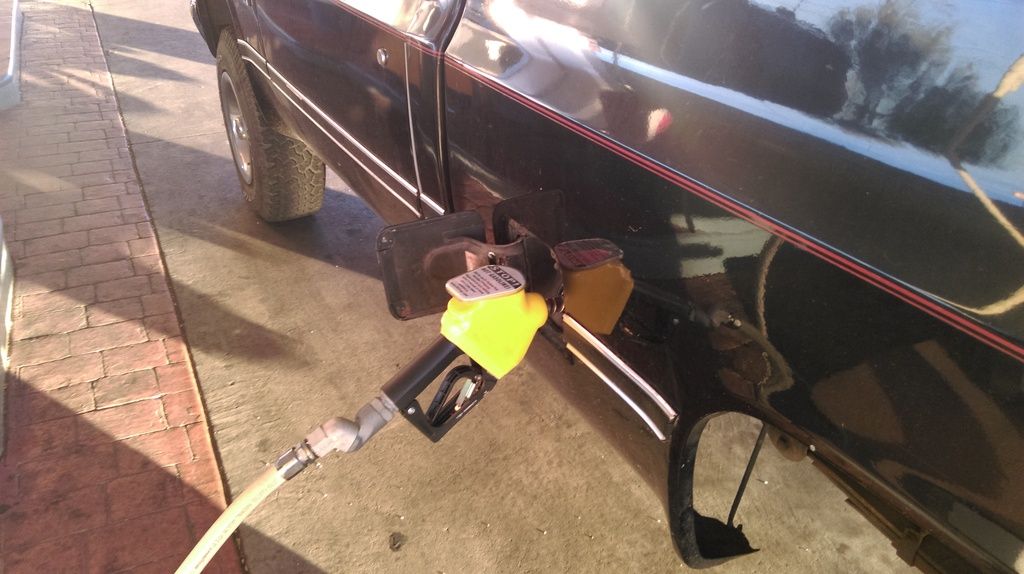
Nothing done to the S10 today. Had to take the old K10 in for an emissions test. Paid Pima county my $12.25 ransom. Took longer this time than last. The "inspector" had to wait for a supervisor or something... I asked what the deal was. He said, a lot of the testing places had been failing secret random quality checks, so now they have to have two sets of eyes on every inspection. What a joke. The whole emissions testing system is a joke. /endrant
Anyhow... I'm pretty impressed with the numbers from the test. Amazing how clean this old truck runs.
How is that even possible...?
Fib the test with a mixture of E85 huh?
95 and older here are exempt , 06 and under commercial are exempt, 25 and older, also testing is free9 more years for the gp come on baby!
I'm not sure "fib" is the right word. That would imply a cheat of some sort. I met/exceeded the standards they set on a test that they control, and I did it by following every guideline they have. There's no rule against using alternative fuels or fuel additives.
Brand new vehicles are exempt for like 5 years or something like that. Maybe less. IDK, I'll never own a brand new vehicle.
'96 and newer get the OBDII check. No MIL and a good gas cap = pass. Usually no visual.
'95 and older go on the rollers and get sniffed. Under the CO and HC limits and have any gas cap = pass. Usually a visual.
All "Heavy Duty" trucks go on the rollers regardless of age. Probably a visual.
I'm thinking, because the S10 is a '97, I'll get the OBDII only test. A lazy inspector would be nice also.
I agree with you emissions testing is a joke, it's also such a waste of time and money. So glad we do t have that stupid bull****.
Sent from a galaxy far far away.
| « Previous Thread | Next Thread » |
| Bookmarks |
Bookmarks |