im willing to bet its a mini welding table/ vice.

|
|


im willing to bet its a mini welding table/ vice.


Why did you need an extra injector harness?
So many compaines make direct drop in injectors for LS cars/trucks.


Thanks! Kinda learning as I go.Originally Posted by spazzz

I love that workbench. Easy to build, and very little scrap when done. Takes a serious amount of weight too. Here's the plans:I will be building a bench like that in spring once the grill takes a permanent home on the deck instead of the garage.
http://www.familyhandyman.com/worksh...bench/view-all
Actually, that's just a chunk of 3/8" hot rolled plate. Local steel supply place had a stack of drops on sale for $13. I grabbed one thinking it would make a nice portable welding plate. The vise is just something I found on craigslist. Currently not mounted. I will eventually, but I've been doing so much cutting and grinding I wanted to do it outside of the garage to keep the mess out there. So I just set the vise on my workmate in the driveway.I have been browsing for vices. Whats with the aluminum stock under the vice? How do you have it mounted?
Didn't really NEED a harness. Just figured it would be the cheapest way to get 8 EV1 pigtails. Eventually, I plan on doing an injector upgrade. Currently, my harness is set up for the Multec 2 injectors. I can get any kind of EV1 injector way cheaper than a Multec 2 injector. As I'm sure you know, the stock LQ4 injectors are only just over 25#. I was thinking of just throwing a set of stock GTP 36# injectors in for the time being. Even those would be more than 40% bigger, and I can get 8 of those dirt cheap!

Cool cool
Yeah I have built the same style a ton at work for storage, benches, ect.
For home I will probably do a 3/4 top or two 1/2" screwed and glued together.
Geesh buying a vice seems to be a painful shopping experience.
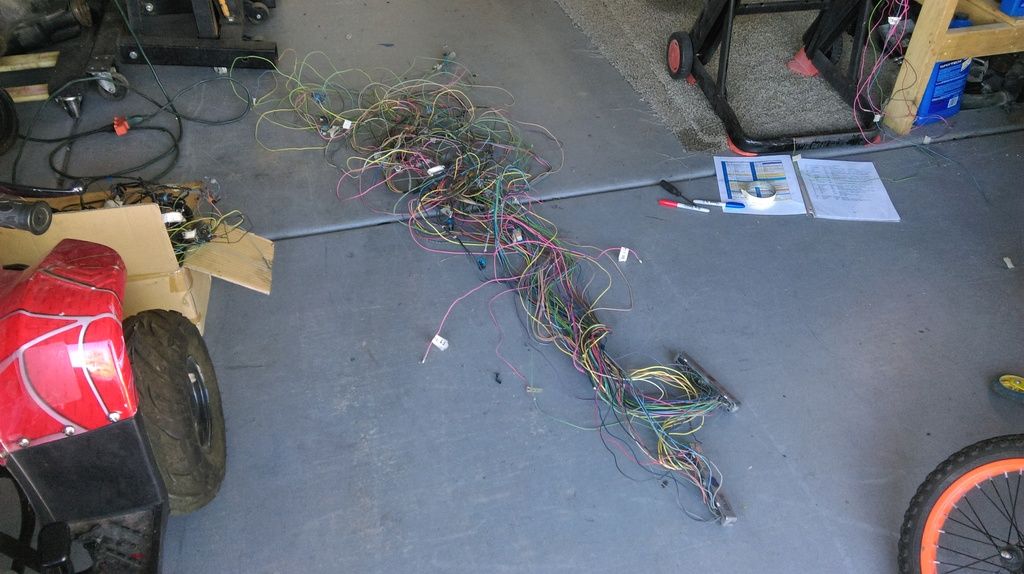
Alright. I think I have it thinned down to the bare essentials. Still a lot left.
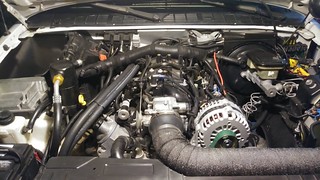
I guess you gotta start somewhere. So, I started with the injectors.
I'm really tempted to completely de-pin the PCM plugs and individually route each component. For $22 I can get over 100 of the female pcm pins, and I already have the crimping tool...
you make it look easy some how, but all we see is the progress, we miss out on all the diagrams your following. and that head banging lol
Honestly... It really hasn't been too bad. No major hurdles. When I step back and look at where it's at compared to where I started, sure I've come a long way. Really though, it's just a matter of taking it one small step at a time to add up to the finished product. Like I say to the kids when they have a seemingly overwhelming task in front of them; "How do you eat an elephant?" To which they roll their eyes and respond "One bite at a time, dad." Then I say, "Start chewing sucker!"
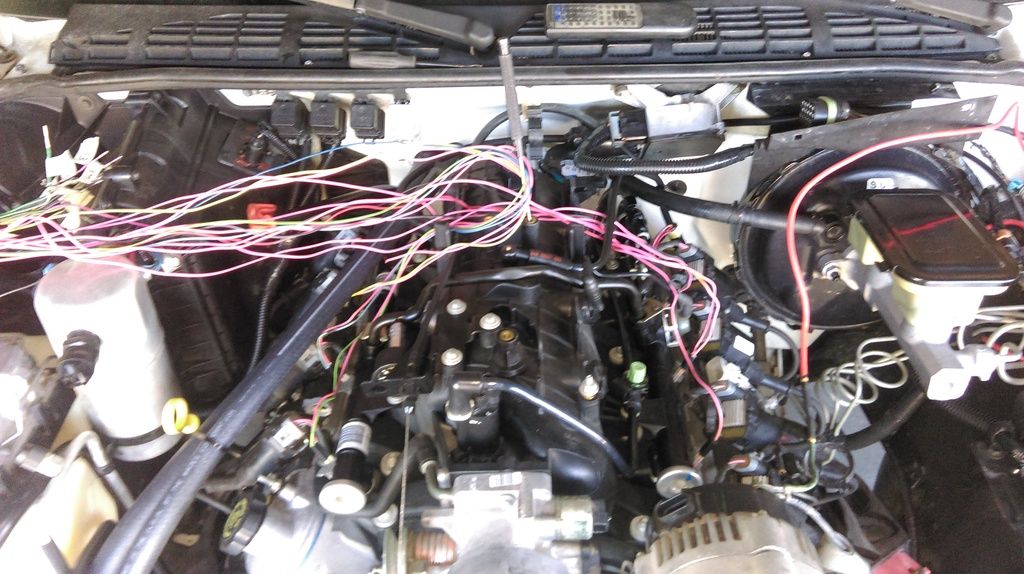
Not a lot of that yet. I don't anticipate too much confusion until I start merging the two harnesses together. Even then it shouldn't be too bad. Just gonna take it one wire/circuit at a time. So far, my biggest frustration are those stupid fuseable links. They merge like 5 wires together so it's impossible to isolate one component. I predict I'll be burning through a lot of solder and shrink tubes.we miss out on all the diagrams your following. and that head banging lol
I did drop $10 on some Ebay PDF factory service manuals yesterday. Should be worth the cost just for the wiring diagrams.
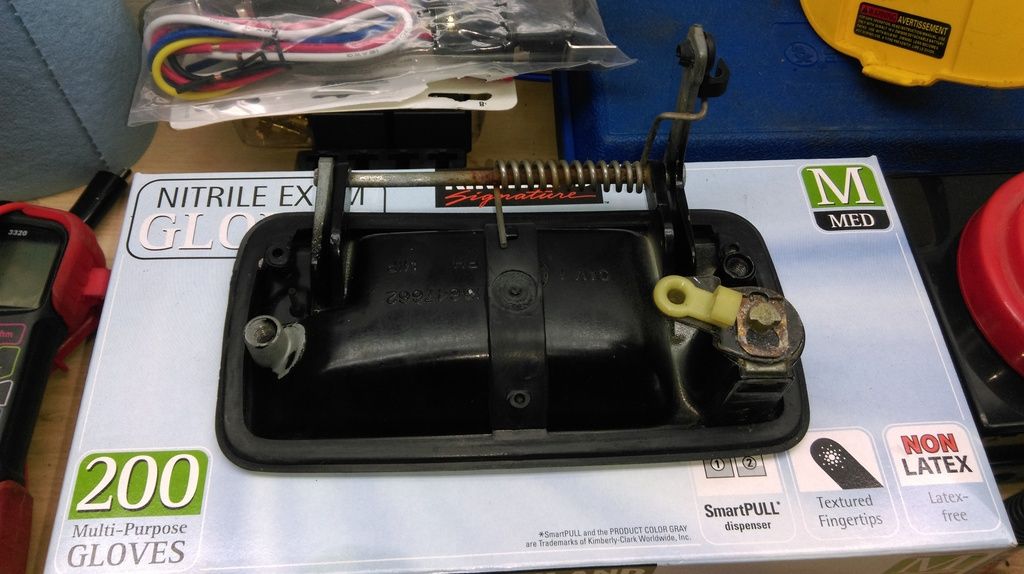
Got my $8 door handle today. Couldn't be happier. Popped the old lock out and the new one in. Within 15 minutes the handle was in and the panel was on. So nice to have two new locks, two keys and a fresh ignition cylinder. Not to mention, the peace of mind knowing the previous owner doesn't still have access to your truck.
I got another piece of the puzzle late yesterday.
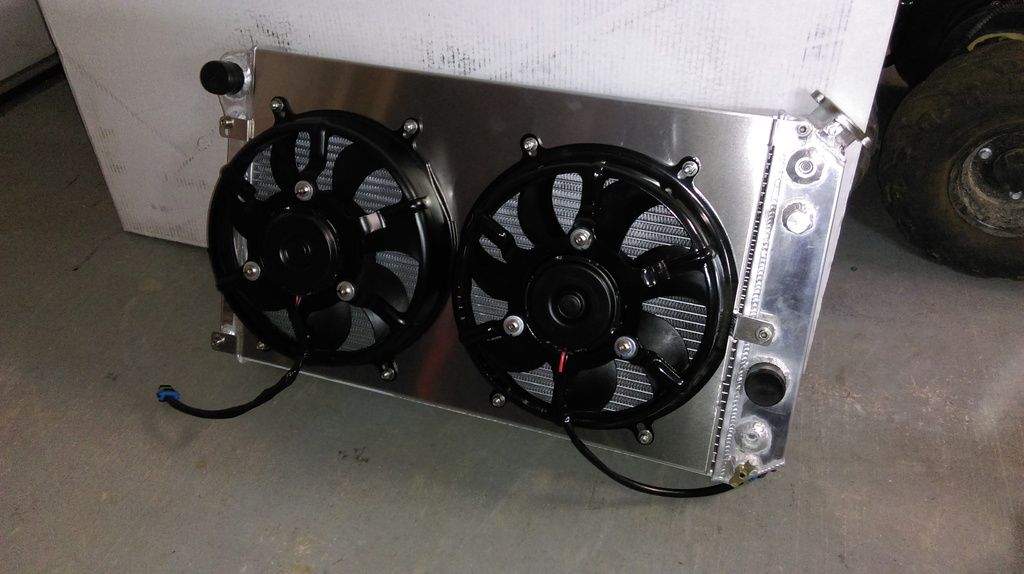
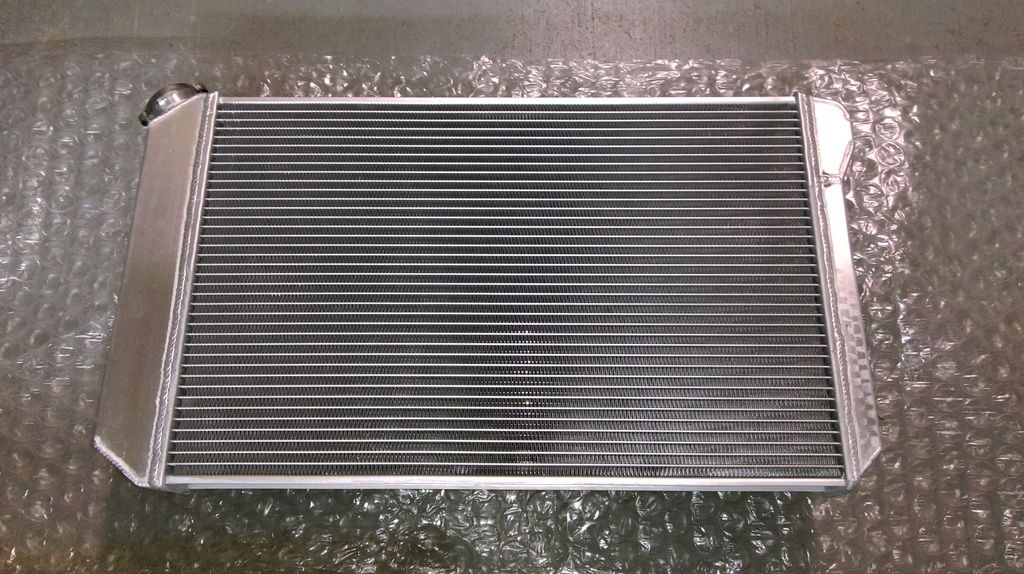
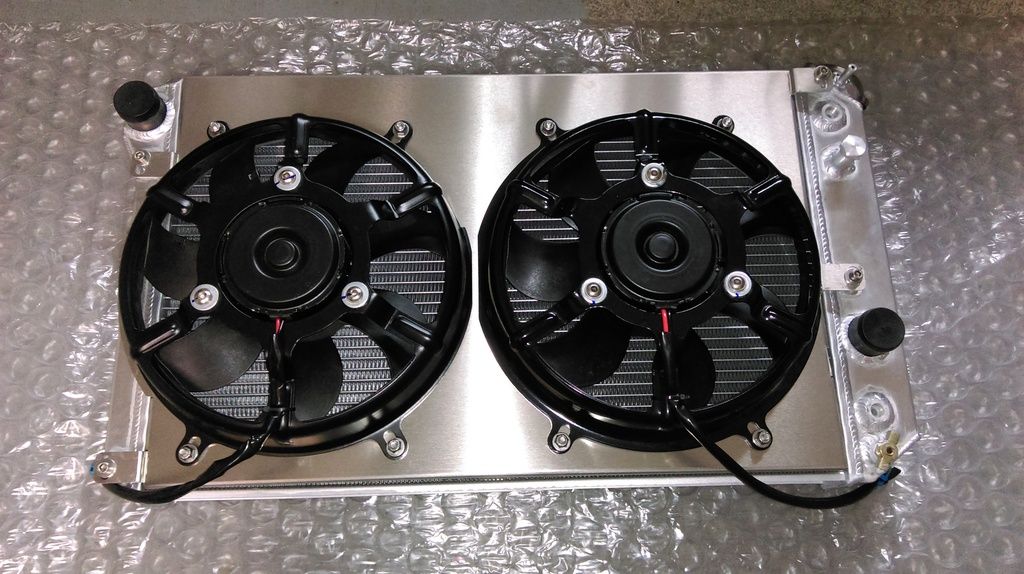
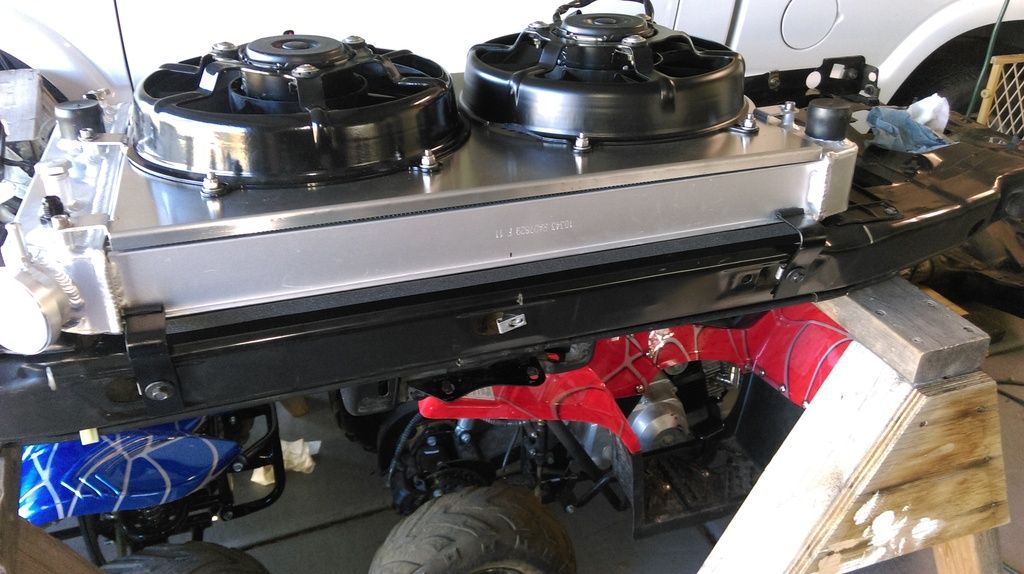
I figured running the stock 4.3 rad with auto trans and AC in a Tucson summer was a pipe dream, so I wasn't even going to mess around with it. Decided to spend the long dollar on the ECP S10 conversion radiator. Almost everything I read across many forums about ECP products was positive, which I think says a lot. Also decided to upgrade to the dual 1600 CFM fans after speaking with Frank at ECP for nearly an hour. It's supposed to be a direct fit, minus a little trimming here and there. We'll see...
I just need to hit the side tanks with a scotchbrite to knock the shine off before I (very carefully) drop it in.
I think now that I have the rad, I'll go ahead and put the front end back together. Two reasons for doing this; I'll be able to re-install the battery and troubleshoot active/working circuits, and if for some reason I need to put the truck outside, the engine compartment will be water tight. I can leave it in the driveway indefinitely without it being a half complete eye sore.

My name is James, and I support this bad-assery. March on soldier.
Thanks for the support!
Did a little brainstorming and I think I have the radiator support figured out. Just some 1" angle directly mounted to the core support.
This is just a mock up. It still needs to come apart. I have to run to the hardware store tomorrow for shorter bolts, lock nuts and more vacuum hose. Also, the angle needs a coat of paint.
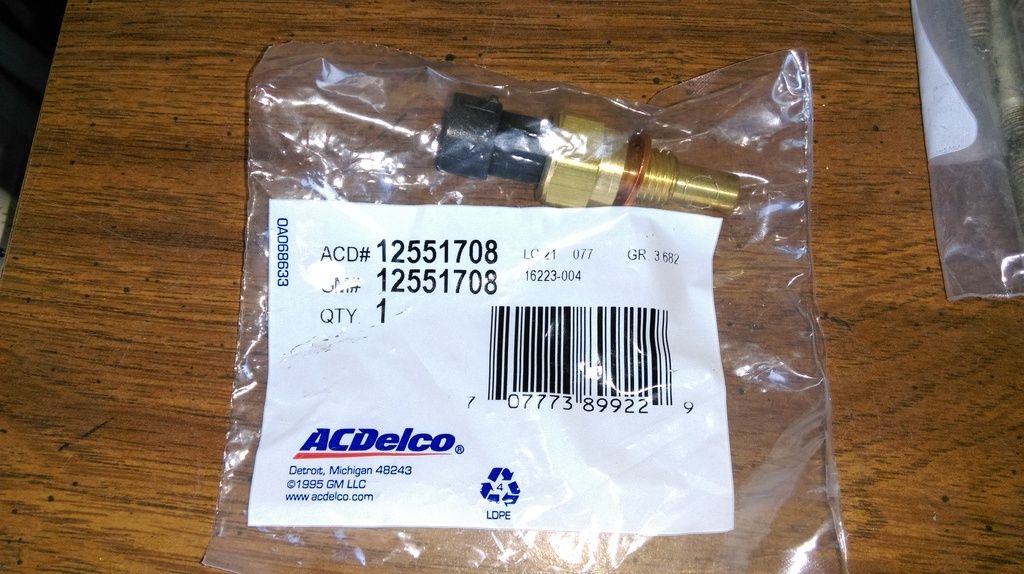
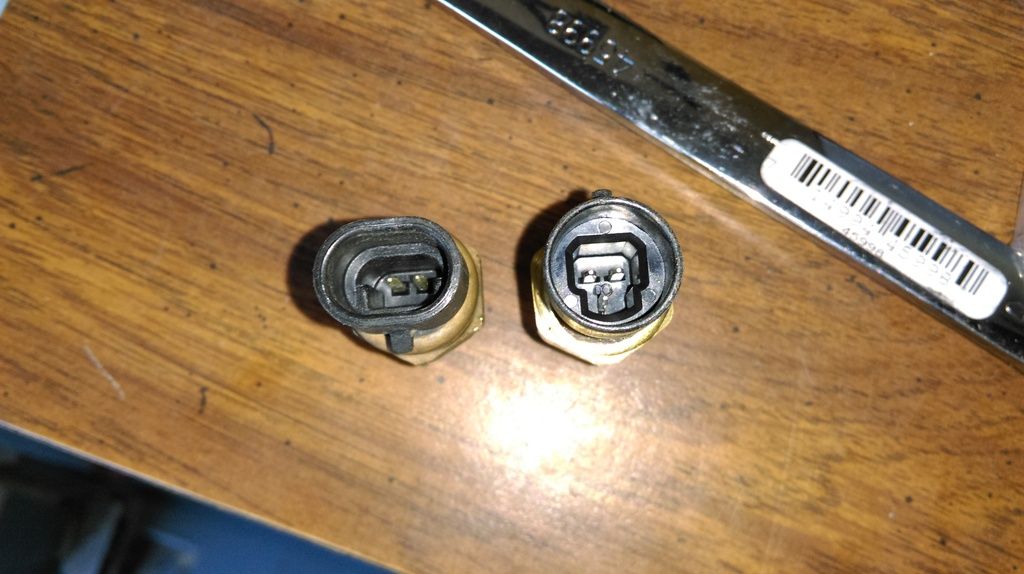
Found a super easy solution to something I thought was going to be a huge pain. I thought I needed two coolant temp sensors. One to feed the PCM (left front head), and one to feed the gauge in the dash (right rear head?). It's nearly impossible to get to the sensor port/tap in the right head once it's crammed into the truck. So I started doing a little research. Turns out, someone figured this out long ago just using a stock 3 pin sensor from an early LS1.
Stock sensor left, new sensor right
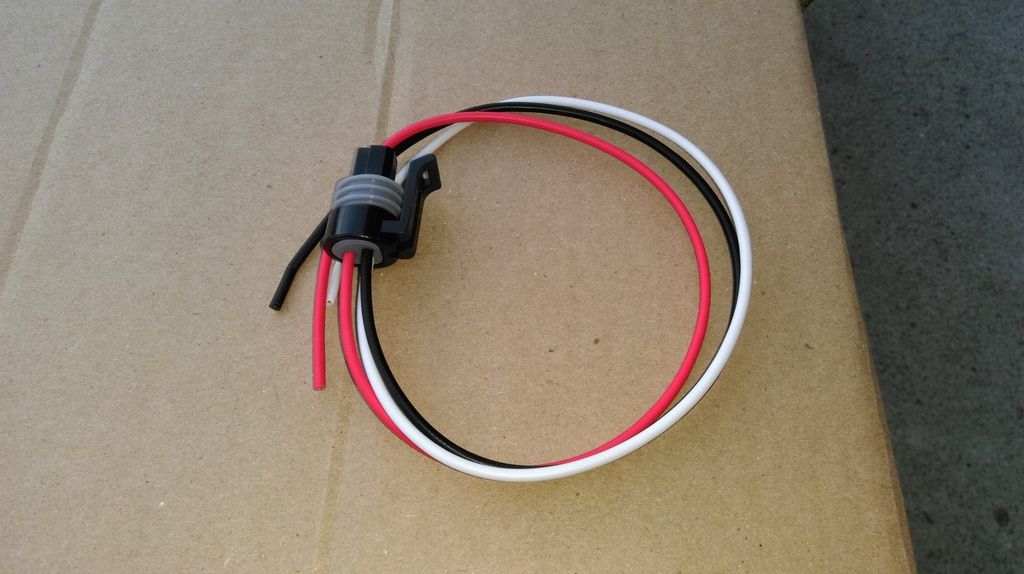
And a new pigtail to go with
The "A" and "B" wires in the new pigtail replace the "A" and "B" wires from the original coolant temp sensor plug in the LQ4 harness to feed the PCM. The third "C" wire will splice into the S10 harness and feed the IPC. Simple!
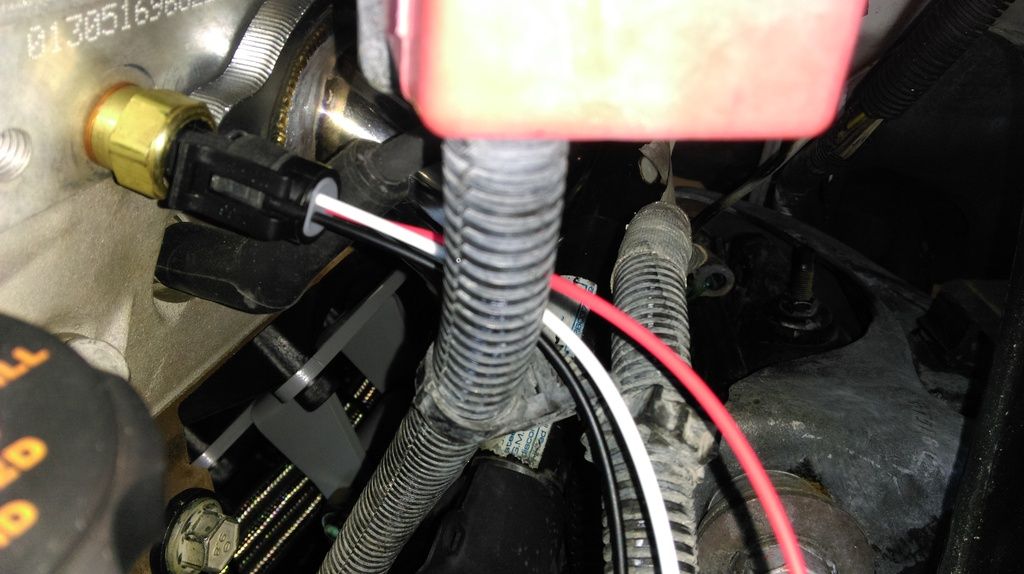
I guess guys have been doing this for years and it works great. Another problem solved using off the shelf factory GM parts.
Aren't grand prix temp sensors the same 3 wire too?
Possibly the same connector. (?) The threads are different though. Different part number for sure.
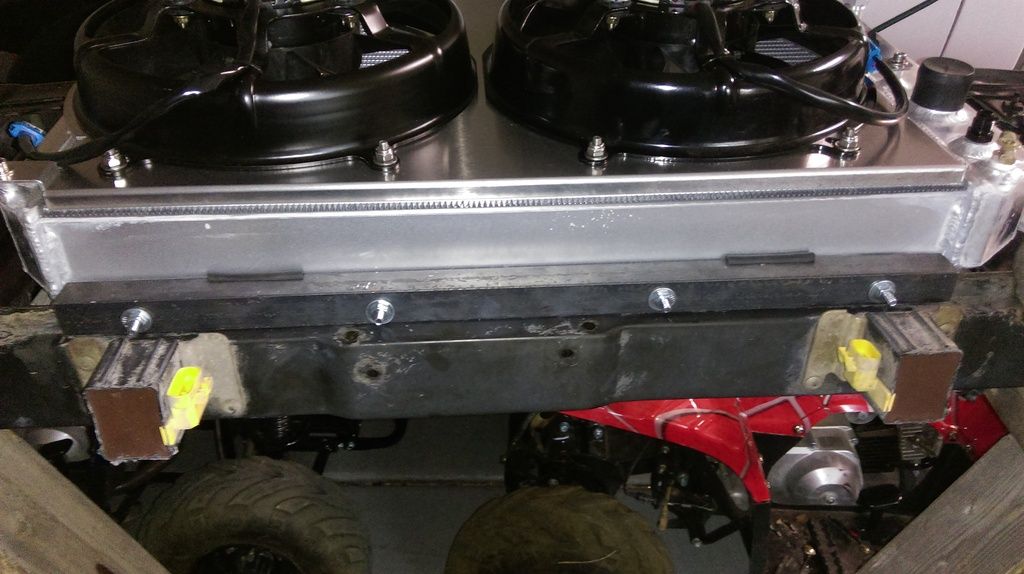
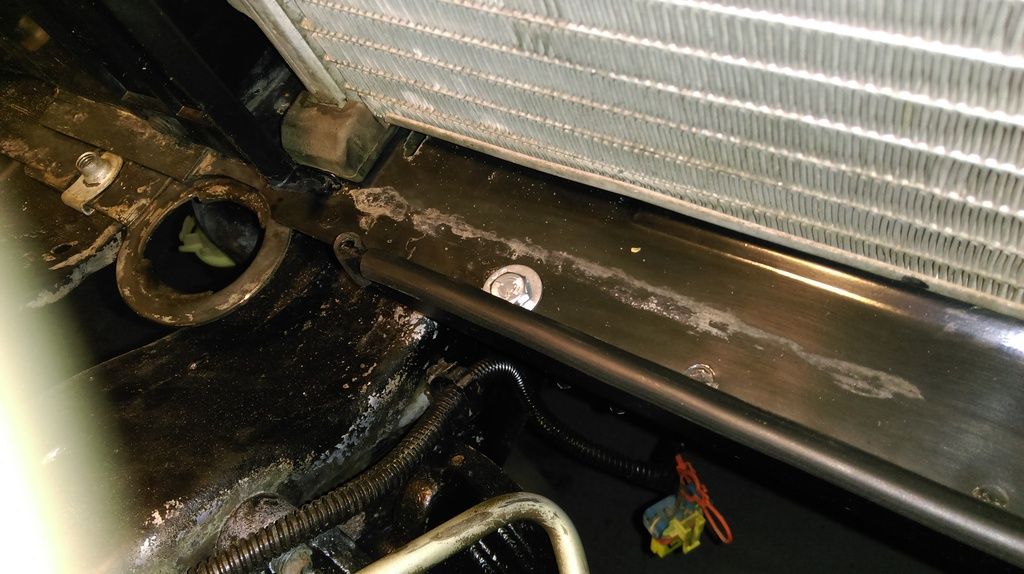
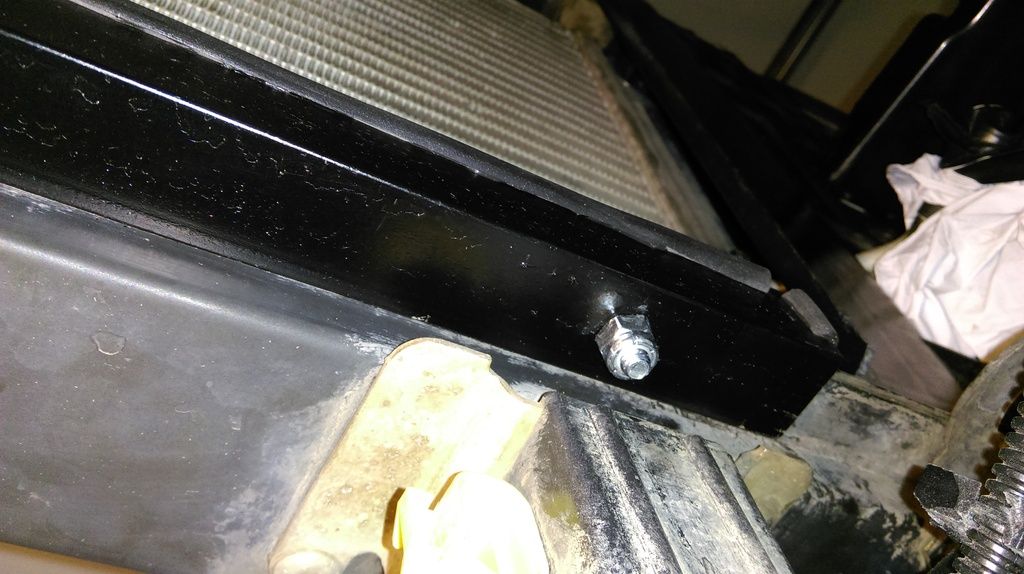
Got the radiator mounting complete. 1" angle bolted to the bottom of the core support with slit vacuum hose as a cushion. I decided to bolt rather than weld incase I ever do the 98+ facelift. Then I can just transfer the angle iron to the new core support. I forgot to get a picture of the finished bottom with the radiator mounted, but it's very similar to what I had before. Just now it's painted and the vacuum hose runs the full length.
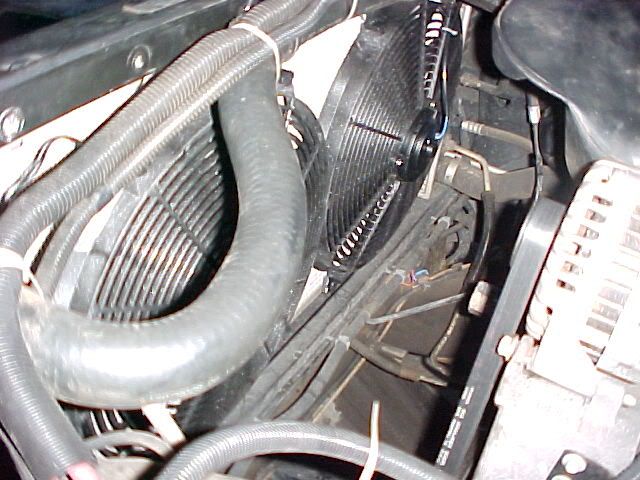
Inside the engine compartment looking forward and down
Under the truck looking up
For the top, I went with a couple straps of 1" flat stock bent to suit. Again, using slit vacuum hose as a cushion. Just enough to hold it forward against the core support.
With a little bit of trimming, I could still get the original factory upper fan shroud on there. That's probably something I'll do further on down the road to maintain the look I'm going for.
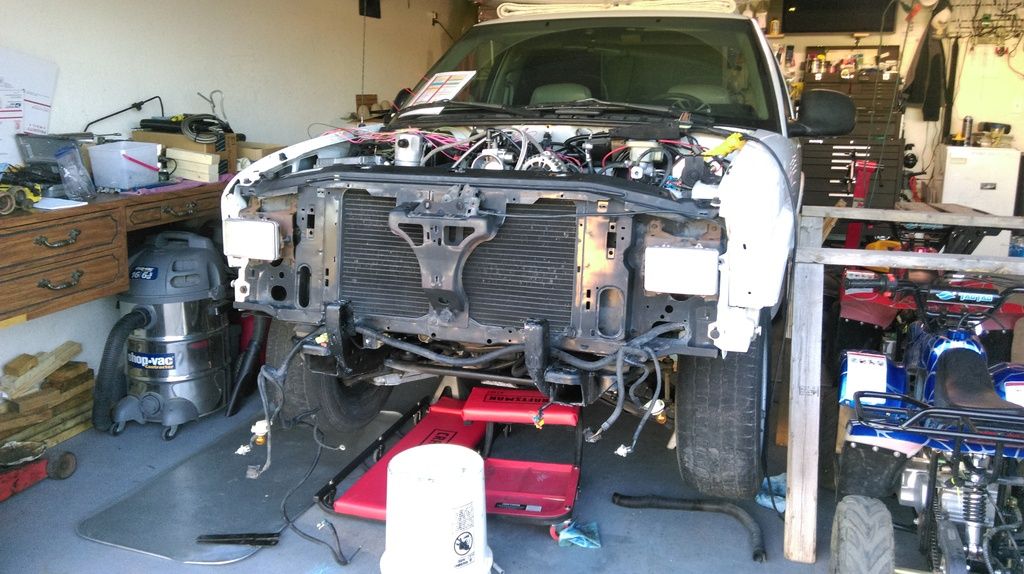
Once I was happy with the radiator mounting, I very carefully set it off to the side and worked the core support back onto the truck
Still need to run all the bolts in, feed all the wires through and secure the grounds, but it's starting to look like a truck again!
One step forward, two steps back...
I was able to do a test fit of the radiator with fans. Interference for days.... The radiator by itself slid in and the shroud cleared, but the fans aren't even close to fitting. The hit the water pump pulley snout HARD. Gonna have to sink the radiator deep into the core support, so the whole mounting setup will change. Might even involve moving the condenser in front of the core support to get the required depth. More cut/weld/grind/paint.
Gonna sit back, sip on a couple cold ones and see what I can do.
why not try the fans on the out side? like pushers. looks to be room there.
A single skinny fan could work too, but you'd have to buy one.
I know if you can find like a volvo fan or ford fan, they are 2 speeds and rather skinny.
i had a pair of 16 inch pro comp fans iirc on my 03 gmc. . they kept the temps one degree cooler then the clutch fan.
| « Previous Thread | Next Thread » |
| Bookmarks |
Bookmarks |