The one you send back is going to be just as clean, right?.....lol

|
|


The one you send back is going to be just as clean, right?.....lol


Lol cheatah.
Ummm... Yeah, Yeah. It's ahhh, clean. You know... All good.
Just as long as it doesn't slide it's way out of the return box, you should be golden. I bet they see nasty sh1t ALL the time anyway...
New rack went it. Firewall brake line went in. Super easy to sneak that brake line in too. The fact that the line was pre-bent didn't add too much in difficulty. I did have to remove the engine hoist brackets above the rear valve cover, which was extra, but most remove them anyway.
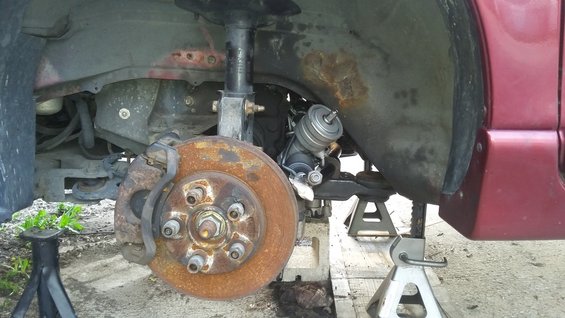
New rack going in, Boss:
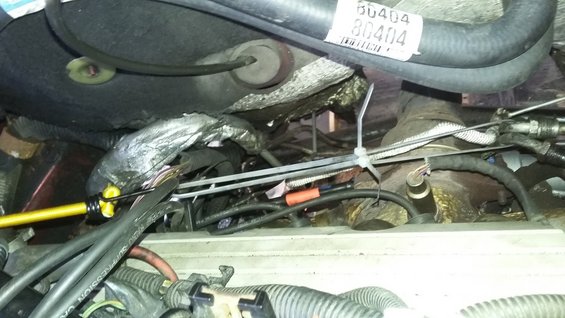
Firewall brake line. The white heat shield is the brake line. Hard to see:
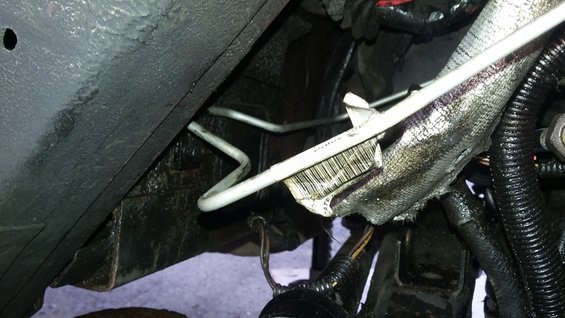
Brake line clipped. Sneaking north, up the fender wall:
Last edited by CHI2000GTP; 07-13-2017 at 04:45 PM.
Very ingenious use of random garage restraint devices...Bungee cord, zip ties...what ever it takes to get it done. Beats fighting all that crap being in the way, I bet. Next time add coat hanger and duct tape for extra points...lol
Got the new rack all bolted up. Last time I posted I only got it situated. This time I actually aligned the telescoping shaft to the rack and put the bolt in. Put in the mounting bolts and thought I was on my way… But nope. I couldn’t get the power steering lines to thread into the new rack. Just wouldn’t happen. The neck of the rack is at a funny angle, the end of the steel p/s lines is bent at almost that angle, but they just don’t wanna talk. That’s were I left it last night. I was getting frustrated. Damaging the threads on the new rack would suck SO BAD… I think I am going to disconnect the hoses on the other end, closer to the pump, so I can move them around and angle them as I want. Not sure. Maybe lowering the sub-frame back down will line them up better..? Hmm
Also noticed other problem spots that have nothing to do with what I’m currently working on. Pics below.
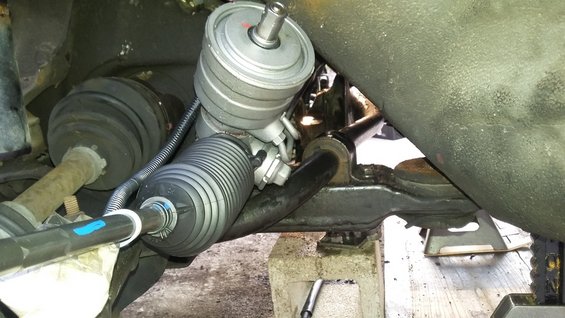
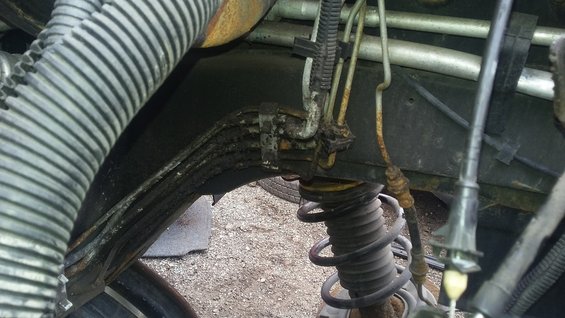
Rack and shaft lined up. Rubber dust boot is chewed up from me trying to lift it :\ Sill serves it purpose though:
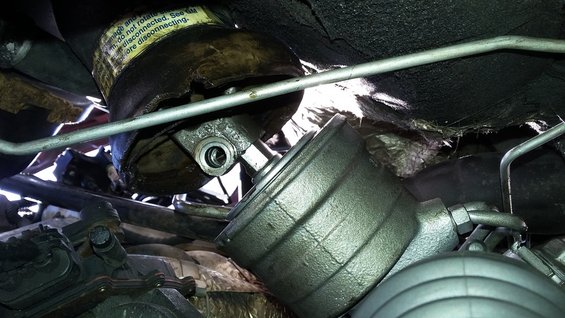
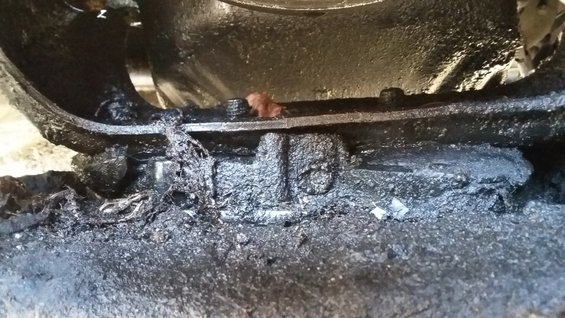
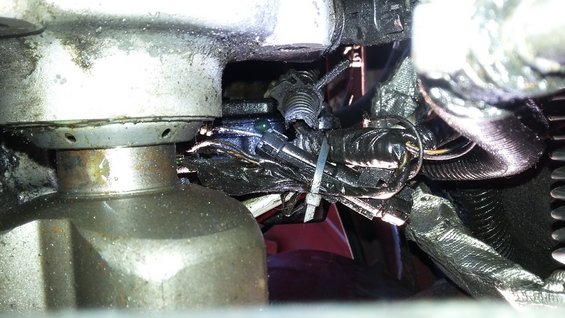
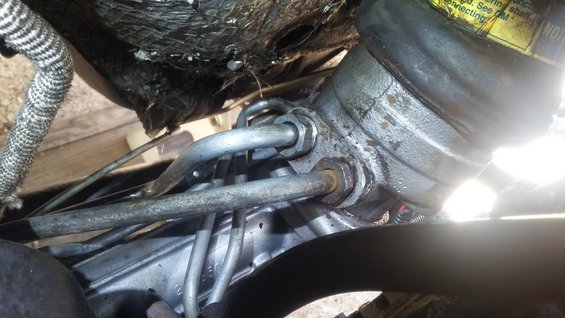
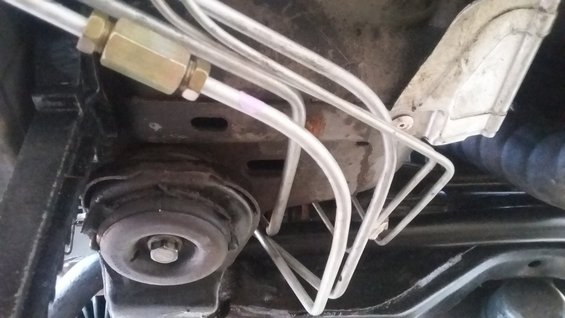
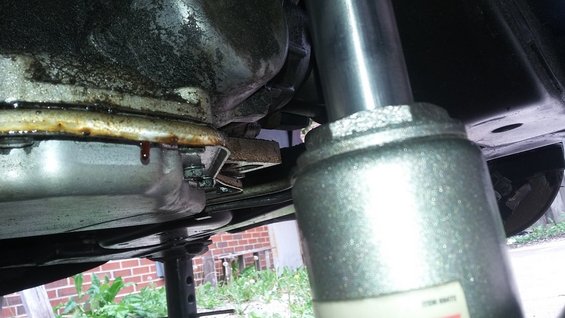
Now to the new problems. Busted motor mount. Only had about 5k miles on it. You can the see the rubber hanging off on the left. And all the liquid everywhere:
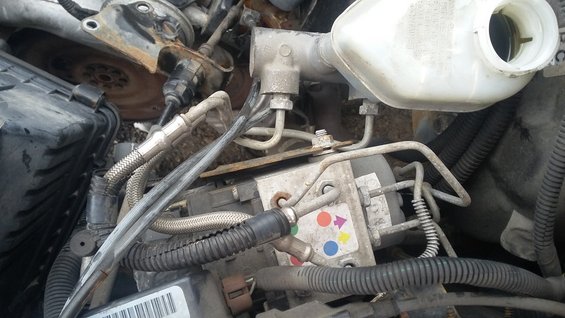
Leaking trans line at radiator. Leaking bad looks like, the entire radiator support was soaked:
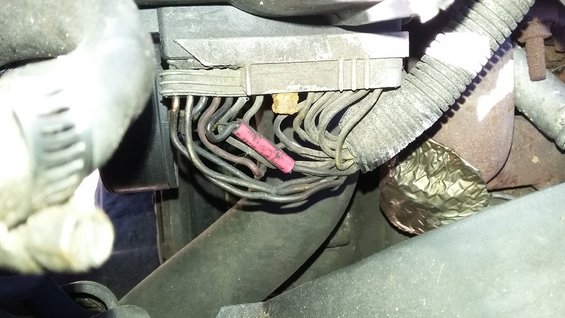
Cracked insulation on the wiring leading to coil pack. Bare wire showing in at least 3 spots. Hard to see in the pic. But you under close inspection you would notice what is now green copper showing through:
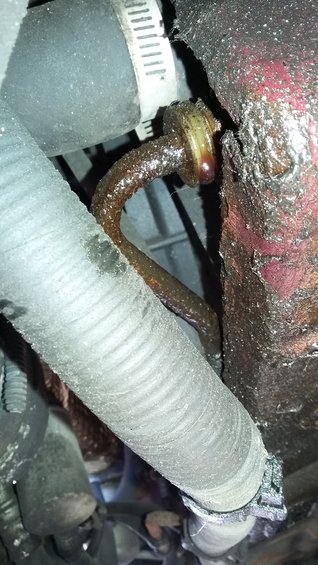
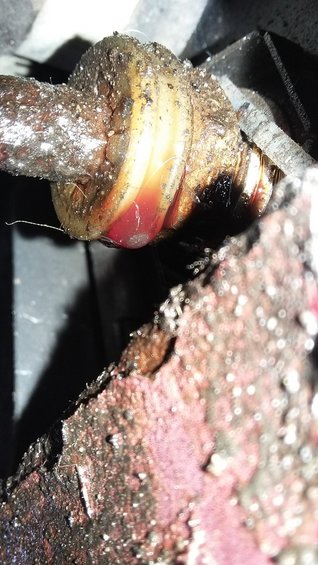
And this bead of green coolant that kept dripping down from the p/s pump. Is a front cover leak in my near future?
Last edited by CHI2000GTP; 07-13-2017 at 04:50 PM.
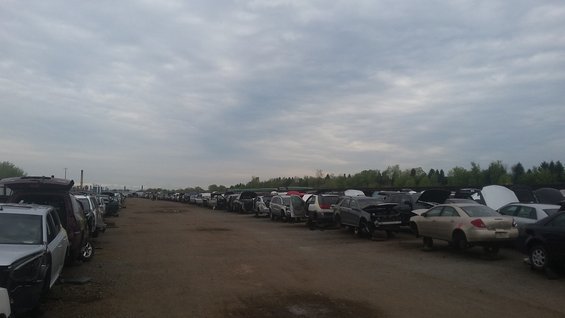
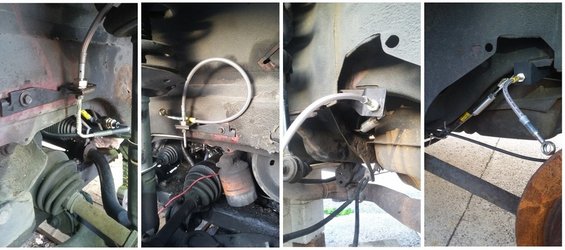
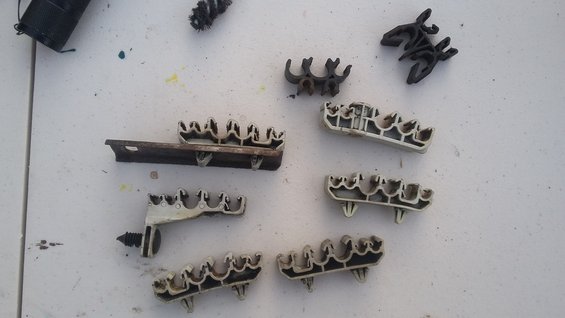
Went to the junkyard Thursday night. Took the day off today (Friday) to get some work done on the GTP. Went to the junkyard cuz I forgot how the brake lines and master cylinder and all hook up, and how the lines face, where they’re clipped, etc… Found a good specimen to study. Entire engine bay was gutted except for the what I needed. Took some photos, made some notes. Quite a few GP’s. Among them were 2 GTP’s with M90 attached, and a 40th. Anyway, got to wrenching on Friday and made some progress.
Acres and Acres of Tetnis:
Ohhh, right. Brake lines go here!
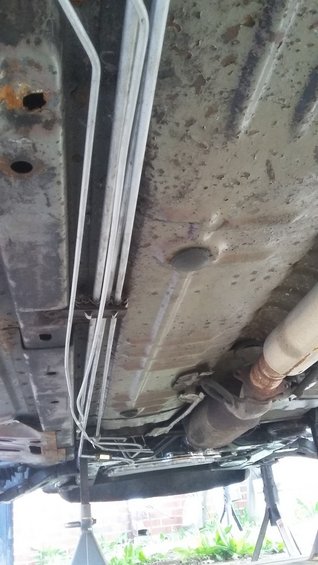
Neatly pinned against the firewall. Gonna be hard to get mine looking like that:

And neatly pinned against the fender wall:
My work area:

In my last post I had trouble threading the P/S lines into the rack. This time I grabbed the angled neck of those lines like it was rattlesnake. Bent the line as best I could in my hand, jammed the fitting in and it caught! Problem solved:
Brake lines and fuel lines fully installed end to end. Still hanging loose though:
Uhhh, a little crowded in there, Boss:
God damn jungle:
Got the ends of the brake lines all set for the calipers:
Tomorrow I play with these. Sure to try my patience:
Last edited by CHI2000GTP; 07-13-2017 at 04:52 PM.
Keep at it, man. You are racking up wins now, for sure...

I love those trashed rotors, look excellent!
Haha. I assure you they're made of the finest rust around.
Spent like 5 hours total working on the car these last 2 weeks. Sucks. Between work, and home, and kids, and dad duties, there is little time for the GTP. I plan on ratcheting up my wrenching time by doing it after my regular day job. I bought an 400W inverter off Craigslist with battery clips, and bought a car battery charger. I'm putting together a lighting tree so I can work in the dark. Remember the car is 20 miles away from me, and outside, with no electrical hookup, and the closest bathroom is a short walk to the Marathon :/ The lighting tree will be composed of random lamps I bought Goodwill that I will mount onto a wooden pole.
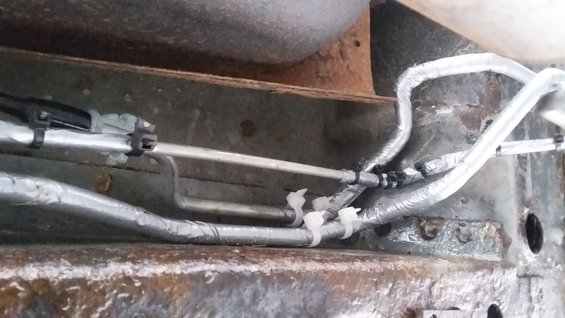
Messed around with the fuel and brake lines some more. The lines from Classic Tube are pretty good, but they are not perfectly bent, either are the fuel lines. The bends in the factory lines were super accurate to the millimeter. Classic Tube lines are rather accurate, but +/- 5mm or so. Usually +5. There are a few spots were the bends rub up against the chassis and possibly against each other. I applied a red neck solution. Not sure everyone will agree to its effectiveness but I can't keep slowing myself down by second guessing these rather inconsequential decisions. There's a spot, a crotch, next to the fuel filter, where all the lines meet up. Plenty of chances for rubbing there. I coated the lines in that spot with duct tape and then added zip ties to act as a barrier between line and chassis. I applied the duct tape very carefully, and very tightly. The zip lines kinda bite into the duct-tape and stay firmly in place. This took a while. Looks like this solution will work well though. I was not OK with those lines somehow being compromised from rubbing, so I needed to do something to feel better about it all. Not sure how the long the duct tape will hold up, but the spots with the zip-ties should last.
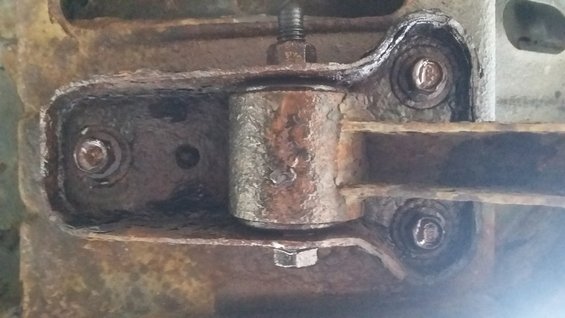
Also tried removing the bracket that holds the front of the trailing arm. Those 3 bolts would not come off. Just would not. I had been applying Liquid Wrench to them often, for weeks now, and even so had trouble. I got a few turns on them, but soon had to use an incredible amount of strength to get them to turn just a tiny little bit. I really do mean an INCREDIBLE amount of strength. So, I stopped. Soaked them in Liquid Wrench again, and jammed a soaked paper towel in there to keep delivering the penetrating oil. Not sure how that will go, not likely it will help. I backed the bolts back in, then back out, sprayed and sprayed. We'll see. Any tips on getting them out? Heat with a butane torch first? For how long?
The "crotch". Lines covered in duct tape and zip-ties. Yeah its janky, yeah its duct tape... Should work though:
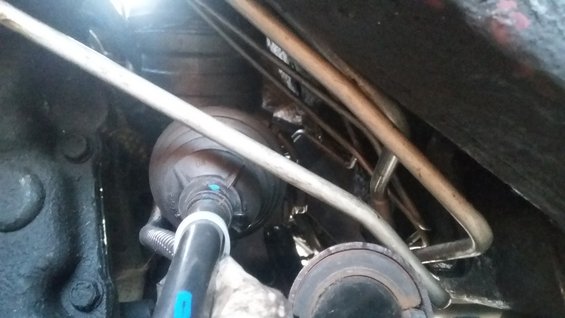
These are the 3 bolts that will not come out. Any tips?
Paper towel in place. Ha:
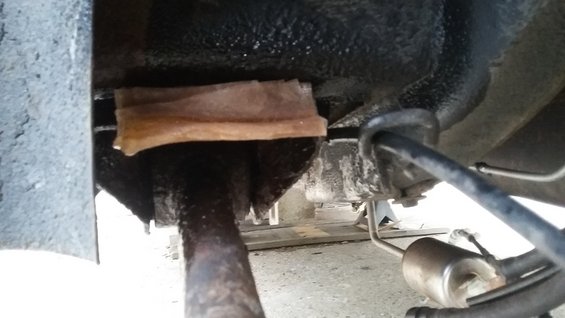
LOL. Had to take a pic of this stretched out drip from the trans pan. Just hanging on for dear life. hahaha. Thought it was amusing:
Last edited by CHI2000GTP; 07-13-2017 at 04:54 PM.

If you can get a nice long breaker bar, and I'm saying at least 36", that should give you enough leverage to keep from giving yourself a hernia...
That, and using something other than liquid wrench. PB B'laster mixed with some ATF, and if you can get it on the inside of the "frame" where the locked up threads actually are might get gravity to do the work for you.
If there isn't any holes near there, and you don't mind drilling a small hole right above where those bolts go in, you can spray right at the threads on the inside.
muscle it but be careful the bolts dont snap if they are rusted in. I like to spend your money so if those come out I would get new bolts and bracket!
^^^^^ I agree on the new hardware, and maybe chase the threads out with the old bolts, after cleaning them up and cutting a slot down it.
New brackets are cheap on RockAuto, too.

Those things will break if you do that with a big ass breaker bar.. i would heat them up with a propane torch. thats how i gots mine out also order a new bracket from rock auto comes with new bolts for 10 bucks. if the bolt holding the tailing arm is froze to then screw frigin burn it out to. will smell like hell but oh well order new tailing arms while your at it can get solid ones on rock auto at the same time.. my .02
Thanks for the input. Those bolts felt like they were gonna snap. Even without the breaker bar. That's why I stopped. Don't want problems like that. I'll try heating it with da torch, drilling holes above the threads will be my last resort. Or I will have a shop remove the bolts as some later time. I've got the new trailing arms. Ordered the boxed trailing arms from ZZP like 2 months ago, just waiting to be installed. As far as the brackets, I'll either try to clean those up, or buy new ones if I have to.
This will be my first time using the torch on the car. Seen it done with a professional torch at a shop. We'll see how it goes. How long do I heat the bolt? Till it turns red? I know this heating procedure works but it seems counter-intuitive. Heating things up makes them expand, which makes me think the bolt expands against the threads, making it even tighter. Can someone explain to me the physics behind this?
It's going to make the bolt expand, yes... But it'll also make the metal of the bolt more "pliable", and it'll squeeze against the rusty threads of the bolt hole and when it cools it'll contract again and give just that little bit extra clearance. Plus it's supposed to make the bolt less likely to snap, because the heating and cooling will make it less brittle and more likely to twist slightly instead of just snapping.
Or something like that. I'd heat the bolt up, tap it a few times with a small hammer while putting a little bit of torque on it with like a box end wrench, then let it cool and heat up the surrounding frame area. If you had an impact wrench, setting it on low, or barely holding the trigger would keep it from just snapping it, but give it the actual impacts that it would need to break the rust loose.
just be mindful of whats around the area of heat wires brake lines and so on.
dont over heat just try different amounts start with say 15 to 25 seconds hitting all the bolts in a circlular motion.
buy the bracket yours are pretty thin. when you get new ones yours will seem like pop can metal.

I X2 this ideaOriginally Posted by WarStryker13

Cool. Got it. Appreciate the explanations and instructions. Here's what I got: First heat bolts for 15-20 seconds in circular motion, heat metal around bolts, tap lightly with hammer, torque a little, tap a little, heat a little more... Ten-4. Ohh yeah, definitely buy new brackets, don't blow up car.
Thanks!
| « Previous Thread | Next Thread » |
| Bookmarks |
Bookmarks |


