this is a writeup on how i did my hv3 install on my 2007 base GP.
tools needed:
any tools that you might need to remove your air intake. i only needed a flathead screwdriver.
Socket set. i used my 1/4 drive socket with a long extension so you can maneuver around the height of the UIM. (you will mostly be dealing with 10mm, and 8mm, i recommend using the 6pt sockets so you do not strip the bolts.)
i used a dremel tool to cut off some clips on the UIM gasket that held a pcv pipe.
make sure to begin this when your car is completely cooled down, i waited about two hours after i had gotten home from work, and i finished the job in about an hour and a half.
i began by removing my air intake setup.
i then removed spark plug wires #2/#4/#6 from the coil pack assembly and tucked them behind the engine.
the next thing i did was disconnect all connectors that i thought would prevent me from lifting up the UIM. i believe there were 4-5 connectors and i'm not exactly sure what they are or do.
next step is to release the pressure from the fuel rail. unscrew the black cap and there is a valve like on a tire. lightly push the valve with your finger or a small flathead. some fuel may shoot out, but mine barely did after leaving the car sit for a while.
next, there are four bolts that hold the fuel rails down. they are located on the brackets that are attached to the fuel rail. unbolt all 4 of these. the pics below show the two front, and there are two on the back that look the same.
after you remove the bolts, you can lift the injectors out of their housings, and begin the UIM bolt removal like below. the fuel rails just pop out. you have to give it some force, but they should come out relatively easily. i just gave a quick yank at the angle they appear to be laying and it worked just fine for me.
in the next picture, note that i had already removed one of the bolts, it is where you can see a hole. that one is a longer bolt than the others. keep that in mind for reinstallation.
keep removing the bolts!
all in all, you should have 7 regular UIM bolts, and then 3 longer ones that connect through the TB (i think), and two other places. just remember where they all go. it's not complicated. here is a pic of all my bolts.
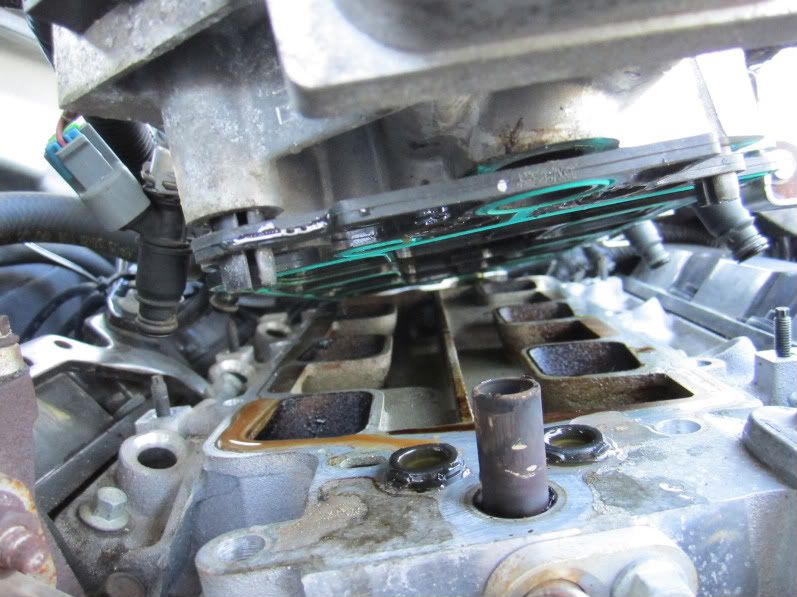
next is to lift the UIM, and remove the stock runners and gasket. the gasket is clipped to the UIM, so you have to kind of set it down and release the clips and then lift the UIM off.
stock runners out...
these are the clips that i had to dremel off. if your car doesn't have them, don't do anything with the gasket...
dremeled...
i was unable to get a picture of the hv3 in the UIM, but there is only one way it will fit up into the channels.
make sure the gasket matches up with the LIM, and then bolt it all back down in reverse order. now is a good time to anti-seize the bolts. you don't have to but it is a good idea.
once the UIM is bolted back down, i slid the injectors back into their respective housings, and bolted the fuel rail down with the four bolts.
reconnect your connectors that you disconnected.
plug in your #2/#4/#6 plug wires on the coil pack.
reconnect your air filter and maf setup including pcv valve.
reinspect everything, wires/connectors/bolts, etc.
fire it up and enjoy your new mod!


