Thread: Speed Daddy Header install writeup

Page 1 of 2 12 LastLast
Results 1 to 20 of 24
  1. #1 Speed Daddy Header install writeup 
    just call me john-o vailskier3's Avatar
    Join Date
    Jul 2008
    Location
    Tampa, FL
    Posts
    1,292
    Thanks (Received)
    0
    Likes (Received)
    0
    Dislikes (Received)
    0
    First off, I would like to thank Lawngoose for this writeup. He walked me through this whole installation, and i basically wrote down everything that I did. He was a huge help to me, and hopefully this helps some of you...

    Speed Daddy Header install plus tips/problems etc.:
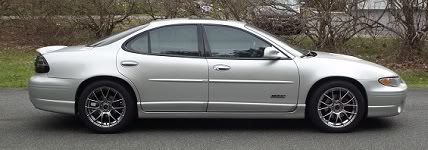
    Please keep in mind that this header install was done on a N/A 2007 grand prix. Some changes may be evident with 97-03. If there is anyone that wants me to add anything that I forgot, PM me and I will make the changes…so, enjoy!!!
    Parts list:
    Jack, Jack stands, spark plug socket (5/8), various 10mm,13mm (deep wall), and 15mm sockets and socket wrenches, open ended wrenches in 13mm and 15mm, hammer, felpro manifold gaskets (optional), breaker bar, copper rtv, and last but not least PRISON SHANK FILE.
    Installation:
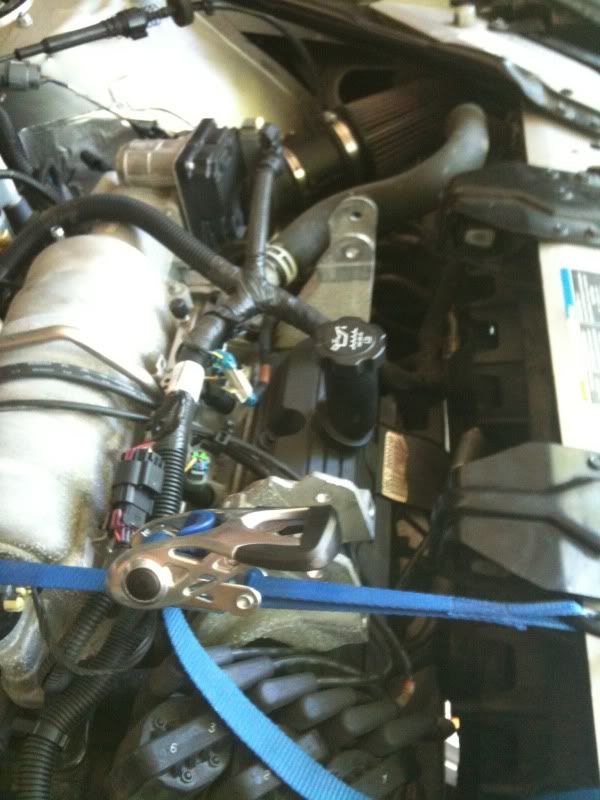
    First things first, remove dogbones by ratcheting the motor forward slightly to take the pressure off of the mounts. (I hear that the S/C guys use the snout of the S/C, and I used the bracket that connects to the alternator and one of the holes in the frame next to the dogbones.) Should be 15mm bolts and you will need either 2 sockets or a socket and another wrench to hold one of the nuts/bolts in place while you loosen the other. Remove front spark plug wires and label as needed, and take out the spark plugs as well. 5/8 spark plug socket.
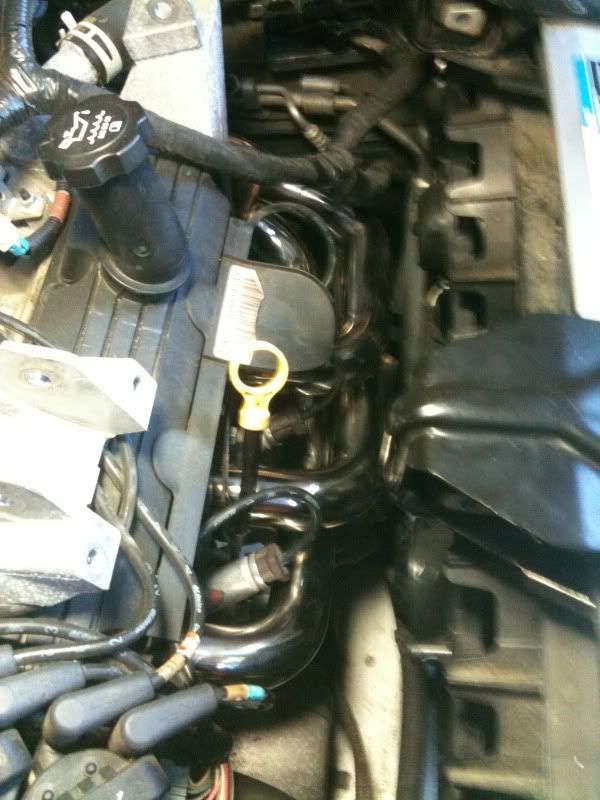
    After this, we took off the front manifold. The first thing that we had to do with this was remove the oil dipstick. It just pulls out. It seems like it should be in there a little better, but make note of where it attaches, and just pull it out. The heat shield must be removed next. On 04+ there are iirc 3 bolts that are 10mm holding the heat shield over the manifolds, and I heard that 97-03 just pull off of the manifolds. Remove these bolts and just pull the heat shield off in any fashion. Next, you will be unbolting the crossover flanges, and the front manifold. 13mm bolts hold it on. There should be six bolts that you remove, and there are two along each primary. One bolt is low and the other bolt is high. Make sure to keep these bolts as you will be using them later to use on your new speed daddy headers. Also, when removing the front manifold, be sure to remove the gasket and inspect it if you plan to reuse it, toss it if you don’t. I know that some people just buy felpro gaskets, and some reuse the stockers. That is a preference choice.
    You can now ratchet the motor as far forward as you can in order to get the rear as far up as possible so that you can work more easily. Remove the spark plug wires, and plugs in the same fashion as the front, and label them if needed. The next thing that you will do is loosen the bolts that connect the rear manifold to the stock downpipe. Don’t remove them because they will hold the downpipe up so it doesn’t fall. These can be a pain, so make sure to have some PB blaster on hand in case they are rusty. Remove the heat shield in the rear the same way as the front. Remove the six manifold bolts just like you did for the front, and remove the gasket and inspect it for cracks, etc. if you plan to reuse it.
    Now, jack up the front of the car. Make sure to use jack stands as the jack itself can fail. We used it as a support in addition to the jack stands though. After you have reached the proper height, you will crawl under the car and remove the pipe that comes from the catalytic converter to the resonator (the long tube about mid car). This is also a PITA to remove, so spray it with some PB blaster, and have a breaker bar handy, a hammer, or some other method. We had to beat the crap out of the wrench with a hammer before it would break loose. Keep the exhaust hangers on if possible so that when you remove the downpipe from the rear manifold, it won’t fall.
    The next thing that we did was put the rear header in place. This is very tricky and takes some finesse. Also, in order to do this, you must bend your trans dipstick tube. This can be bent quite easily. Bend it toward the driver’s side of the vehicle. The next thing that you will do is lower the header from the engine bay. Lower it straight down facing the way that it is supposed to be mounted and try to get a couple bolts in with the gasket in place to hold the header there. Don’t tighten it down yet.
    At this point, you can go back underneath the vehicle and rtv the joints and use the clamps provided, or use band clamps from NAPA or some other parts store of your choice. One thing to note about the pipe that connects to the resonator is that the holes may not line up 100% perfectly with the bolts. We actually used a “prison shank file” to make the hole in the flange a little bigger so that the bolts would fit through. This took quite some time, but was much more effective than when we tried to use the power drill to drill it out a bit. After you get this all done, reinstall the exhaust hanger donuts, and head back up to the engine bay.
    Now, your downpipe should be properly connected to the resonator, and to the rear header. I recommend tightening down the rear header now. Make sure to torque these down. Try to make sure that each bolt has equal pressure. i.e., don’t just start on one side, tighten it like crazy, and work down the line. Try to get them all in a little bit, and tighten them each down a little bit at a time until they are all so tight that they will not go any more. You will feel a point where it just does not want to go any further. Do not try to push them past this point! Now you can reinstall your spark plugs and attach the wires in the proper fashion.
    After the rear header is in completely and your plugs and wires are connected and are away from the pipes, let your ratchet strap loose. Check again to make sure that your plug wires are not touching the pipes because we don’t want you to fry those (I used some zip ties to hold them up so that they do not make any contact with the headers.
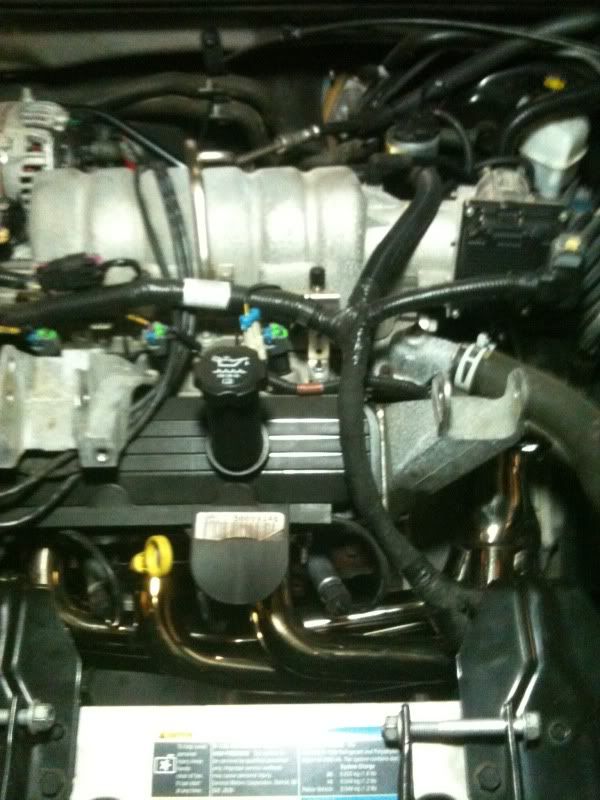
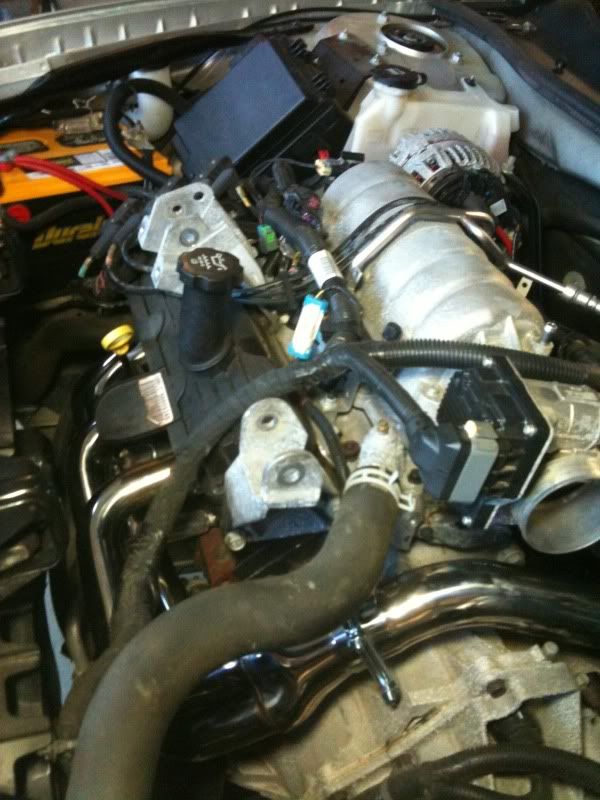
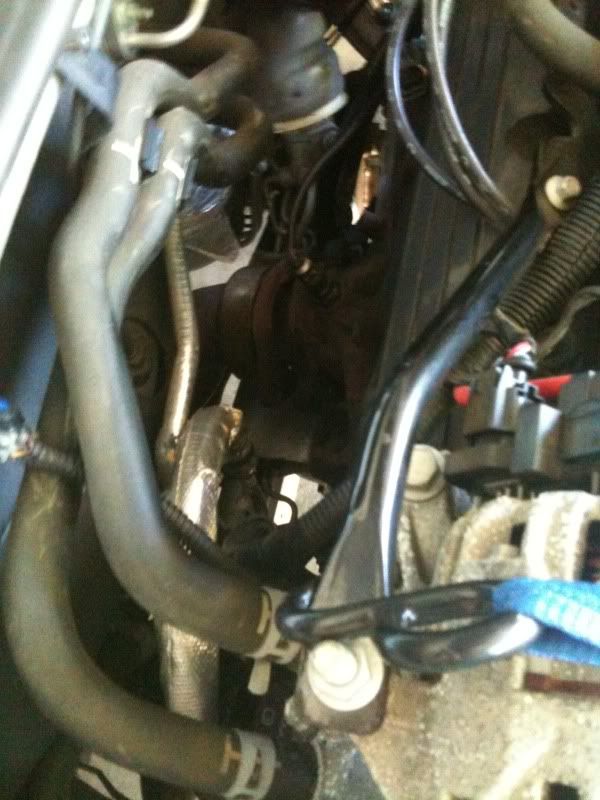
    Now, begin placing the front header in with the crossover. It should make a nice arch over the trans. Make sure that the crossover is in good and tight. Again, make sure that you put a gasket in because you don’t want to have to go back and do that. It is advised that you try to put a couple bolts in the front header after you get your gasket lined up. If you notice that your header is going to touch or be anywhere close to your AC line, try to bend the line down a little so that you can get some more clearance. Be careful not to crimp the line though. Just bend it enough so that you have some clearance. After you fit in the crossover and the front manifold, tighten down those bolts the same way that you did the rear. Install your clamps over the joints, and then you will reinstall your spark plugs and wires. Reinstall your oil dipstick tube in the proper location.
    Now, you are ready to start the car. Have someone else do this so that you can start to feel for leaks. You will inspect the front and rear headers first, and then move to the crossover joints next. If those are free and clear of any leaks, have your friend give it some gas so that you can hear if there might be a leak in the downpipe. If not, try to wait a while to let them cool down, and try to tighten down the bolts again. You may find that you didn’t get one quite tight enough. You will be able to tell if you have a leak by noticing soot on the pipes. There will be small streaks of black soot where there are leaks. You should be able to hear them at ¼ to ½ throttle. This is a very important step. If you have leaks anywhere, make sure to get them welded. Even if you have to pay $100 for welding a few joints, these headers are still cheaper than SSAC’s and others.

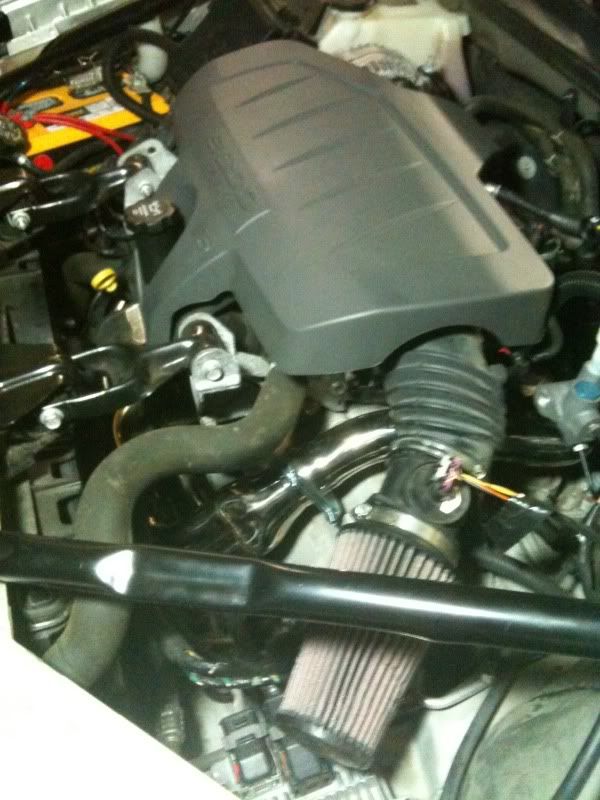
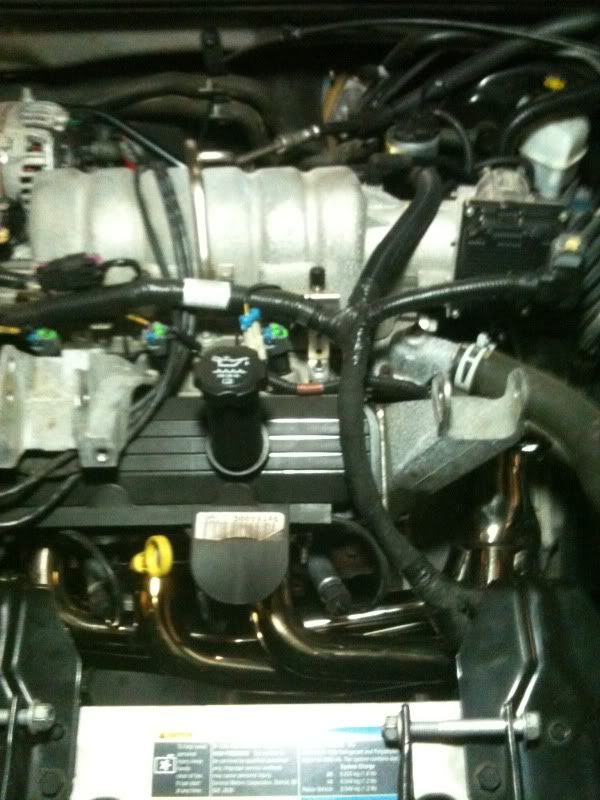
    and here are some pics of my header install...sorry for the crappy iphone quality pics


    Last edited by vailskier3; 06-20-2010 at 04:28 PM. Reason: added pics ;)

    2014 Camaro 2SS - stock, for now...
    SOLD but not forgotten - '07 GP Base SD Headers - hv3 - open cone - HPTUNERS user
    Reply With Quote  
     

  2. #2 Re: Speed Daddy Header install writeup 
    GTX Level Member colindunn's Avatar
    Join Date
    Apr 2010
    Location
    Aurora, IL
    Posts
    567
    Thanks (Received)
    0
    Likes (Received)
    0
    Dislikes (Received)
    0
    this is good. im ordering these for my 2001 gtp. seems like something i could do myself. as long as i know what im doing, i can do it. good write up to get me started.
    Reply With Quote  
     

  3. #3 Re: Speed Daddy Header install writeup 
    GT Level Member AmericanRiceEater's Avatar
    Join Date
    Mar 2010
    Location
    New York
    Posts
    320
    Thanks (Received)
    0
    Likes (Received)
    0
    Dislikes (Received)
    0
    SSAC are way more reliable. Some people will say SD are the same exact thing just a knock off. But in all reality it's like comparing nike to payless.
    Black 2000 GTP Coupe. SSAutoChrome headers, K&N Cold Air Intake, Reptile Tuned PCM, 3.4" ZZP MPS, 104 Autolites & 180 Stat.

    PS3 Online: Zirpola (Dont use mic.)
    Reply With Quote  
     

  4. #4 Re: Speed Daddy Header install writeup 
    GT Level Member AmericanRiceEater's Avatar
    Join Date
    Mar 2010
    Location
    New York
    Posts
    320
    Thanks (Received)
    0
    Likes (Received)
    0
    Dislikes (Received)
    0
    You'll need a cat conv, new flex pipe, thicker clamps, tons of rvt for SD. Theres a really solid thread already made about this . its stickied called headers/manifold thread.
    Black 2000 GTP Coupe. SSAutoChrome headers, K&N Cold Air Intake, Reptile Tuned PCM, 3.4" ZZP MPS, 104 Autolites & 180 Stat.

    PS3 Online: Zirpola (Dont use mic.)
    Reply With Quote  
     

  5. #5 Re: Speed Daddy Header install writeup 
    Donating Users
    Join Date
    Jan 2010
    Location
    South Deerfield, MA
    Posts
    552
    Thanks (Received)
    0
    Likes (Received)
    0
    Dislikes (Received)
    0
    Quote Originally Posted by AmericanRiceEater View Post
    SSAC are way more reliable. Some people will say SD are the same exact thing just a knock off. But in all reality it's like comparing nike to payless.
    Maybe SSAC were better when they made their own, but I believe they are just having the SpeedDaddy headers drop shipped for them now. Reasons I believe this:
    I got mine and looked at all the pictures of the SD headers and they are identical down to every weld position.
    Others have talked about an SSAC stamp on them, but mine had none.
    It was shipped to me directly from China, not North Carolina.
    None of the paperwork in or on the box mentions SSAC.

    I can't say 100% that these are SD headers from SSAC, but it sure does look like they are doing that. I wish I had saved the $120 and just bought the SD ones. I went with SSAC for the same reasons you are stating, but don't believe that to be the case anymore.

    2002 GTP: GMPP Sway Bars, BMR trailing arms, KYB AGX/Vogtlands, 12" brake upgrade
    Modified SSAC headers, K&N Intake, 3.4 MPS, S1X, Gen V, 104's, HPTuned.
    Reply With Quote  
     

  6. #6 Re: Speed Daddy Header install writeup 
    Donating Users Ibwrong's Avatar
    Join Date
    Dec 2007
    Location
    Oklahoma City
    Posts
    943
    Thanks (Received)
    0
    Likes (Received)
    0
    Dislikes (Received)
    0
    Quote Originally Posted by Silver GTP View Post
    Maybe SSAC were better when they made their own, but I believe they are just having the SpeedDaddy headers drop shipped for them now. Reasons I believe this:
    I got mine and looked at all the pictures of the SD headers and they are identical down to every weld position.
    Others have talked about an SSAC stamp on them, but mine had none.
    It was shipped to me directly from China, not North Carolina.
    None of the paperwork in or on the box mentions SSAC.

    I can't say 100% that these are SD headers from SSAC, but it sure does look like they are doing that. I wish I had saved the $120 and just bought the SD ones. I went with SSAC for the same reasons you are stating, but don't believe that to be the case anymore.
    Agree.. They look identical and the SSC stamp doesnt make a difference.

    SSAC are way more reliable. Some people will say SD are the same exact thing just a knock off. But in all reality it's like comparing nike to payless.
    no if anything thats like comparing Nikes to Fake Nikes...... I still dont see how you get this, have you ever seen a set of SD Headers and compared them to a set of SSAC's in person... They are identical even with the damn sink trap of a down pipe.
    Last edited by Ibwrong; 07-15-2010 at 05:43 AM.
    2000 GTP - Project
    2000 Mustang GT
    2006 Charger
    Reply With Quote  
     

  7. #7 Re: Speed Daddy Header install writeup 
    Turbo is the way to go. BillBoost37's Avatar
    Join Date
    Jul 2009
    Location
    W Spfld
    Posts
    26,833
    Thanks (Received)
    53
    Likes (Received)
    90
    Dislikes (Received)
    1
    Some tips/tricks you guys didn't happen to mention. If you unbolt the downpipe before ratcheting the engine forward it will have less load on it and the bolts may come out easiers.
    Loosening the rear subframe bolts and allowing it to come down about three inches gives you an easy way to remove and put in yoru rear manifold/header.
    The two fasteners on the ends of each head that hold the header/manifold are studs. Removing the studs (5.5 mm) helps gain a lot of room for taking the manifolds out and putting the headers in.
    I drink..so consider that when reading my posts.

    2010 Audi A6 Dual IC's
    Reply With Quote  
     

  8. #8 Re: Speed Daddy Header install writeup 
    DUI BABY Bio248's Avatar
    Join Date
    Jan 2008
    Location
    MILWAUKEE
    Posts
    31,340
    Thanks (Received)
    0
    Likes (Received)
    1
    Dislikes (Received)
    0
    clean up the initial post so that it reads easier and ill probably sticky this. good work.
    Reply With Quote  
     

  9. #9 Re: Speed Daddy Header install writeup 
    GTX Level Member colindunn's Avatar
    Join Date
    Apr 2010
    Location
    Aurora, IL
    Posts
    567
    Thanks (Received)
    0
    Likes (Received)
    0
    Dislikes (Received)
    0
    Quote Originally Posted by AmericanRiceEater View Post
    You'll need a cat conv, new flex pipe, thicker clamps, tons of rvt for SD. Theres a really solid thread already made about this . its stickied called headers/manifold thread.
    i heard the clamps it comes with arnt great. so you recommend buying different ones? it looks like it comes with a flex pipe. i know il need a ton of rtv, but headers for 200 bucks i dont mind spending some extra money on getting them right.
    Reply With Quote  
     

  10. #10 Re: Speed Daddy Header install writeup 
    Donating Users Ibwrong's Avatar
    Join Date
    Dec 2007
    Location
    Oklahoma City
    Posts
    943
    Thanks (Received)
    0
    Likes (Received)
    0
    Dislikes (Received)
    0
    Quote Originally Posted by colindunn View Post
    i heard the clamps it comes with arnt great. so you recommend buying different ones? it looks like it comes with a flex pipe. i know il need a ton of rtv, but headers for 200 bucks i dont mind spending some extra money on getting them right.
    if you want to make sure they seal right, just get some band clamps from napa or your local parts store.
    2000 GTP - Project
    2000 Mustang GT
    2006 Charger
    Reply With Quote  
     

  11. #11 Re: Speed Daddy Header install writeup 
    GTX Level Member Ricky21's Avatar
    Join Date
    Mar 2010
    Location
    Minnesota
    Posts
    802
    Thanks (Received)
    0
    Likes (Received)
    0
    Dislikes (Received)
    0
    I would get new gaskets for sure the ones they come with suck, i just dropped my car off at the shop to get some felpros put in, i did the headers myself and it was a b**** so im having my mechanic do it and make sure its done right, im sick of them leaking
    Reply With Quote  
     

  12. #12 Re: Speed Daddy Header install writeup 
    GT Level Member AmericanRiceEater's Avatar
    Join Date
    Mar 2010
    Location
    New York
    Posts
    320
    Thanks (Received)
    0
    Likes (Received)
    0
    Dislikes (Received)
    0
    Hey man you can seal up SD headers nicely, look at these things.

    3 x 6 Stainless Steel Flex Pipe Exhaust w/ Interlock: eBay Motors (item 370405699561 end time Jul-17-10 20:33:19 PDT)

    I would say buy a flex from zzp but their 3 x 6 inches has been out of stock for a while. This is the same exact flex i bought of ebay and it's way thicker than the one speed daddy comes with.

    Here's some really nice exhaust clamps from zzp, you'll need 2, 2.25 clamps, and one 3 inch clamp. Because the other 3 inch clamp is made specially to fit over the piece thats welded above you flex pipe. Or you can buy band clamps from a local shop. But these are really nice clamps. The thing is for buying clamps from zzp make sure you buy enough, i thought they come in pairs but they do not.
    ZZ Performance

    When i got my headers installed they charged me $ 250 all together. They welded in the new flex and used the thicker clamps that i provided. They were also nice enough to put a cat converter on, but it's not needed. Your SES light may come on w.o having a converter put on. You'll need to a code to delete it from your PCM.

    Otherwise good luck.
    Black 2000 GTP Coupe. SSAutoChrome headers, K&N Cold Air Intake, Reptile Tuned PCM, 3.4" ZZP MPS, 104 Autolites & 180 Stat.

    PS3 Online: Zirpola (Dont use mic.)
    Reply With Quote  
     

  13. #13 Re: Speed Daddy Header install writeup 
    SE Level Member
    Join Date
    Jun 2010
    Location
    TomsRiver
    Posts
    9
    Thanks (Received)
    0
    Likes (Received)
    0
    Dislikes (Received)
    0
    how are these headers performance wise. ive been debating on going with the SD headers or going with pacesetters from zzp. anybody feel like giving me some advice on this
    PaceSetter Headers Ls1 Valve springs Comp cams lifters seats seals reatiners Ported L67 throttle Body MSD Igntion Xp Hot cam kit KN intake 3.0 pulley Delco Iridium plugs ZZp tune
    Reply With Quote  
     

  14. #14 Re: Speed Daddy Header install writeup 
    donated to get this wow TorqueAutoMotiv's Avatar
    Join Date
    Apr 2009
    Location
    stockton ca
    Posts
    5,292
    Thanks (Received)
    0
    Likes (Received)
    0
    Dislikes (Received)
    0
    Quote Originally Posted by Ttypel67 View Post
    how are these headers performance wise. ive been debating on going with the SD headers or going with pacesetters from zzp. anybody feel like giving me some advice on this
    sd headers over pacesetters from what i hear and there are cheaper

    98 gtp sedan forest green ,S1X intense cam,Intense pcm,Magnaflow exhaust, ubend delete,TEP trans 3.29's,3.4 smoothflow mps,Dyno'd 281hp and 371ft #'s of trq at the wheels
    http://www.cardomain.com/ride/3338681
    Reply With Quote  
     

  15. #15 Re: Speed Daddy Header install writeup 
    just call me john-o vailskier3's Avatar
    Join Date
    Jul 2008
    Location
    Tampa, FL
    Posts
    1,292
    Thanks (Received)
    0
    Likes (Received)
    0
    Dislikes (Received)
    0
    Quote Originally Posted by Bio248 View Post
    clean up the initial post so that it reads easier and ill probably sticky this. good work.
    clean up like how? is it too wordy?

    2014 Camaro 2SS - stock, for now...
    SOLD but not forgotten - '07 GP Base SD Headers - hv3 - open cone - HPTUNERS user
    Reply With Quote  
     

  16. #16 Re: Speed Daddy Header install writeup 
    GTX Level Member noreasonwhyy's Avatar
    Join Date
    Mar 2010
    Location
    Michigan
    Posts
    994
    Thanks (Received)
    0
    Likes (Received)
    0
    Dislikes (Received)
    0
    clean up as in your first post was a rough draft. make it a finished product. number the steps, take out obvious/apparent information, organize by section [tools needed, steps, etc.]
    Reply With Quote  
     

  17. #17 Re: Speed Daddy Header install writeup 
    Awaiting Confirmation
    Join Date
    Jul 2009
    Location
    aowdnawi
    Posts
    23,292
    Thanks (Received)
    0
    Likes (Received)
    1
    Dislikes (Received)
    0
    less boost with SD's versus pacesetters so they must flow better for a fairly stock car.
    Reply With Quote  
     

  18. #18 Re: Speed Daddy Header install writeup 
    GT Level Member rmcardle3's Avatar
    Join Date
    Jan 2010
    Location
    Houston, TX
    Posts
    163
    Thanks (Received)
    0
    Likes (Received)
    0
    Dislikes (Received)
    0
    Quote Originally Posted by noreasonwhyy View Post
    clean up as in your first post was a rough draft. make it a finished product. number the steps, take out obvious/apparent information, organize by section [tools needed, steps, etc.]
    Everyone loves to be the critic. I thought it was very well written and I'm going to vomit if I have to read another "Creative Writing" lecture in this "Exhaust Header Install" thread. Sorry, just how I feel.
    Last edited by rmcardle3; 10-03-2010 at 10:50 PM.
    2000 GRAND PRIX GTP (Sedan)
    MICHELIN Pilot® Sport A/S Plus 245/50 ZR16 97W M+S
    Cone Intake, SD Headers
    Reply With Quote  
     

  19. #19 Re: Speed Daddy Header install writeup 
    SE Level Member quadracer960's Avatar
    Join Date
    Mar 2010
    Location
    indiana
    Posts
    42
    Thanks (Received)
    0
    Likes (Received)
    0
    Dislikes (Received)
    0
    Did you notice any difference in exhaust tone/loudness at at??
    Reply With Quote  
     

  20. #20 Re: Speed Daddy Header install writeup 
    resident snitch gtpinsc's Avatar
    Join Date
    Jul 2008
    Location
    sumter,south carolina
    Posts
    6,432
    Thanks (Received)
    0
    Likes (Received)
    0
    Dislikes (Received)
    0
    Quote Originally Posted by quadracer960 View Post
    Did you notice any difference in exhaust tone/loudness at at??
    i did... im running no cat with flowmaster 40's

    02 GTP with mods 05 GP for DD
    Quote Originally Posted by SuperSport View Post
    The majority of the people here are potheads who want to buy good condition parts at junkyard prices.
    Reply With Quote  
     

Page 1 of 2 12 LastLast

Similar Threads

  1. Speed Daddy Headers
    By ctrout in forum 3.8L V6 Supercharged (L67)(L32)
    Replies: 58
    Last Post: 06-01-2011, 10:37 PM
  2. Speed Daddy Headers
    By Advan22 in forum 3.8L V6 Supercharged (L67)(L32)
    Replies: 3
    Last Post: 05-09-2010, 12:06 AM
  3. Speed Daddy Headers
    By Vioarr in forum 3.8L V6 Naturally Aspirated (L36)(L26)
    Replies: 25
    Last Post: 02-27-2010, 03:29 PM
  4. Speed daddy and dna headers sale
    By killakross5o4 in forum Group Buys
    Replies: 183
    Last Post: 02-22-2010, 10:07 PM
Tags for this Thread

View Tag Cloud

Bookmarks
Bookmarks
Posting Permissions
  • You may not post new threads
  • You may not post replies
  • You may not post attachments
  • You may not edit your posts
  •