Damnit I'm an idiot. I screwed up!!! While I was porting the very first port I blew threw the injector seat. Looks like I need to steal a head off of the engine coming out of the 2007.


|
|


Damnit I'm an idiot. I screwed up!!! While I was porting the very first port I blew threw the injector seat. Looks like I need to steal a head off of the engine coming out of the 2007.


that just might be ok, the o ring seals higher up from the bottom there.
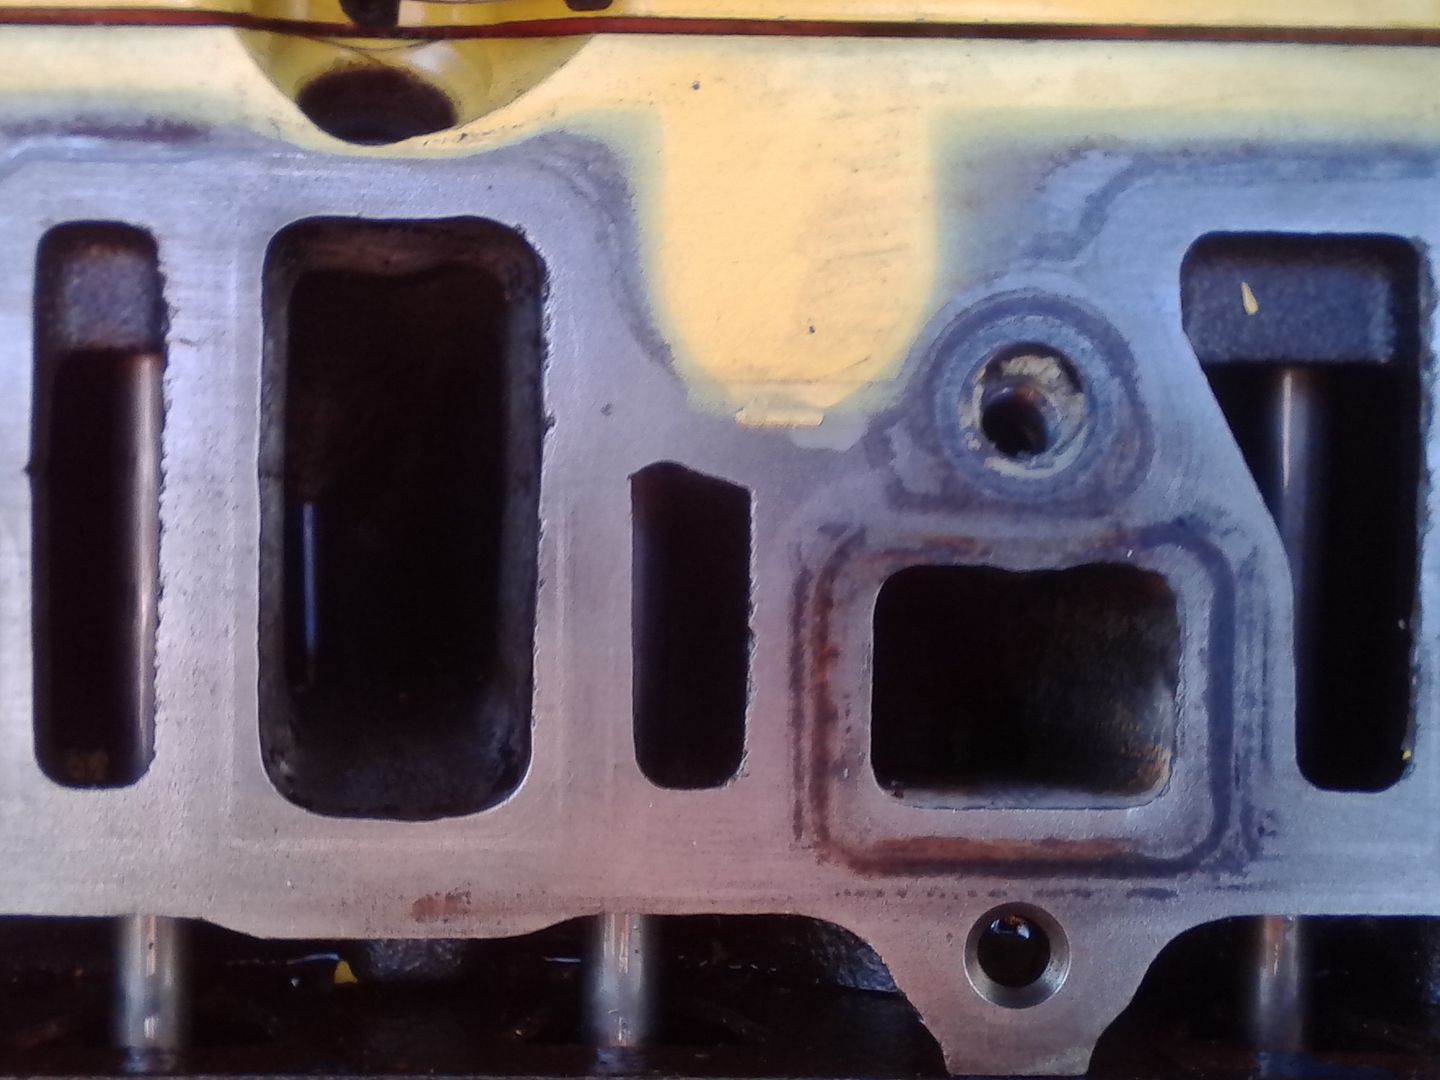
i just smoothed them humps up. didnt take a whole lot off em.
kinda hard to see but theres a little hump left. none of my pics show it really. this was a ic install after the fact, you dont get to see your port work much after you bolt it up, so i took a pic lol
i also cleaned up the coolant ports some.
so shinny in the sun, this is like 6 months after the build was installed. no egr keeps things clean like they say.


Weld it shut.
I put an injector in and you are right the o ring sits above there. I do not have a welder. I was looking into getting the flux welder at Eastwood but I am out of cash. I thought about an epoxy of some sort?????
I was reading in the how to porting guide that he just made it even with the rest of the port so that is what I was doing.I should have known better than to go too low there!!
Last edited by rickisrad; 06-09-2017 at 06:06 PM.
im sure if you hit up a muffler shop or some place they would not charge to much to lay a line of weld over it, then you smooth the weld over and its all good.
Looks like at least part if the lip is there. If at least half is you're gold
Hell on that part of the head, JB Weld would work mint.
Shoot, I JB Welded a giant block off plate to a supercharger for covering the silencer ports years ago. It held up like a champ on the car.
I am going to try job weld. I will put a small amount from inside the injector hole and smooth it out. I'll post pics tomorrow once I'm done with it.Originally Posted by Fivefingerdeathpunch


Don't do it there is too much chance of it eventually diss lodging during future service and getting into the engine.
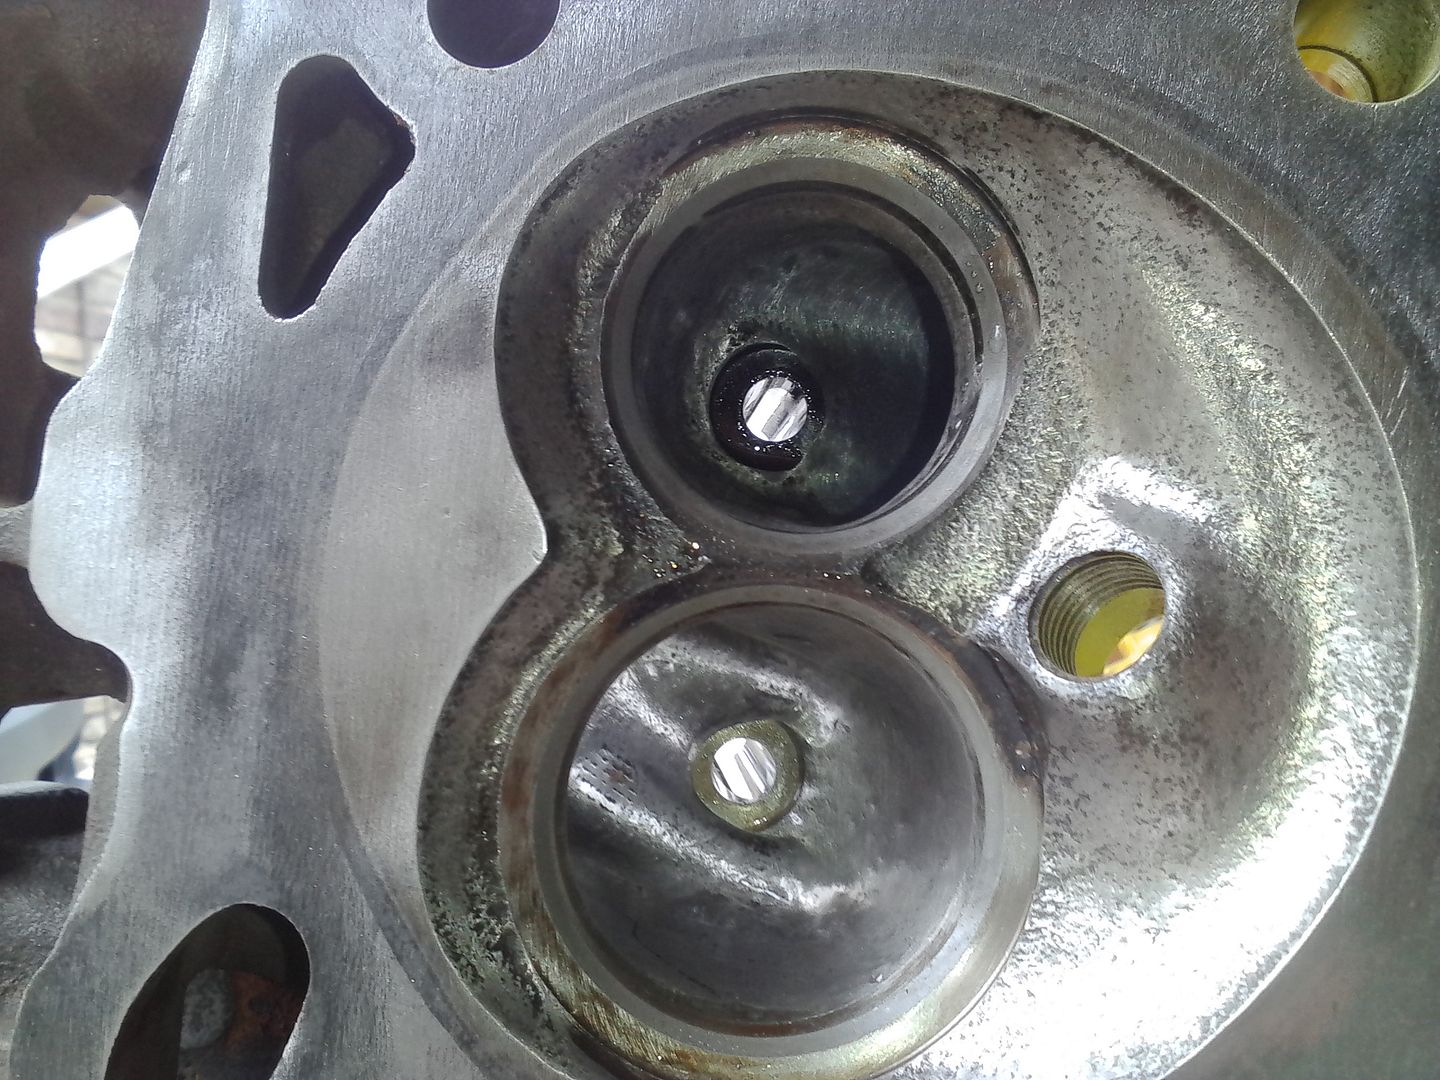
I have done plenty of heads where I've broken into the bottom 1/16th of the injector ports and had no problems with oring sealing.
that is of course unless you're missing the O-ring retaining discs on the OEM l67 injectors.... thankfully almost every aftermarket injector has a metal O ring retainer Groove
Yes the bottom retaining discs are there. I have brand new OE injectors. Ok I will just let it go. Very true about the possibility of dislodging.
Pretty sure I am the worlds worst at porting!!!! I think I am just going to throw my 90# springs, 1.8 roller rockers on my other set of stock heads and call it a day. I guess some people just don't have the patience or attention span to port properly.

that not horrible really, you cant sit there for a afternoon and expect them to be done. you can expect to invest a good 10 to 12 hrs per head.
i did mine in 2- 4 hr sessions tops. or you will look for a puppy to punch for no reason. lol
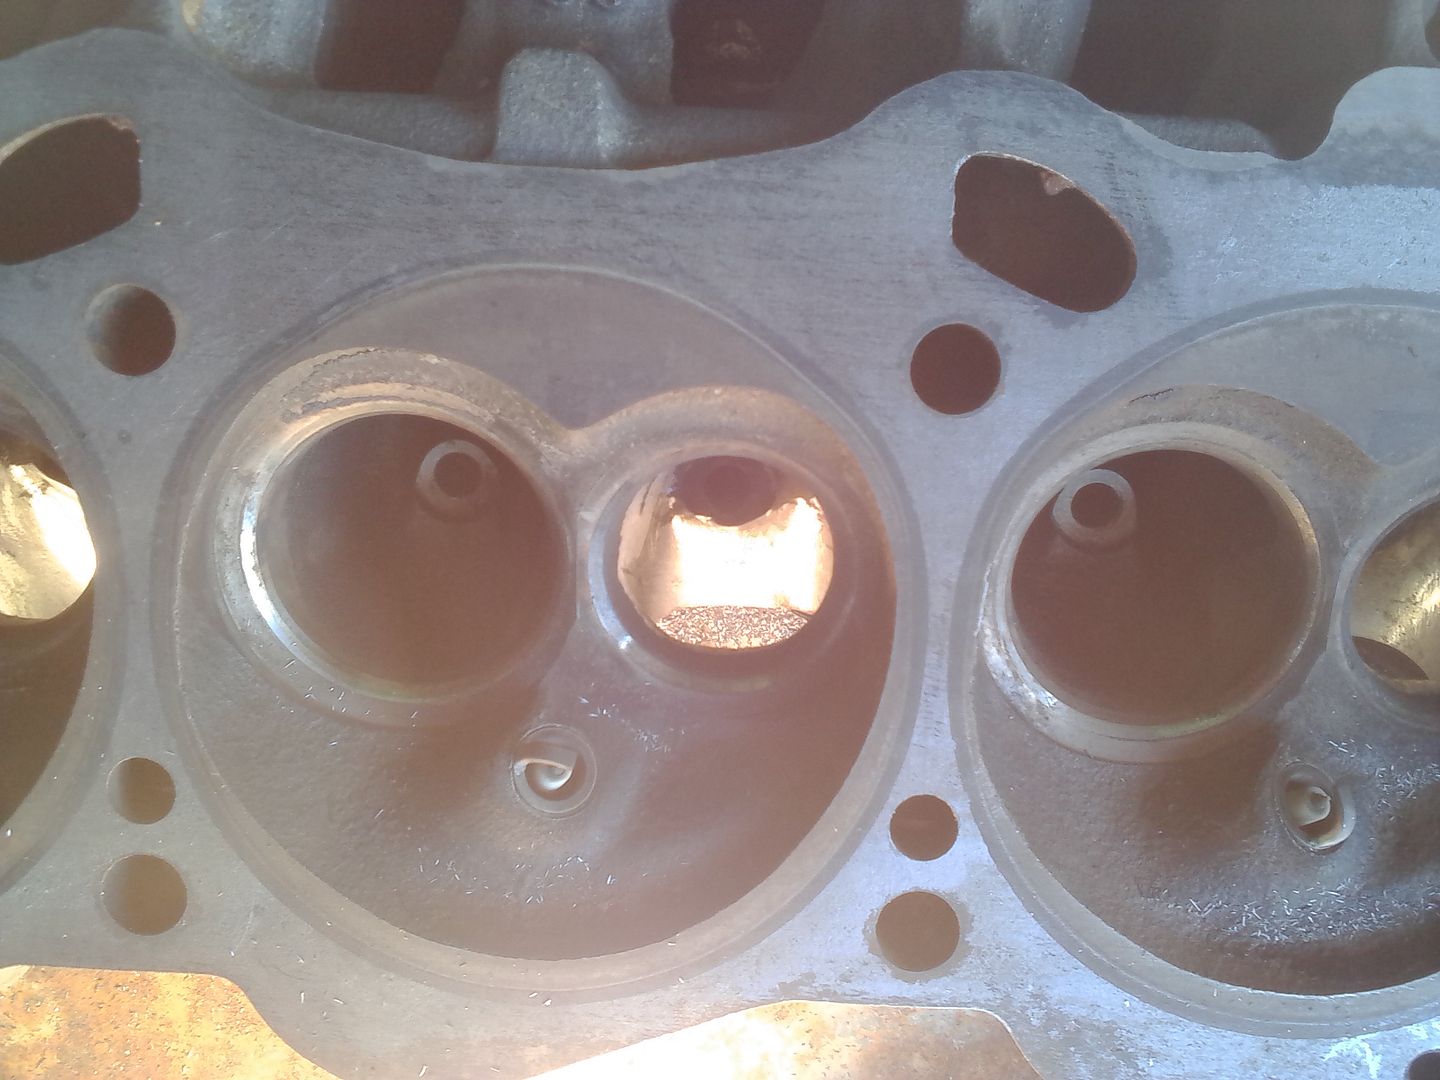
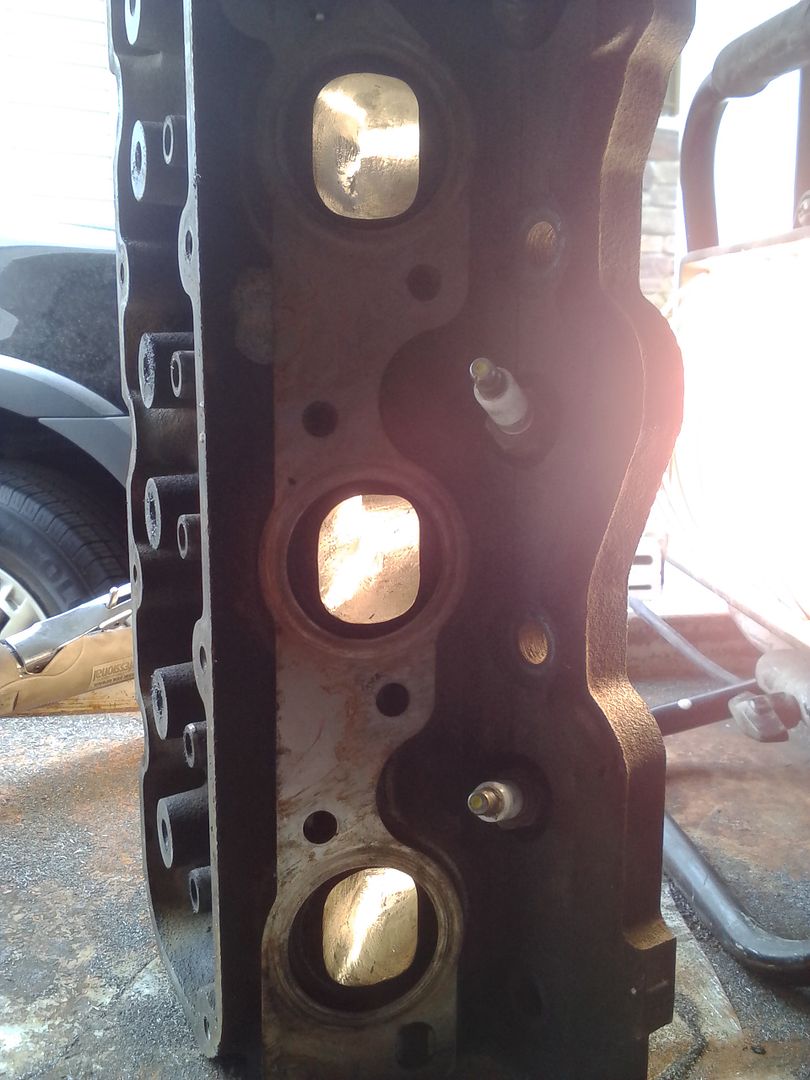
Lmao!! You are right about that, I was looking for a kitten too!!! Anyone have a picture of their combustion chamber port. I just want to see where you stopped. Several times the bit grabbed and skimmed across the valve seat but just scratches. Thanks
heres one of mine. see th evalve seat where its cleanest looking, this is after lapping the valves, in your pic it looks like you skipped along the top part, so in the clear still. all i did to the chamber its self was to smooth it out. didnt remove much at all.
in this pic you can see i worked it from one end, the lip there is like 2 mm's did that all the way around all over, except where the castings needed to be ground out deeper.
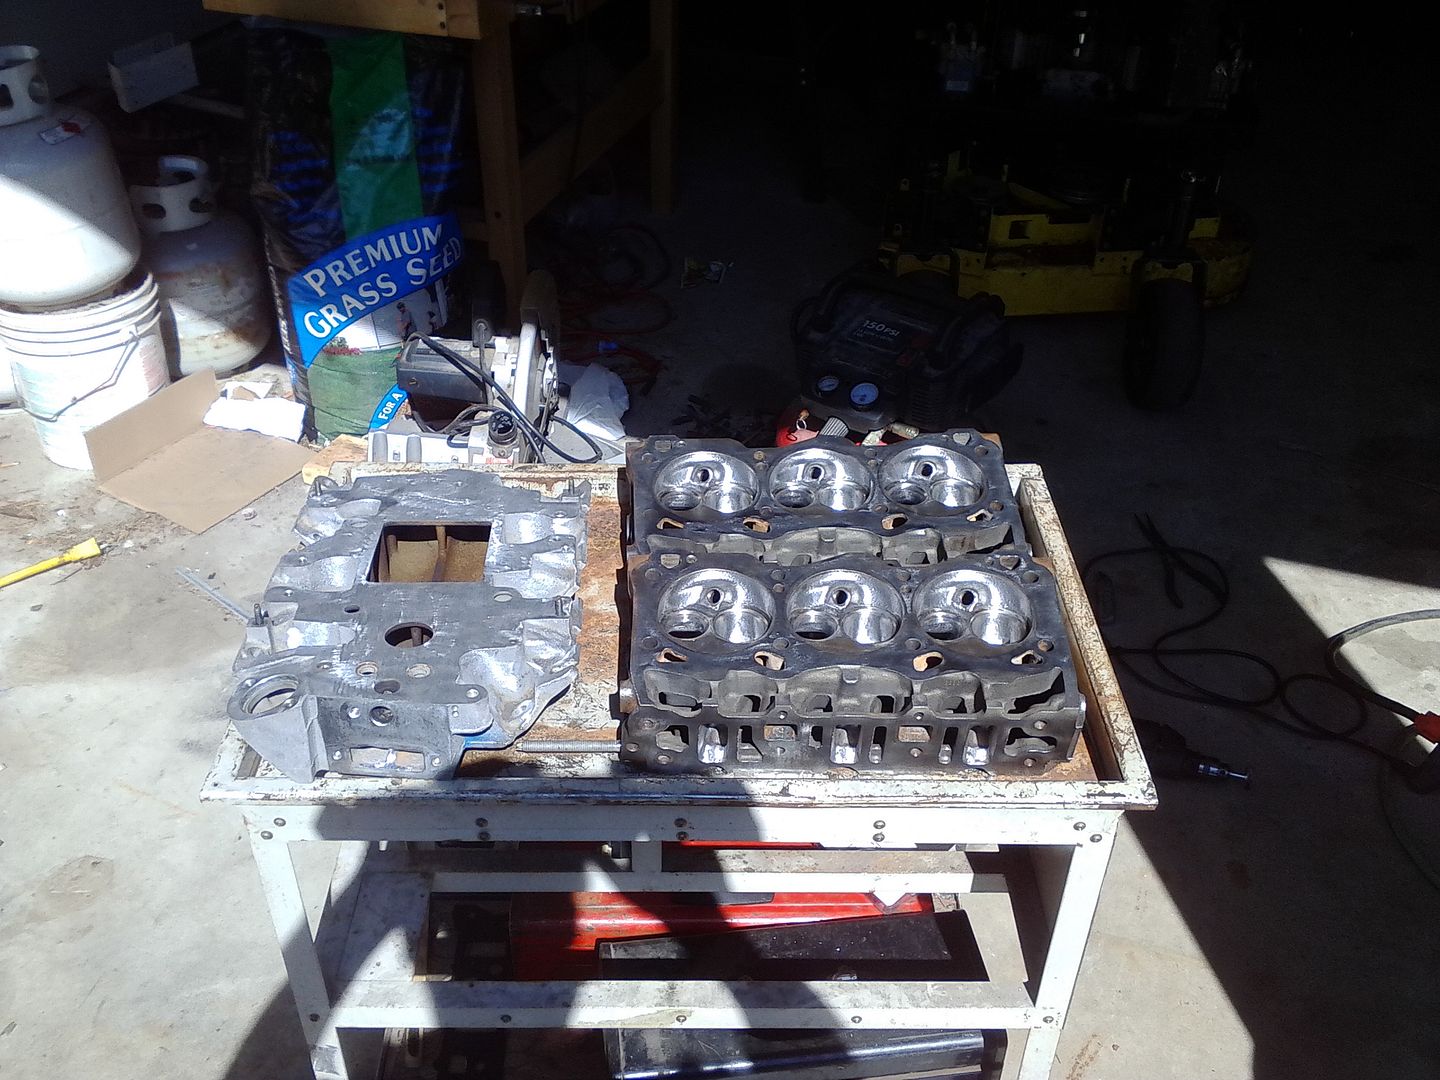
ill whore this one again, cause it looks damn good to me lol its only ground down, not polished yet.
and my porting table you could say, it held a lot of metal chips thats for sure. got to love how the sun really makes em pretty looking lol
Very nice!!!! What do you use to polish? I am using an 8 piece dual carbide set I got from the Eastwood around the corner. $54 not too bad. I have some of the sand stones but those seem to leave a rougher surface than the carbide bits.
i went through almost 2 of this kit, its 80 and 120 grit, use a drill, cause its quieter. https://www.harborfreight.com/sandin...-pc-62394.html
What method did you guys use to resurface the head and block surfaces. I seen where people use sand paper glued to a glass surface and did it that way. Some just scuff up the surfaces with a scotch brite pad and WD 40, and I've also seen with a mouse sander. Just want your opinions for our types of head.
https://www.harborfreight.com/pack-o...scs-99985.html hf sells a kit with a few different disc's and a mounting thing to go in a drill. i used a razor blade and brake cleaner, then the disc's and cleaned em down good with brake cleaner and a compressed air.
ahh ok. I was afraid to use those on the head gasket surface. I did not want to possibly create a low spot. I use those disks on the intake and exhaust manifold surfaces.
Thanks
| « Previous Thread | Next Thread » |
| Bookmarks |
Bookmarks |