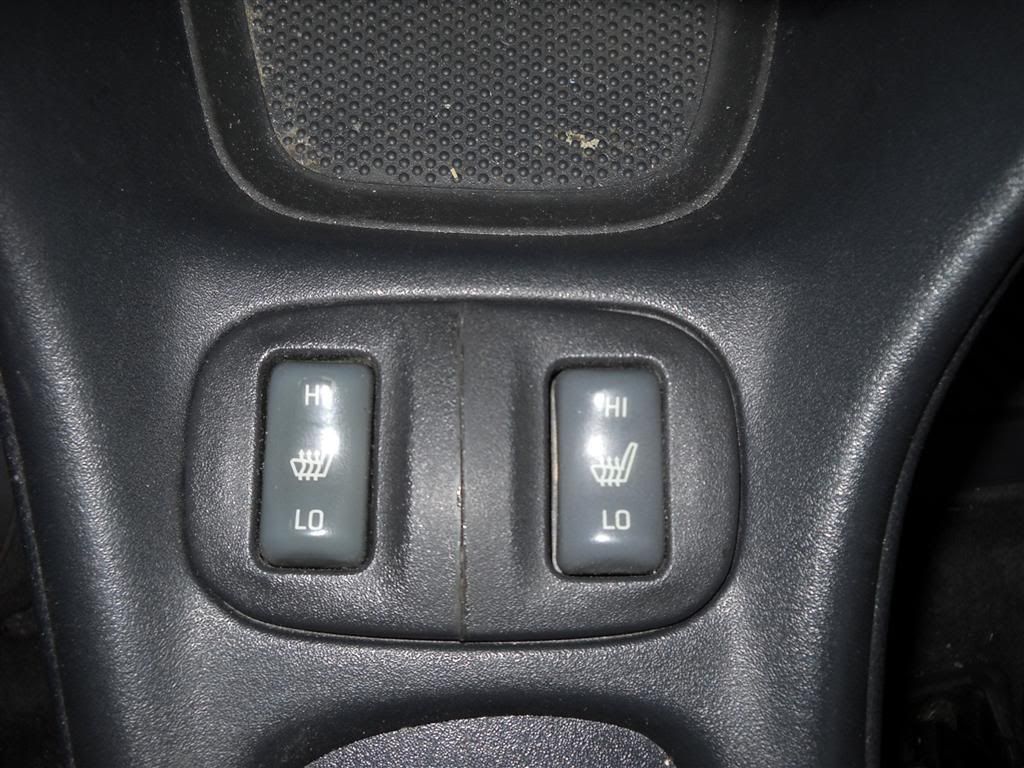
what make year and model is the GP with the heated seat switches on the center console. close to the little cubby thing.

|
|


what make year and model is the GP with the heated seat switches on the center console. close to the little cubby thing.


97-03... all models had the possibility. But uh..it's a GP, so it's not switches, it's singular. Switch. Because in a GP .. no one is expected to want to ride with you.


my 02 gtp had both seats heated, so it had switches (plural), same with my gxp

It had to be customized that way before you bought it. They have multiple write-ups on it, its easy to do ... but factory, only the driver was allowed that option.Originally Posted by Lenny

On the GXP Im not 100%, but the 02 factory only has 1 switch... you have to install the 2nd yourself.

well if the passenger side was installed by the previous owner, then he did a hell of a good job making it look like it came like that from the factory. and i specifically remember both were heated cause we used to play tricks on each other and turn it on when the other person wasn't looking. lame joke i know, but in the summer time it was hilarious.

Passenger heated seat was definitely not an option on the '97 - '03 GPs, so he either custom did it himself, or he bought one of the aftermarket dual heated seat kits they used to sell.
Grand Prix Dual_Heated_Seat
Shame they don't sell them anymore... GF is always complaining that her seat is cold during winter
If I recall correctly, those kits were pretty damn pricey. I still plan on doing one up myself (I know others have as well) by using their same method of cutting 2 heated seat switch trims in half, and fusing both the halves with the buttons together. I will snag the heat pads out of a GP in the yards, as they are a dime a dozen here.
yep your right... my bad i was confused for a second.... i was thinking of my friends regal gs. i do remember people being pissed that their seat wasn't heated when they road in my car
whoops

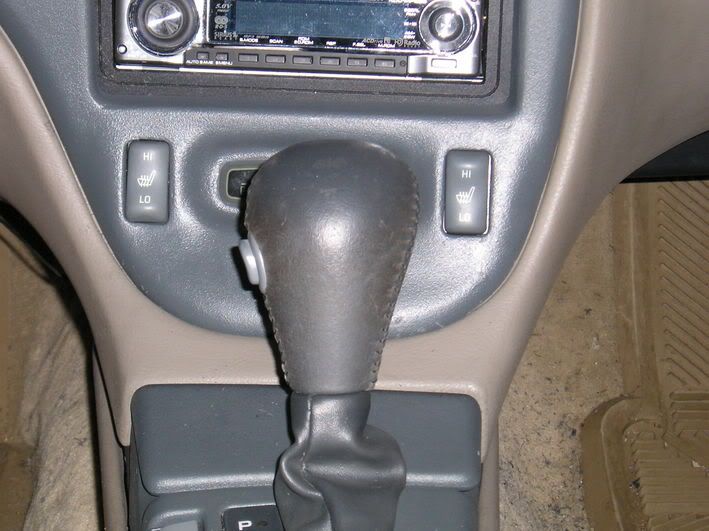
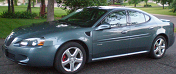
04+ depending on more specific year, usually the GT2 and others had both heated leather seats. Each seat has their own button located on the HVAC. Also has a high/low setting as well.

i jus wanted a platform to mount a different switch such as interior lights. not the actuall heated seats.


my 2004 compg has heated seats for driver and passenger, two buttons
MY 07 GXP has seat warmers on both sides(with hi and lo settings) also. Wife loves them in the winter
Regal had the dual heated seat or no heated seats. Very common option.
TL.. send me two switch panels and I can make you a dual. It's pretty easy.


I've done this before and it is not hard. Just takes some time to get it to fit correctly. I measured and cut and then sanded both sides until it was the right measurement. And it fit in perfectly.
Right.. it's not too tough overall. Heck.. the way i'd do it would be to nab that section of a console out of a jy car.
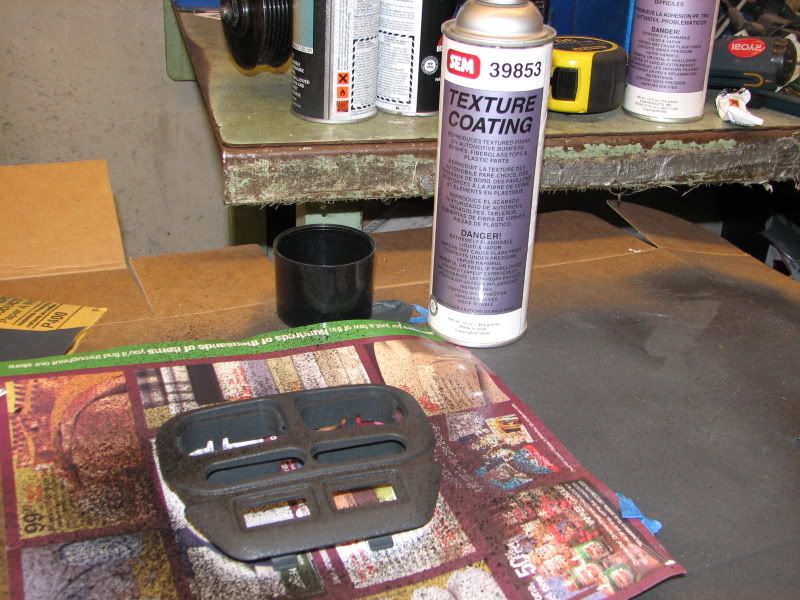
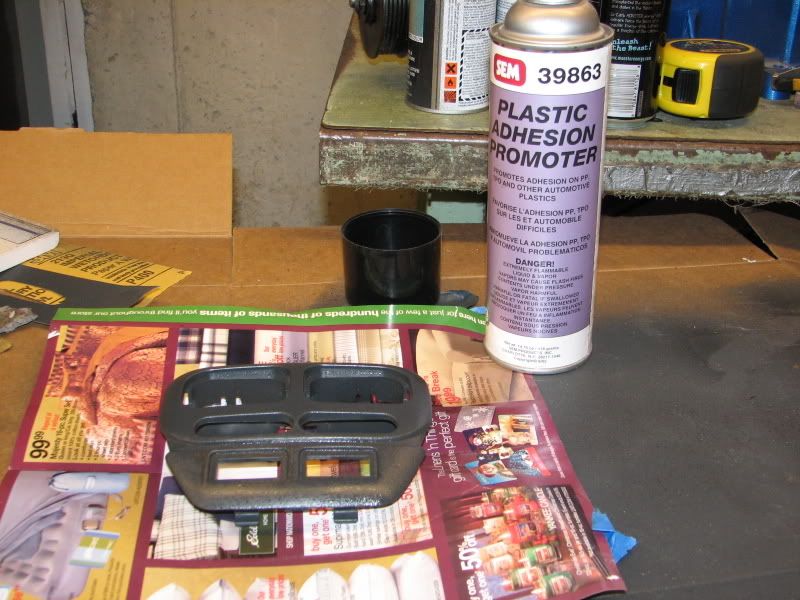
Cut the two pieces, sit them in place and tape one side to hold. Then JB weld or plastic weld them together. Sand the top lightly to make it nice and smooth. Then use SEM texture paint, knock a little of that down and then SEM graphite paint it to match the interior color. Presto..
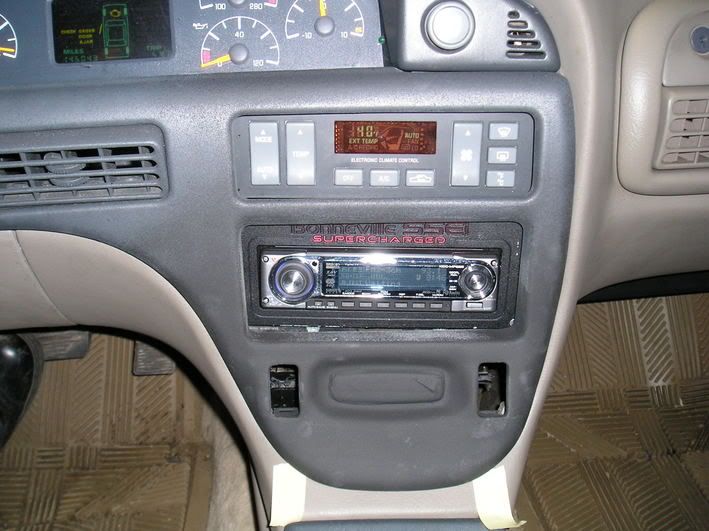
Here's a teaser from Bonneville days
Here is my homemade seat switch. Nothing professional. But I thought it looked fine. I'm sure Bill would do a better job:

Are you able to run both seats on hi at the same time for long periods of time?
Zef.. if you wanted to finish that off. JB Weld that seam. Sand it down.. then pick up SEM texture paint and SEM flexible adhesive Graphite.
When I did the heateds in my B'ville,...it was GP switches and cutting up a dash. JB weld filled the best w/o bubbles etc. So when you sand, you don't need glazing putty or other fillers.
With texture
Not quite perfect, but good enough for me..

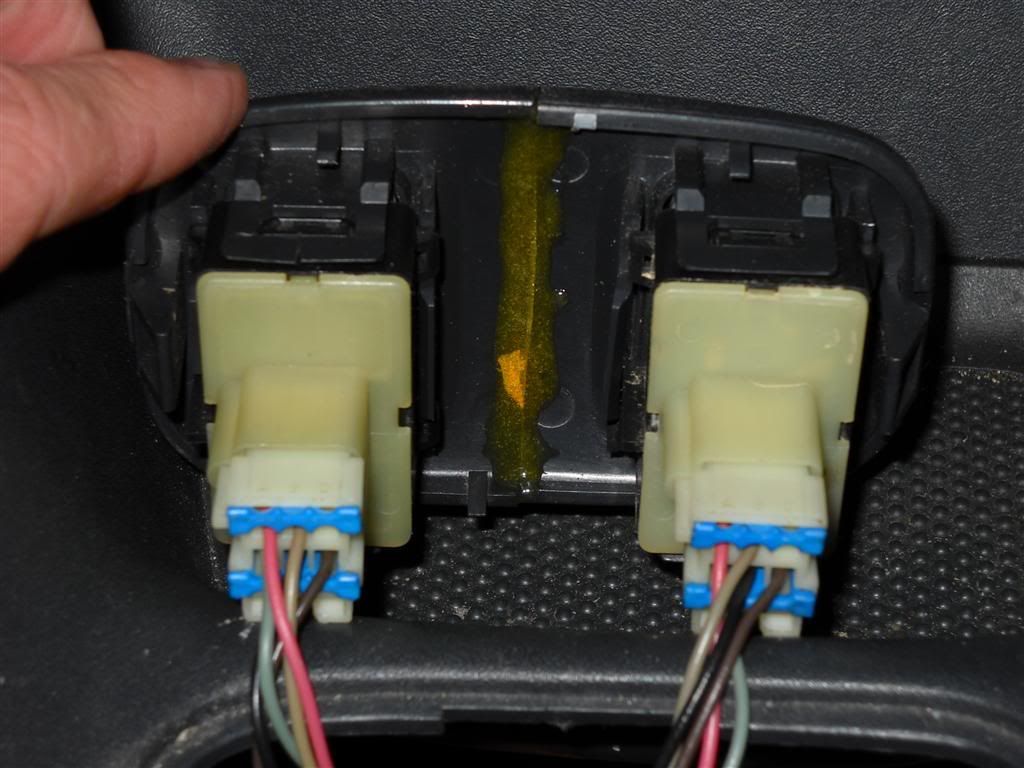
I put down a layer of JB Weld to the back surfaces and layed a small piece of steel banding in it while it was wet, so I had a "mechanical" type of connection to make the composite. Then I put another layer of JB Weld over top of that, so it's sealed in. I finished up the top surface with a layer of JB in the seam and then used icing to finish the rest before I coated it.
While not as perfect of a match as the SEM products seem to be, I found a Rustoleum product that comes close. It's a textured surface gray. The texture matches just about right on with the OEM texture - maybe even exactly like it. The gray is a little lighter than the OEM graphite and/or the SEM graphite color.
Although, I think your way is better, Bill, I didn't have a use for the materials after this project is complete and they're somewhat expensive to just have sitting around on a shelf.
I began to take apart the console cover last night, removing the cupholders and will also remove the dash bezel and all will get a coat of the Rustoleum color so it all matches. I think it will actually tie in quite well, since the top half of the cockpit is already a lighter gray than the rest, anyhow.
Again, though, I would have preferred your materials. It's the right way to do it, in my opinion.
| « Previous Thread | Next Thread » |
| Tags for this Thread |
| Bookmarks |
Bookmarks |