Edit:
Now that it's complete, here's the full build sheet:
Master rebuild kit
-New BW frictions, Raybestos steels, seals, gaskets, and filter
PNH JTFM Torque convertor (Stock repalcement)
Bonded separator plate
Torlon check balls
Oversize 2nd steel plates x2
Molded 2nd apply piston
Sonnax 3rd clutch piston kit (984965-01k)
TEP reconditioned reaction carrier
TEP reconditioned input piston
300m iput shaft
7/8" 2.93 ratio sprockets
Borg warner PCS
Borg warner TCCS
Shift solenoid x2
Superior AFL valve repair kit
Superior valve body kit
Sonnax TCC relief valve
Sonnax lube tube clamp
Trans-go shift kit
Hardened 4th clutch hub
ZZP aluminum pan (With improved steel threads)
New 2-1 coast band
New 7/8" Hy-Vo chain
New 1-2 Sonnax shift valve
New accumulator pistons
New bushings (All of them)
New thrust washers
New Lube dam
New magnets
New drive sprocket bearing
"Mods" Include:
Modified shift kit spring arrangement
Enlarged separator plate feed holes
Tightened 2nd clutch pack
Tightened 3rd clutch pack
5 Friction input clutch
See post #232 for it's real world review.
Begin original post:
This fall/winter, I'm planning on building a transmission for my car.
Here's what I'm planning on using for parts:
PNH Torque convertor
Master rebuild kit
-New frictions, steels, seals, gaskets, and filter
All bands
Bonded spacer plate
Torlon check balls
Oversize 2nd steel plates x2
Molded 2nd apply piston
Molded 3rd apply piston
TEP reconditioned reaction carrier - Original is out of spec
300m iput shaft
7/8" 2.93 single chain set
Borg warner PCS
Borg warner TCCS
AC Delco shift solenoid x2
Superior AFL valve repair kit
Superior valve body kit
Sonnax TCC relief valve
Trans-go shift kit
Dorman pan w/ drain plug - Junkyard poked the original
Hardened 4th clutch hub
Differential lube tube clamp
Lube dam
Round magnet
Here's the "mods" I plan to do:
Tightened 2nd clutch pack
Tightened 3rd clutch pack
Convert to internal cooler check ball
Here's what I'm debating:
Bushings - Not seeing any substantial wear on the originals
Drive sprocket bearing - Feels tight, but I'm told it's a common failure (?)
Bonded sonnax 3rd apply piston - Because I'm right there
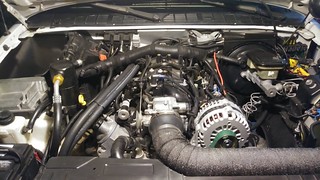
The core transmission was pulled from a smashed junkyard '02 Regal with an unknown history. The only thing I know for sure is, 4th gear was gone (based on the completely absent splines on the 4th hub). No chunks in the pan, average amount of sludge on the magnet. Fluid looked.... average for a Tucson w-body. No burned or scarred internals.
This setup is probably overkill for my current, or even future mods, but here's my though process: I'm going to pull and shelf my current stock, working transmission. Install the built trans and roll on that until I eventually move on from this car. At that point, I'll re-install the stock trans and sell the built trans as a low mile working unit. Hopefully for what I have into it.
For what it's worth, I have all the time in the world to do this build. No rush on anything. I also have HP tuners, so I can make adjustments in the PCM to take advantage of all the improvements in this build.
So what do you guys think? Is it a solid plan? What are your thoughts on the pieces I'm debating?