Thread: CS144 Alternator Upgrade

Page 1 of 3 123 LastLast
Results 1 to 20 of 59
  1. #1 CS144 Alternator Upgrade 
    GrandPrix Junkie Booba5185's Avatar
    Join Date
    Feb 2013
    Location
    Missouri
    Posts
    4,206
    Thanks (Received)
    0
    Likes (Received)
    7
    Dislikes (Received)
    0
    Hey Guys,
    I've had a few ask to do a write up on the CS144 swap, and I haven't really found information on it in all one place, so here goes. The CS130D has an internal fan which makes the entire thing run hotter causing reliabilty problems. The CS144 has an external fan and the case is bigger (130mm vs 144mm) so it runs a lot cooler. They say the external fan is louder, but I never noticed a difference. Here's some output comparisons, the pullies are basically the same size:


    It's just shy of a 1:3 ratio on 3800s, so at 1,000 engine RPM the alternator's RPM is 3,000. So at idle, the CS130D puts out around 90a while the CS144 puts out just under 120a. That's a pretty big difference, and obviously it has the higher max output. For $100-$150 you can upgrade it to 200a with simple tools as well, so that's a big plus. Anyways, here's the parts list:
    CS144 Alternator out of a:

    • BUICK LESABRE (1996 - 1999)
    • BUICK PARK AVENUE 1996
    • CHEVROLET LUMINA (1998 - 1999)
    • CHEVROLET MONTE CARLO (1998 - 1999)
    • OLDSMOBILE 88 (1996 - 1999)
    • OLDSMOBILE 98 1996
    • OLDSMOBILE LSS (1996 - 1999)
    • OLDSMOBILE REGENCY(1997 - 1998)
    • PONTIAC BONNEVILLE (1996 - 1999)

    Mounting bolts out of the above vehicles; 2 bolts. One bolt goes through the alternator, through the alternator bracket, and threads into the head. The other bolt goes through the alternator and threads into the bracket. Reuse your stock bolts for the other holes to mount the bracket.
    CS144 harness\plug from one of the above vehicles.
    New belt 93.985 inch Model K060935. You stock belt will most likely be too small, but try it if you wish.
    Upgraded charge wires (you should have done this already)
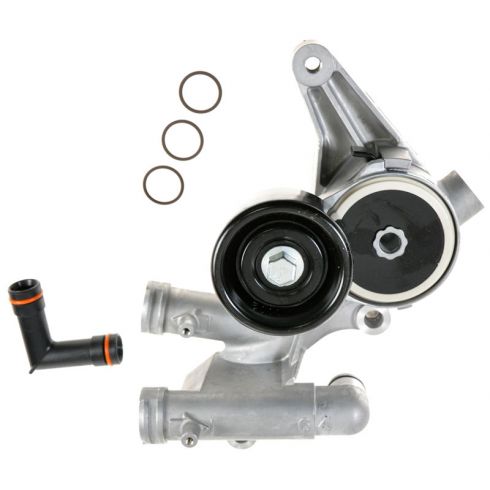
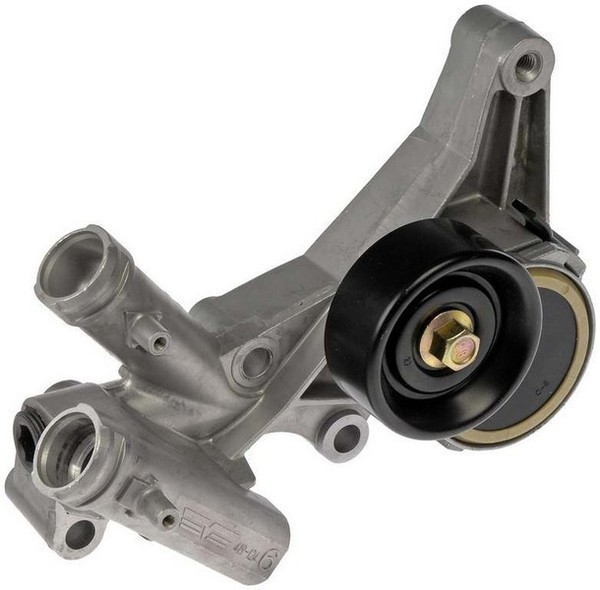
    Alternator bracket out of a 99 Camaro 3.8l. It may be available in other vehicles, but Rockauto has conflicting information on it. (optional on 97-98 Grand Prix)
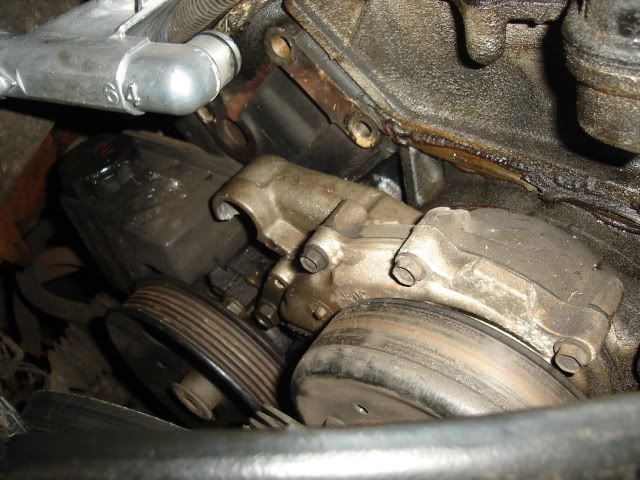
    Now a 97-98 Grand Prix alternator bracket will work, but the coolant elbow that goes into the timing cover is cast into the bracket so it can break the timing cover on removal. This is the 97-98 Grand Prix bracket:

    Here's what it can do:

    Here's the Camaro bracket:


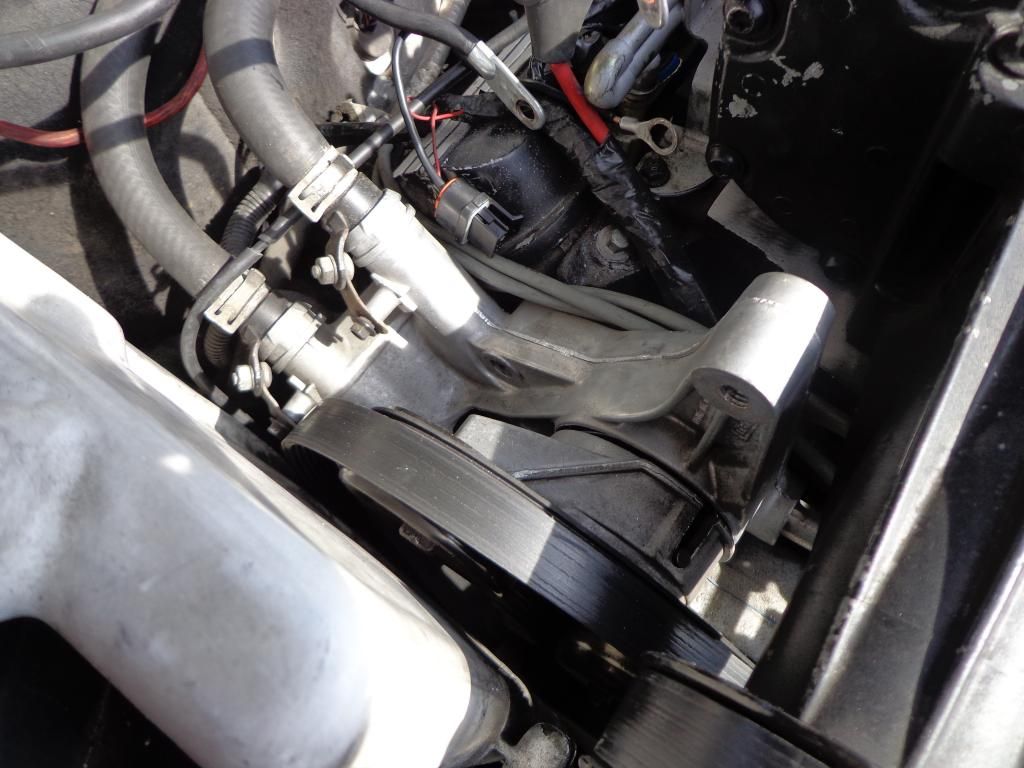
    Pay attention to the heater hose angles, they can be 180* or 90* make sure you get the same angle you currently have (180*). Not all of the fittings bolt on the same way, as you can see in my picture of the installed bracket:

    You can also see the 2 bolt holes for the CS144 in that picture. Be sure to use the aluminum coolant elbows:

    Now that the bracket and everything is ready for the alternator it's time to wire it up. It's 2 wires if you choose to run the sense wire. The sense wire is not required, but it is the most efficient way for the alternator to monitor voltage. Without the sense wire, the regulator will just monitor the voltage of the output stud and adjust the alternator's output from there. I have ran it both ways and never really noticed a difference though. The S wire is the sense wire, and you can run it to the battery's positive post or the fuse box, or just not use it at all up to you. I wouldn't reccomend using the factory orange wire for sense, it's too small and adds resistance making the alternator think there is less voltage than it really is. The L wire goes to the factory (small) red wire. NOT the charge wire, the smaller red wire that went to the CS130D plug originally. Take the orange wire and tape it off, it won't be used. Here's a pic:

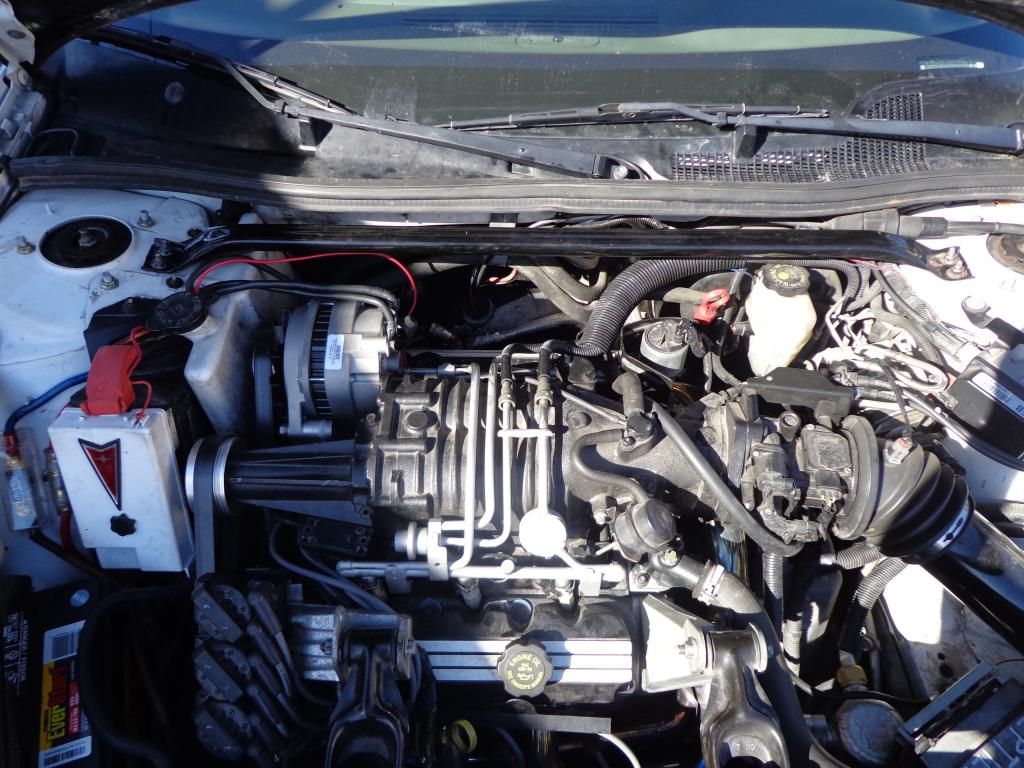
    From here, if you have a Gen III or are N\A, you bolt the alternator in, hook it all up, put the new belt on, and you are done. If you have a Gen V supercharger, you'll need to grind the back of the alternator to clear the longer case of the supercharger:

    Now that I have a final setup for it all, I'll eventually upgrade my charge wire to 1\0 AWG, the wires in this pic are just to get me by til then. You can also see there is an extra ground wire on the back of the case. If you choose to ground the alternator, this is the place to do it. The pink wire in the picture is the sense wire and leads to the fuse box.

    If anyone has any input or questions, feel free to ask. I'll make another thread on upgrading the CS144 to 200a if needed.
    Last edited by Booba5185; 05-17-2015 at 01:02 AM.
    Retros, LEDs, SD Hood GMPP, Votland, Addco
    06+ Impala brakes, L76 Springs, ERs, Self-Tuned, 3.5 Gen V L32, Ported TB, 240a CS144, SSAC, Upgraded Transmission, Android Head Unit, Remote stuff, GXP Seats

    Reply With Quote  
     

  2. #2 Re: CS144 Alternator Upgrade 
    GXP Level Member Turbocharged400sbc's Avatar
    Join Date
    Jan 2008
    Location
    hangover park IL
    Posts
    2,714
    Thanks (Received)
    4
    Likes (Received)
    11
    Dislikes (Received)
    0
    you need to use the late 96 to 98 Wbody heater hose fittings.... by the way thanks for sharing the info on the 99 Camaro tensioner but now its going to be a lot harder for me to grab a cheap replacement once everyone catches on to the dual replaceable elbow horizontal bolt alternator bracket
    ~James~ Psychotic Gearhead
    projects: 84 Cressida waGN~ 90 LN3 3800, equal length headers, T70, 89 700r4, misc parts,
    1994 Oldsmobile 442 (462ci-4wd-2 engines) L67/4t80e^2,
    00 Turbo Regal 608 fwhp 575ftlbs at 5500rpm, 98 WhippledRiv, 97 GTP
    Reply With Quote  
     

  3. #3 Re: CS144 Alternator Upgrade 
    Banned
    Join Date
    Jan 2013
    Location
    maryland
    Posts
    1,508
    Thanks (Received)
    0
    Likes (Received)
    0
    Dislikes (Received)
    0
    Great writeup im doin this very soon!!
    Reply With Quote  
     

  4. #4 Re: CS144 Alternator Upgrade 
    Donating Users bandook's Avatar
    Join Date
    Apr 2015
    Location
    Columbus, OH
    Posts
    1,781
    Thanks (Received)
    2
    Likes (Received)
    27
    Dislikes (Received)
    0
    Awesome man thanks! 1st Saturday of the month is 1/2 off. that's where I'll be, picking alternators
    Top Swapped 01 Imp
    VS (very small?) cam, SD Headers, 2.8" pulley, 29°, ported everything, E85, AEM water/meth, Deka 60's, HPT tuned
    Reply With Quote  
     

  5. #5 Re: CS144 Alternator Upgrade 
    Turbo is the way to go. BillBoost37's Avatar
    Join Date
    Jul 2009
    Location
    W Spfld
    Posts
    26,833
    Thanks (Received)
    53
    Likes (Received)
    90
    Dislikes (Received)
    1
    Just buy a 99 Bonneville.. It's super easy
    I drink..so consider that when reading my posts.

    2010 Audi A6 Dual IC's
    Reply With Quote  
     

  6. #6 Re: CS144 Alternator Upgrade 
    SE Level Member
    Join Date
    Nov 2014
    Location
    Vancouver, BC
    Posts
    24
    Thanks (Received)
    0
    Likes (Received)
    0
    Dislikes (Received)
    0
    Quote Originally Posted by bandook View Post
    Awesome man thanks! 1st Saturday of the month is 1/2 off. that's where I'll be, picking alternators
    My thoughts exactly!


    Thanks Bill for the great write up.
    2000 Regal GS - Stage 2 ZZP IC, Ported LIM, 3.2" pulley, F-body brakes, 3" cat-less DP, 2.5" custom exhaust, various handling upgrades, and smaller stuff.
    Reply With Quote  
     

  7. #7 Re: CS144 Alternator Upgrade 
    GrandPrix Junkie Booba5185's Avatar
    Join Date
    Feb 2013
    Location
    Missouri
    Posts
    4,206
    Thanks (Received)
    0
    Likes (Received)
    7
    Dislikes (Received)
    0
    Bill? Lol guess I've been called worse.
    Retros, LEDs, SD Hood GMPP, Votland, Addco
    06+ Impala brakes, L76 Springs, ERs, Self-Tuned, 3.5 Gen V L32, Ported TB, 240a CS144, SSAC, Upgraded Transmission, Android Head Unit, Remote stuff, GXP Seats

    Reply With Quote  
     

  8. #8 Re: CS144 Alternator Upgrade 
    SE Level Member
    Join Date
    Nov 2014
    Location
    Vancouver, BC
    Posts
    24
    Thanks (Received)
    0
    Likes (Received)
    0
    Dislikes (Received)
    0
    Quote Originally Posted by Booba5185 View Post
    Bill? Lol guess I've been called worse.
    My reading skills are lacking apparently! lol
    2000 Regal GS - Stage 2 ZZP IC, Ported LIM, 3.2" pulley, F-body brakes, 3" cat-less DP, 2.5" custom exhaust, various handling upgrades, and smaller stuff.
    Reply With Quote  
     

  9. #9 Re: CS144 Alternator Upgrade 
    Banned
    Join Date
    Jan 2013
    Location
    maryland
    Posts
    1,508
    Thanks (Received)
    0
    Likes (Received)
    0
    Dislikes (Received)
    0
    The stock heater hose fittings do not work? Whats the measurements for the 96 98 wbody fittings? i will get new ones from the auto store
    Reply With Quote  
     

  10. #10 Re: CS144 Alternator Upgrade 
    Turbo is the way to go. BillBoost37's Avatar
    Join Date
    Jul 2009
    Location
    W Spfld
    Posts
    26,833
    Thanks (Received)
    53
    Likes (Received)
    90
    Dislikes (Received)
    1
    Quote Originally Posted by Booba5185 View Post
    Bill? Lol guess I've been called worse.
    All the cool write ups are under my name. Give him time though.. he'll never find it because it's under your name lol
    I drink..so consider that when reading my posts.

    2010 Audi A6 Dual IC's
    Reply With Quote  
     

  11. #11 Re: CS144 Alternator Upgrade 
    GrandPrix Junkie Booba5185's Avatar
    Join Date
    Feb 2013
    Location
    Missouri
    Posts
    4,206
    Thanks (Received)
    0
    Likes (Received)
    7
    Dislikes (Received)
    0
    Quote Originally Posted by jayroca View Post
    The stock heater hose fittings do not work? Whats the measurements for the 96 98 wbody fittings? i will get new ones from the auto store
    They won't work because of the way they bolt to the alternator bracket. Let me get some pics...

    Yea Bill, you've done a lot more write-ups than me, but at least they can find this one since you posted in it. I'm surprised you haven't done a write-up titled "How to upgrade your W-body" then just post "Sell it and buy an Audi"
    Retros, LEDs, SD Hood GMPP, Votland, Addco
    06+ Impala brakes, L76 Springs, ERs, Self-Tuned, 3.5 Gen V L32, Ported TB, 240a CS144, SSAC, Upgraded Transmission, Android Head Unit, Remote stuff, GXP Seats

    Reply With Quote  
     

  12. #12 Re: CS144 Alternator Upgrade 
    GrandPrix Junkie Booba5185's Avatar
    Join Date
    Feb 2013
    Location
    Missouri
    Posts
    4,206
    Thanks (Received)
    0
    Likes (Received)
    7
    Dislikes (Received)
    0
    Look at the way the heater hose fitting bolt to the bracket. 99+ Grand Prix bracket:

    Camaro bracket:


    You can see on the 99+ GP bracket the hose fitting bolt to the "top" whereas the Camaro bracket has them bolt to the side of the bracket.
    Retros, LEDs, SD Hood GMPP, Votland, Addco
    06+ Impala brakes, L76 Springs, ERs, Self-Tuned, 3.5 Gen V L32, Ported TB, 240a CS144, SSAC, Upgraded Transmission, Android Head Unit, Remote stuff, GXP Seats

    Reply With Quote  
     

  13. #13 Re: CS144 Alternator Upgrade 
    GXP Level Member
    Join Date
    Mar 2015
    Location
    Tomball
    Posts
    2,633
    Thanks (Received)
    0
    Likes (Received)
    3
    Dislikes (Received)
    0
    Very nice, If I ever need to upgrade alternators I will be sure to keep this in mind.

    Thanks Boobafet,

    Jeff
    Reply With Quote  
     

  14. #14 Re: CS144 Alternator Upgrade 
    GT Level Member Going Too Phast's Avatar
    Join Date
    Dec 2007
    Posts
    161
    Thanks (Received)
    0
    Likes (Received)
    0
    Dislikes (Received)
    0
    I did this swap a few years ago as a supporting mod for my amp-hungry aftermarket cooling fans. It actually turned out that a stock 140 amp CS144 wasn't enough for me and I had to upgrade the stator, bridge rectifier, and eventually add an overdrive pulley. However I finally got the amperage I needed at idle. I did a writeup on clubgp at the time (here) but the information in the OP gives you what you need. I did my writeup from the perspective of someone who has a '97-'98 bracket already installed (like myself with a '98 GTP). The information about the '99 Camaro bracket is good to know.

    If you have the newer alternator bracket, I think you have a few other options for adding a higher amp alternator other than swapping brackets (although it obviously isn't all that difficult to change). If you don't need a whole lot of extra amps, I mentioned in my old post that a 2005 Buick LeSabre (it was used on a few other models around 2004-2005 IIRC) came with a 140 amp alternator that bolts right on to the '99+ alternator bracket. In my post though, I incorrectly identified it as an AD244 alternator. I believe it actually is a Denso hairpin alternator. IIRC, the hairpin alternators use more advanced technology and I believe they will give you the most idle amperage (i.e., Hairpin 140 amp idle amperage > CS144 140 amp idle amperage). However the real-world difference may be negligible and once upgraded, the CS144 should be better than a stock hairpin. I was researching all of this a few years ago, so I don't know if I am remembering it correctly. The disadvantage with the hairpin alternators is that I did not find any easy source for parts to upgrade the output.

    I think there is also the option to use CS144 and AD244 alternators with the '99+ alternator bracket if you use this bracket adapter here. Kind of pricey for what it is. It would be nice if they had some pictures showing what alternators/brackets the adapter was meant for, but I guess you could always email them if you had questions. As I recall, the AD244 is similar to the CS144, but it is newer and has an internal cooling fan.

    Anyway, it is a great upgrade if you have installed anything that is going to put extra load on your electrical system. As the OP noted, it is really pretty easy to open up the CS144 and do repairs or upgrades since all of the parts bolt in essentially. I recently installed a new head unit that displays the voltage and I enjoy looking at it when I'm at idle with my fans on high and see it still pumping out solid, steady voltage.
    Reply With Quote  
     

  15. #15 Re: CS144 Alternator Upgrade 
    GrandPrix Junkie Booba5185's Avatar
    Join Date
    Feb 2013
    Location
    Missouri
    Posts
    4,206
    Thanks (Received)
    0
    Likes (Received)
    7
    Dislikes (Received)
    0
    I've done the same upgrade, up to 200a with a 1.9 inch pulley. It is very easy to install, and can be done really cheap. I wasn't sure about that adapter from alternatorparts.com for 2 reasons. One, I have the Gen V so I don't know exactly where it would place the alternator on the bracket. I already had to do some grinding to fit it, and I have about 1 or 2mm between the supercharger and the alternator as it is. Two, I was screwed over by the owner. He was very helpful wish diagnosing problems and giving me troubleshooting instructions...until his rectifier was the result of his own troubleshooting. He stopped answering my calls, and said he doesn't warranty any parts unless he installs them. From there I sourced a new rectifier from ebay, for cheaper, and look identical to the alternatorparts' rectifier.

    On top of that, like you mentioned the adapter is damn near the same price as a new tensioner. I have a little mini write-up on the 200a upgrade in my build thread, let me go find it and post it in here...
    Retros, LEDs, SD Hood GMPP, Votland, Addco
    06+ Impala brakes, L76 Springs, ERs, Self-Tuned, 3.5 Gen V L32, Ported TB, 240a CS144, SSAC, Upgraded Transmission, Android Head Unit, Remote stuff, GXP Seats

    Reply With Quote  
     

  16. #16 Re: CS144 Alternator Upgrade 
    GrandPrix Junkie Booba5185's Avatar
    Join Date
    Feb 2013
    Location
    Missouri
    Posts
    4,206
    Thanks (Received)
    0
    Likes (Received)
    7
    Dislikes (Received)
    0
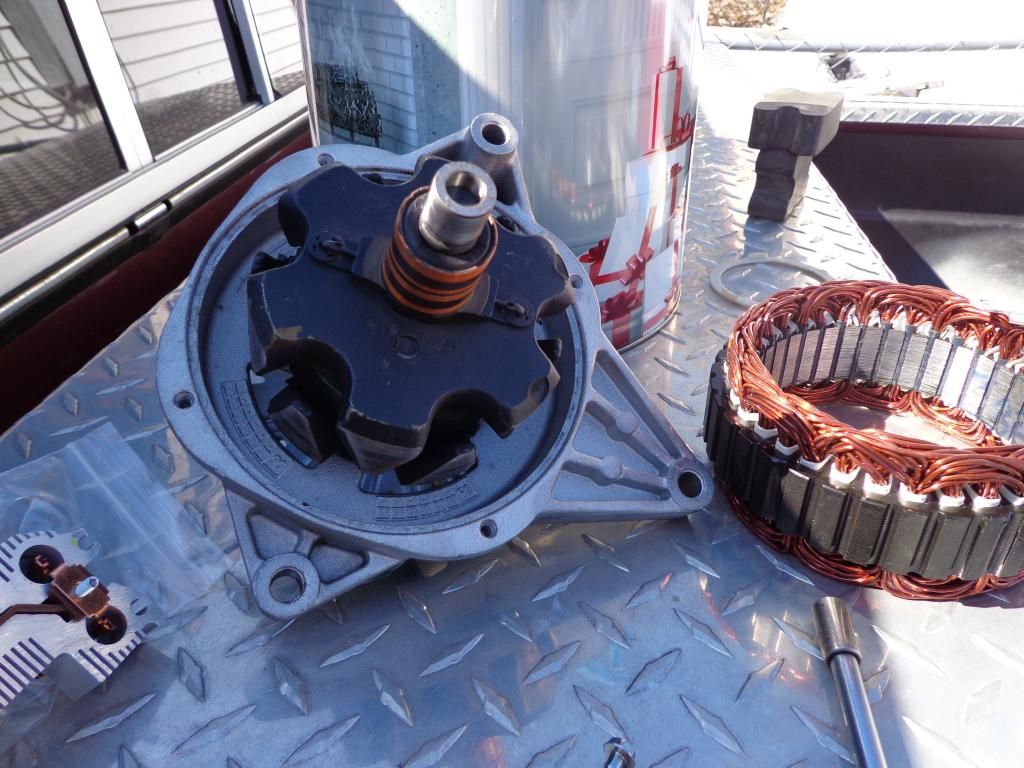
    Okay so pics have uploaded. Very easy upgrade, no really, VERY easy to do. I just had bad luck and my new rectifier decided to take a ****, lol. So you start by taking out the 4 bolts around the case, which I didn't get a picture of. After that you basically smack on of the ears with your hand to knock the front of the alternator loose and it pulls right apart. Front half, the rotor, shaft, housing, etc:

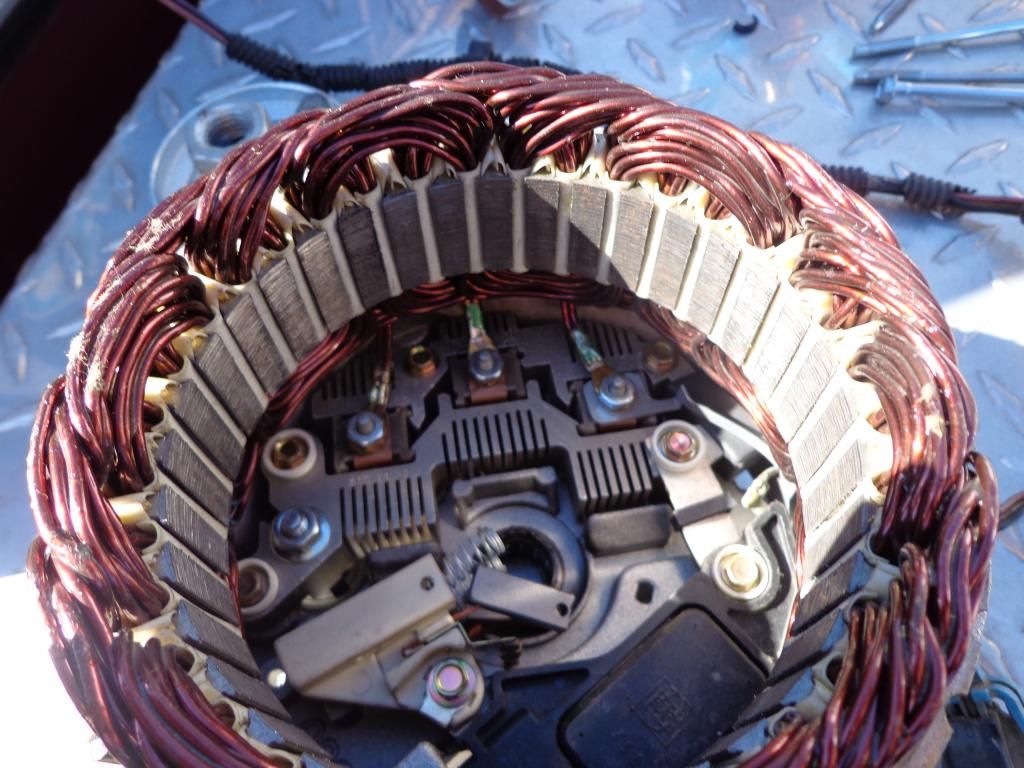
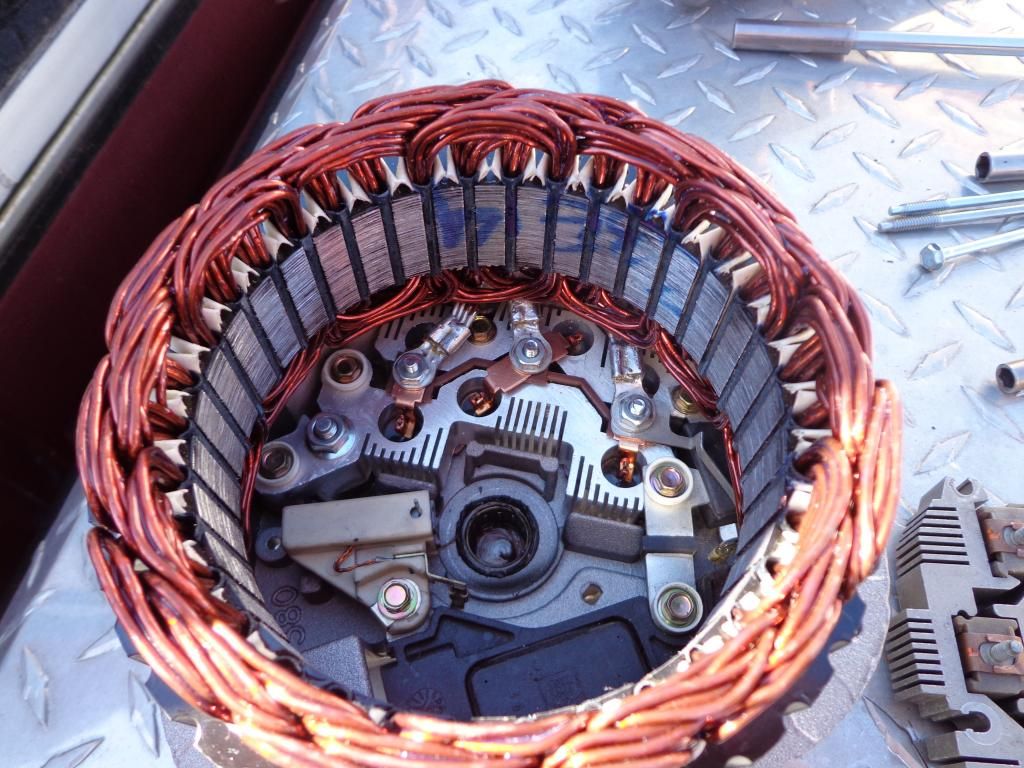
    Other side of the coin, you can see the stator (winding of wire), rectifier (heatsink), voltage regulator (black thing at the bottom), capacitor (little black thing in between the rectifier and regulator), and the brushes (springs and grey things hanging in the middle). DON'T LOOSE THE BRUSH'S SPRINGS, THEY CAN AND WILL FALL OUT.

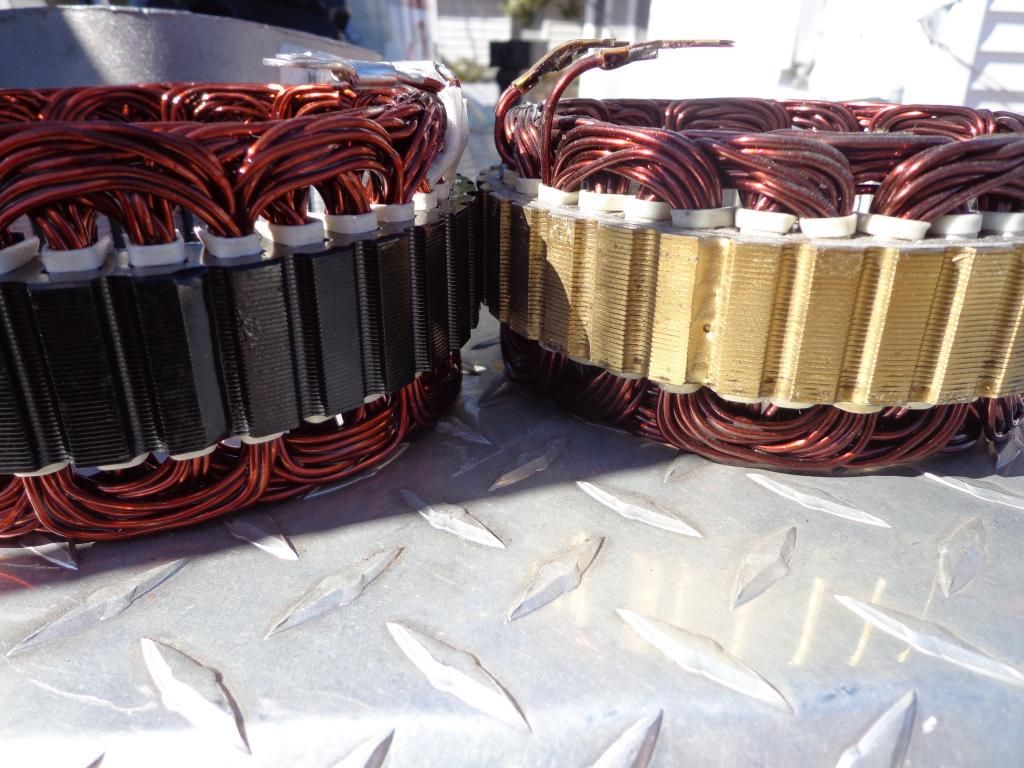
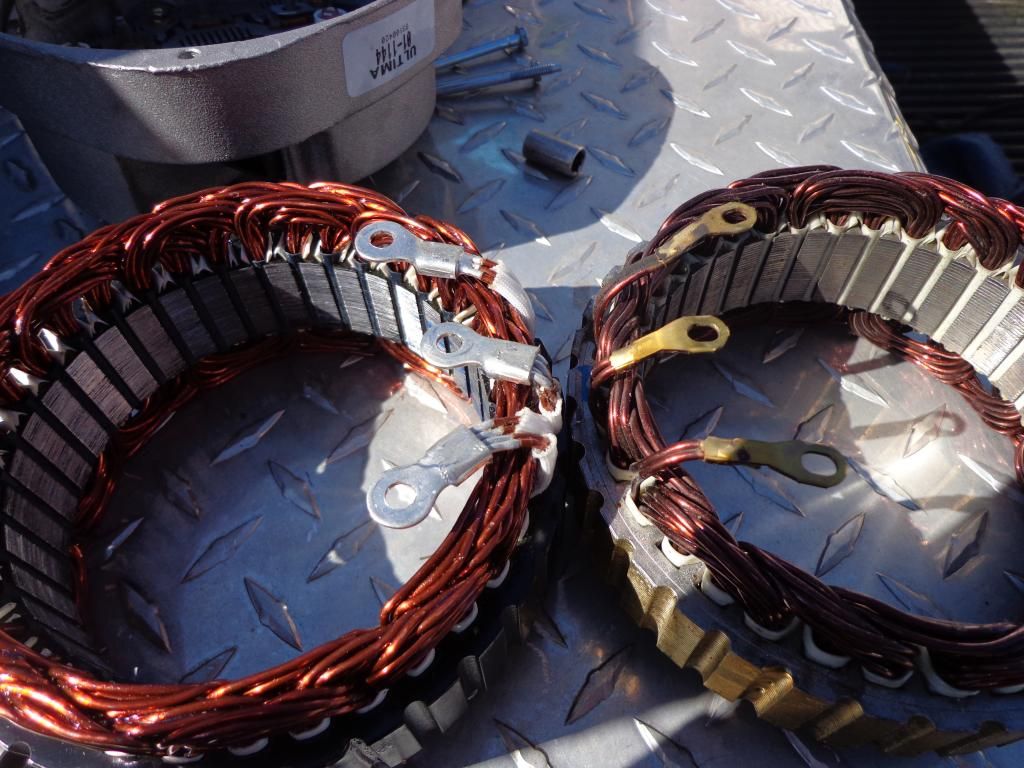
    Naturally, you have to take EVERYTHING out to get to the rectifier safely. I guess I didn't get any pics of this, but you'll get the idea on reassembly. To disassemble, take the 3 nuts off that connect to the 3 wires of the stator, then pull the stator out. This may or may not be gentle, sometimes they are stuck in the case a bit. Here's the stock stator on the right, upgraded 200amp stator on the left:


    You'll end up with something looking like this, this picture is actually during reassembly, but you get the idea:

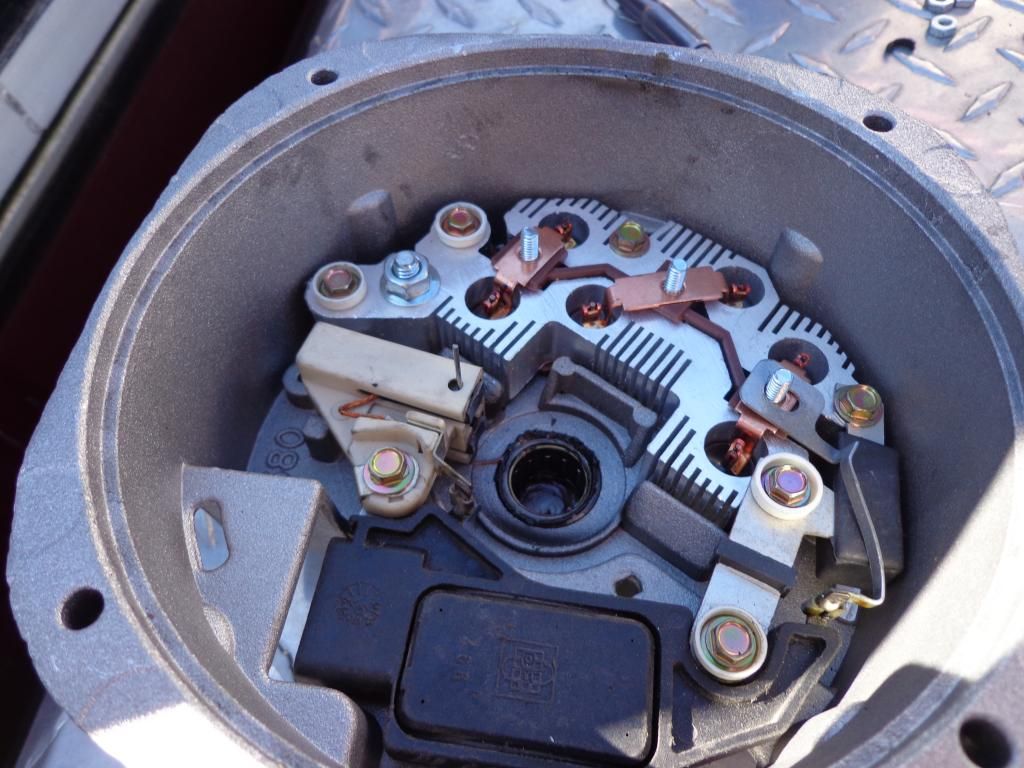
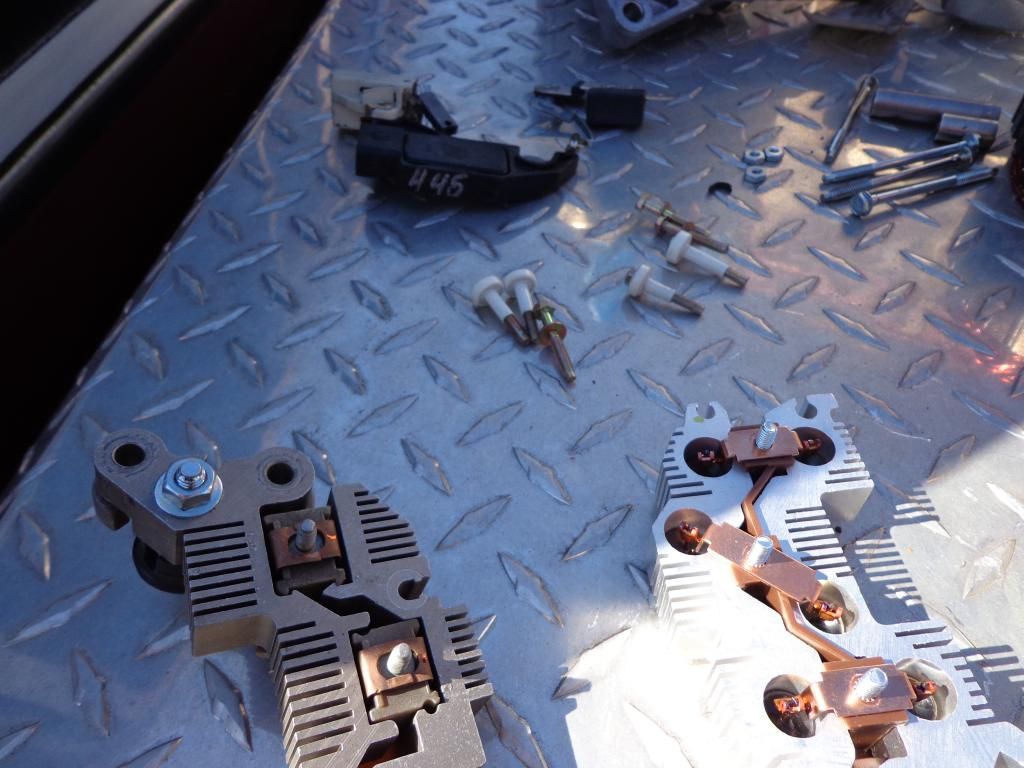
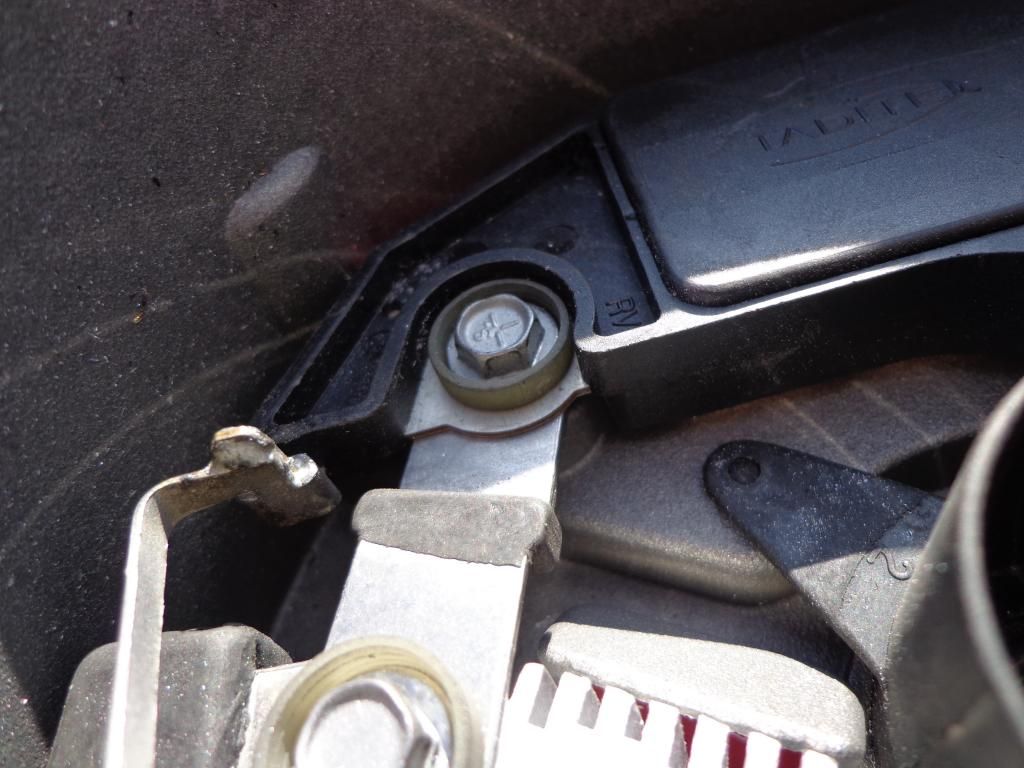
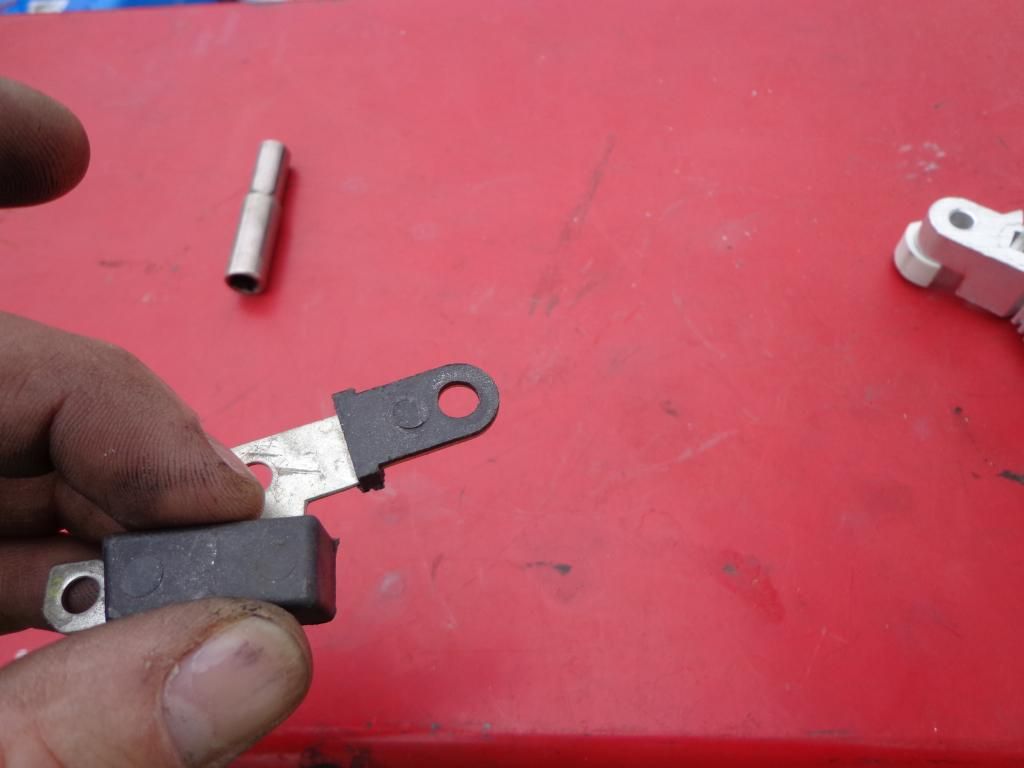
    Take all that out. The brushes and voltage regulator have 2 screws holding them in. The one on the left is NOT isolated, the one on the right IS isolated (plastic sleeve). From there, remove the screws holding everything else in, noting what is isolated and what isn't (the "top" 2 screws holding in the rectifier aren't...), and take everything out. Capacitor first, then voltage regulator\brushes, then finally the rectifier. Here's the pile of it all, note the screw with the longer isolator, it's goes into the right hole of the rectifier, and holds the capacitor and rectifier down :

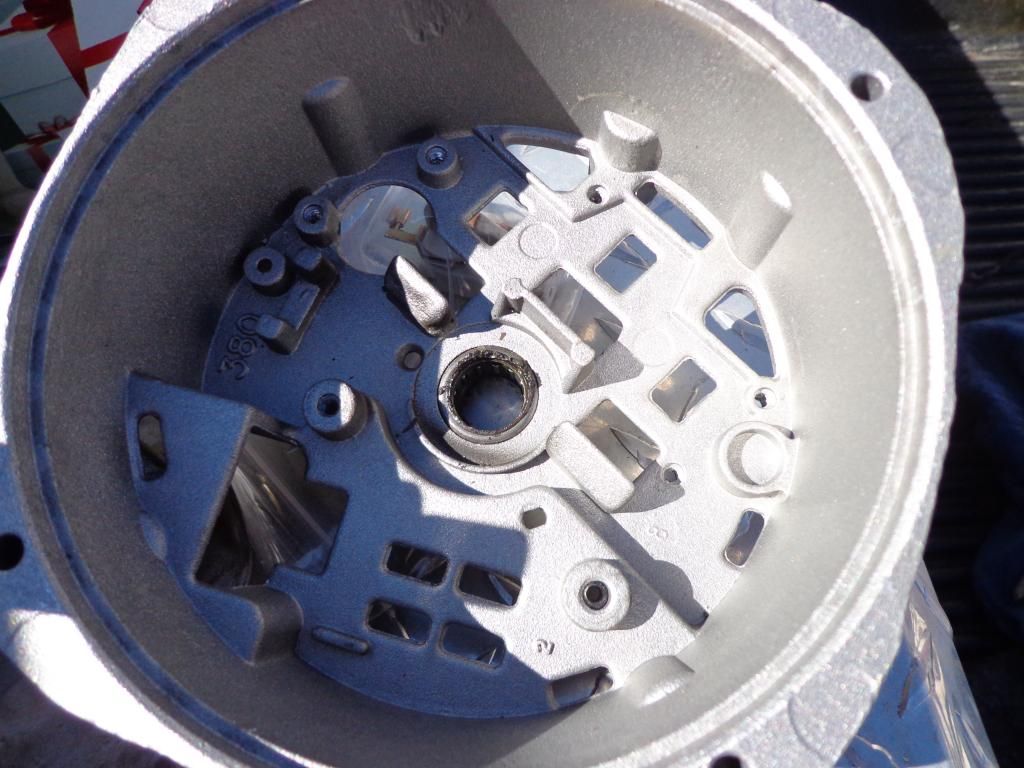
    Empty:

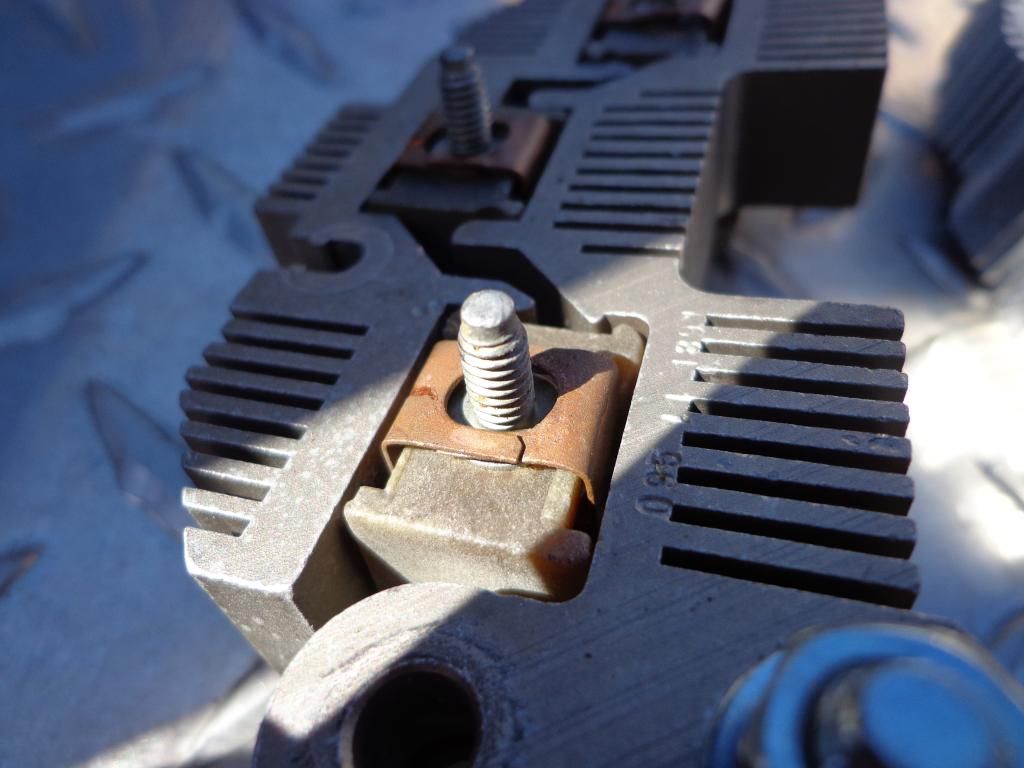
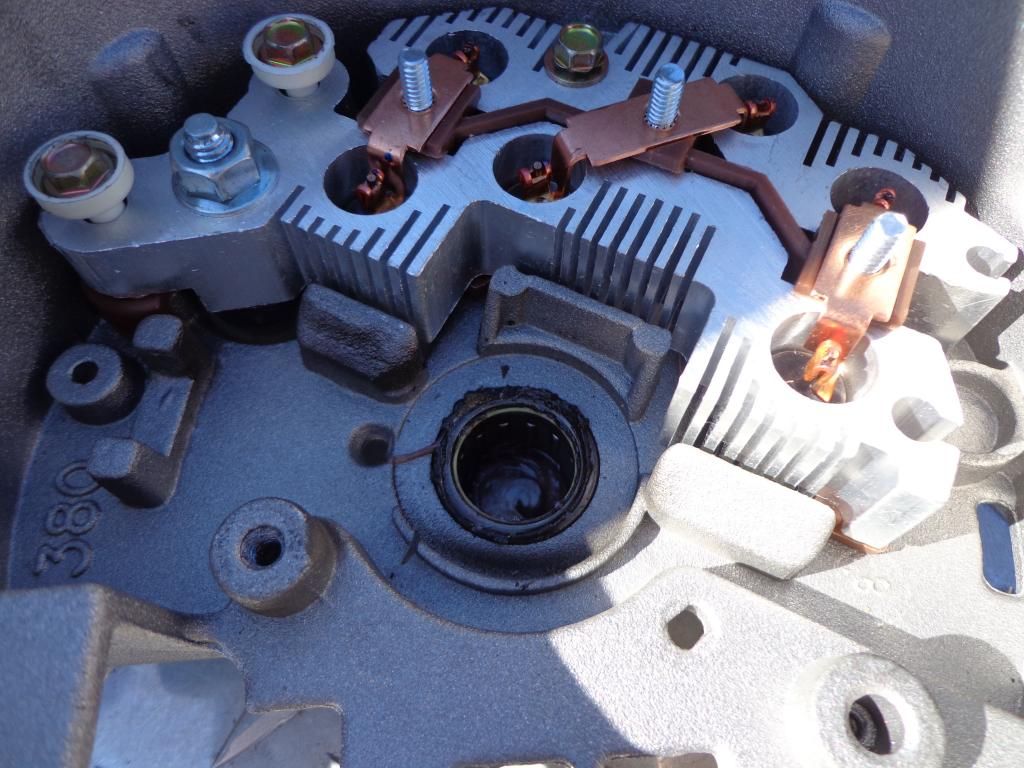
    This alternator was a piece of SH*T. Look at the rectifier. These connections are very crucial, and there are broken into 2 pieces. WHY?

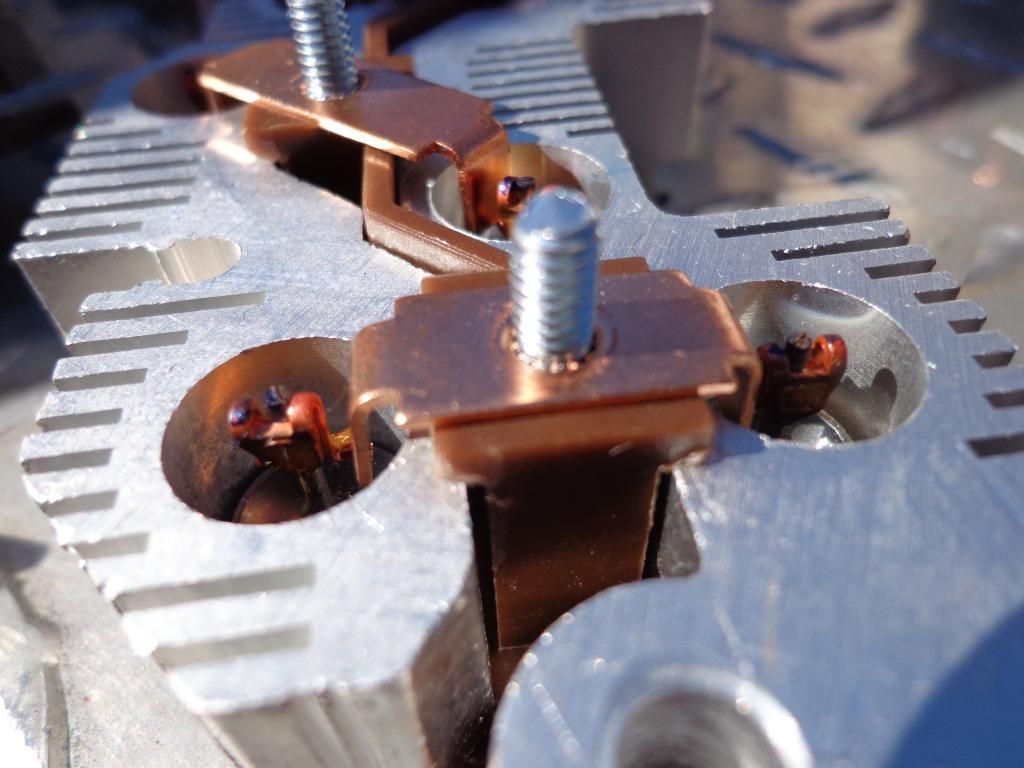
    Upgraded:

    Remove the charging stud from the stock rectifier (10mm nut you see in the above pictures) and move it over to the new rectifier and tighten down (snug). Then install the rectifier. It goes right in for the most part, just make sure the plastic of the charging stud goes all the way through.

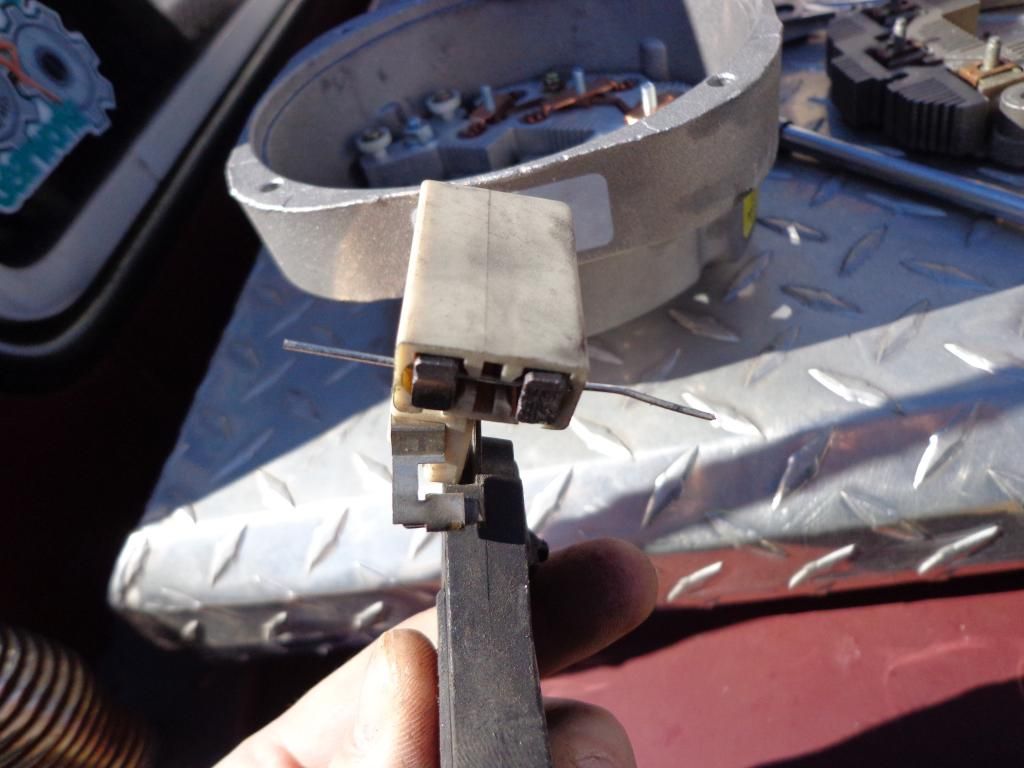
    Then, you have to reassemble the brushes. I used a paper clip bent straight, worked great. The brushes have little holes in them that line up with holes in it's "case?" to hold them in for reassembly. It's as easy as putting the spring in, putting the brush in, and holding it down in there while you stick the paper clip through the hole. Picture:

    Then set the voltage regulator back in, put the capacitor back in. Make sure the regulator is on top of the capacitor. This is wrong:

    This is right:

    This plastic will face the alternator:

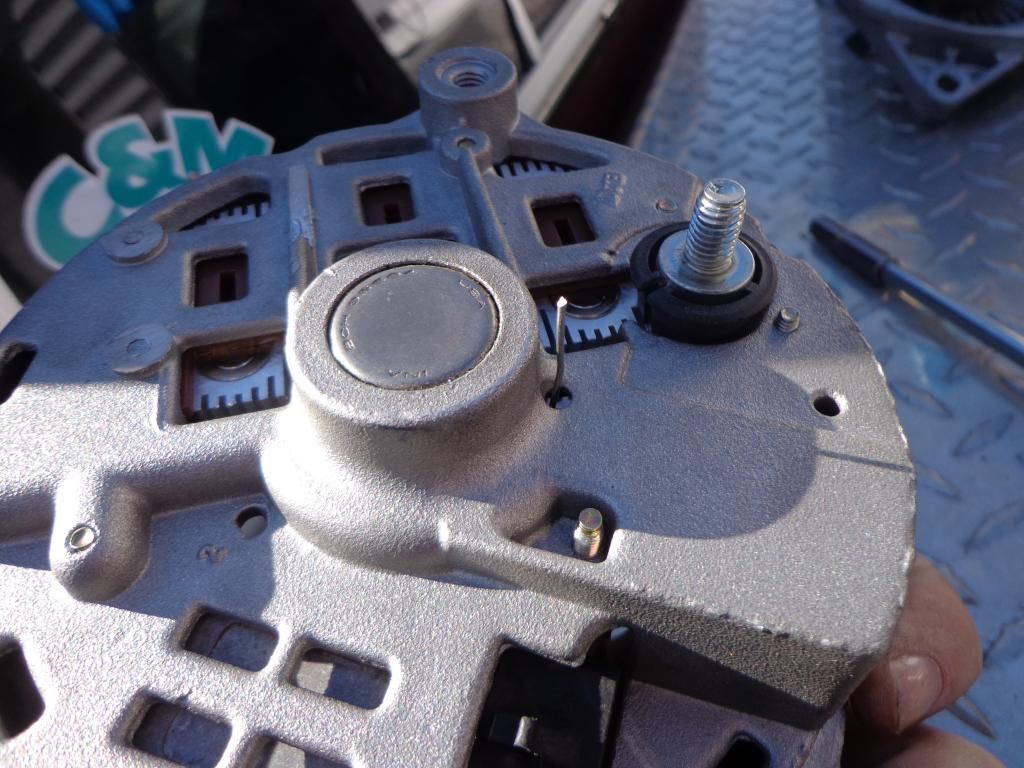
    See the paper clip sticking up in the middle? Push it down with your thumb. Don't push it OUT, just push it down flush with the top of the brush's "case." Don't worry, there is a hole in the back of the alternator so you can pull it out after it's all back together, see:

    Here's everything all back together, before I put the 2 halves of the alternator back together:

    I don't have a picture of it, but you basically set the top half back in the bottom half, making sure everything is clocked right (you can make a mark before dis-assembly if you wish). It will almost fit all the way together, but the 4 outer bolts will pull it together a bit more (less than 1\8th of an inch, nothing major). Tighten the bolts a little at a time, going in a criss-cross pattern. Once those are all tightened, pull the paper clip out of the rear of the alternator to release the brushes, and your done!


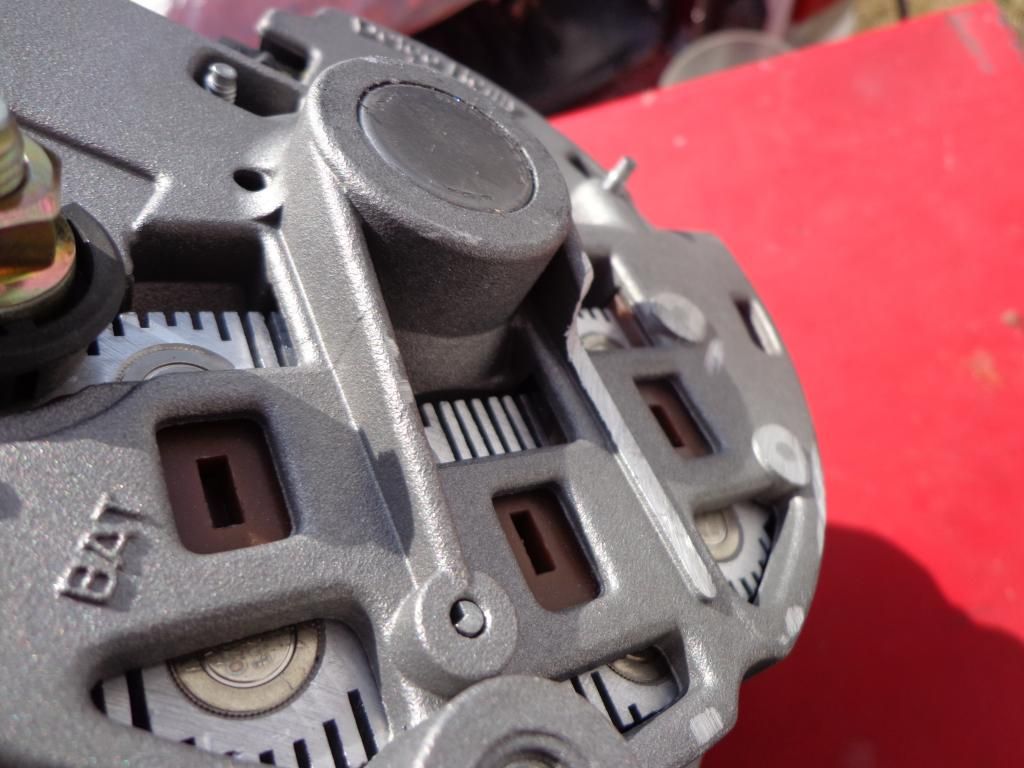
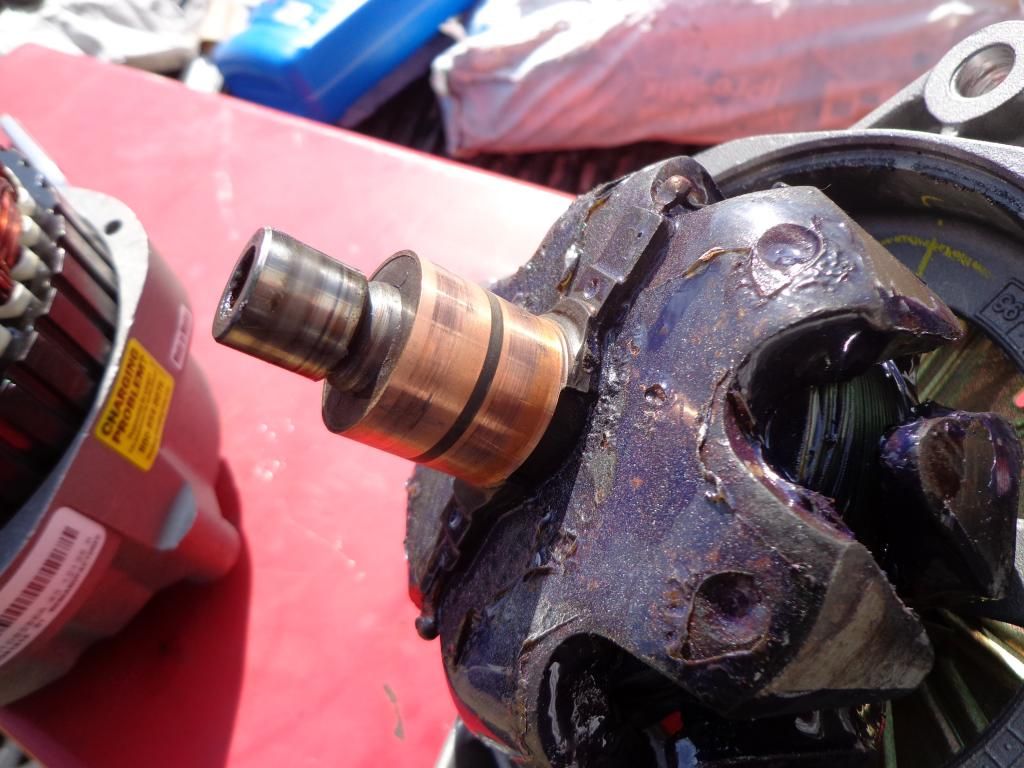
    This kit did comes with new brushes, but mine had PLENTY of life left in them, and they were soldered to the regulator. Not a big deal, I can handle desoldering them, but there was no need. IF YOU REPLACE THE BRUSHES YOU WANT TO SAND (GENTLY\LIGHTLY) THE COPPER RINGS AROUND THE ROTOR (THING ON THE FRONT HALF OF THE ALTERNATOR). Lay the sand paper in your hand, wrap your hand around the copper rings like you are opening a bottle of beer, then turn the alternator pulley back and forth a few times to sand it. Wipe them off and keep going with the install. You can see the copper rings in this pic:
    Retros, LEDs, SD Hood GMPP, Votland, Addco
    06+ Impala brakes, L76 Springs, ERs, Self-Tuned, 3.5 Gen V L32, Ported TB, 240a CS144, SSAC, Upgraded Transmission, Android Head Unit, Remote stuff, GXP Seats

    Reply With Quote  
     

  17. #17 Re: CS144 Alternator Upgrade 
    GXP Level Member Turbocharged400sbc's Avatar
    Join Date
    Jan 2008
    Location
    hangover park IL
    Posts
    2,714
    Thanks (Received)
    4
    Likes (Received)
    11
    Dislikes (Received)
    0
    nice addition, my kinda style!

    i love finding good used remans in the JY...though sometimes you need to pop the top to clean copper corrosion off the commutator.

    for some reason it looks like the price for the 99 F body bracket i love is going up rofl
    seems like its 15$ more than the last one i bought...damn bastards

    are either of you using the G/h body style battery thermister?
    ~James~ Psychotic Gearhead
    projects: 84 Cressida waGN~ 90 LN3 3800, equal length headers, T70, 89 700r4, misc parts,
    1994 Oldsmobile 442 (462ci-4wd-2 engines) L67/4t80e^2,
    00 Turbo Regal 608 fwhp 575ftlbs at 5500rpm, 98 WhippledRiv, 97 GTP
    Reply With Quote  
     

  18. #18 Re: CS144 Alternator Upgrade 
    GrandPrix Junkie Booba5185's Avatar
    Join Date
    Feb 2013
    Location
    Missouri
    Posts
    4,206
    Thanks (Received)
    0
    Likes (Received)
    7
    Dislikes (Received)
    0
    That I am not, anymore information on that?

    I picked up a F-body bracket at the JY originally, but the tensioner (spring) in it was bad.
    Retros, LEDs, SD Hood GMPP, Votland, Addco
    06+ Impala brakes, L76 Springs, ERs, Self-Tuned, 3.5 Gen V L32, Ported TB, 240a CS144, SSAC, Upgraded Transmission, Android Head Unit, Remote stuff, GXP Seats

    Reply With Quote  
     

  19. #19 Re: CS144 Alternator Upgrade 
    GXP Level Member Turbocharged400sbc's Avatar
    Join Date
    Jan 2008
    Location
    hangover park IL
    Posts
    2,714
    Thanks (Received)
    4
    Likes (Received)
    11
    Dislikes (Received)
    0
    the G/H body uses a thermister on one regulating lead of the alternator to sense battery temp and adjust the charging voltage to compensate for a colder battery's higher internal resistance since its not in the engine bay.

    on some of the coldest days the whippledRiv would charge at nearly 15.8 volts
    ~James~ Psychotic Gearhead
    projects: 84 Cressida waGN~ 90 LN3 3800, equal length headers, T70, 89 700r4, misc parts,
    1994 Oldsmobile 442 (462ci-4wd-2 engines) L67/4t80e^2,
    00 Turbo Regal 608 fwhp 575ftlbs at 5500rpm, 98 WhippledRiv, 97 GTP
    Reply With Quote  
     

  20. #20 Re: CS144 Alternator Upgrade 
    GrandPrix Junkie Booba5185's Avatar
    Join Date
    Feb 2013
    Location
    Missouri
    Posts
    4,206
    Thanks (Received)
    0
    Likes (Received)
    7
    Dislikes (Received)
    0
    Damn, I might have to look into that...
    Retros, LEDs, SD Hood GMPP, Votland, Addco
    06+ Impala brakes, L76 Springs, ERs, Self-Tuned, 3.5 Gen V L32, Ported TB, 240a CS144, SSAC, Upgraded Transmission, Android Head Unit, Remote stuff, GXP Seats

    Reply With Quote  
     

Page 1 of 3 123 LastLast

Similar Threads

  1. 04+ HUD, HD Trans Upgrade and ZZP Alternator Relocation
    By Explicit_Spade in forum For Sale - Parts
    Replies: 24
    Last Post: 11-14-2013, 06:13 PM
  2. I think I need a new alternator
    By acidcrashdburnd in forum 3.8L V6 Supercharged (L67)(L32)
    Replies: 18
    Last Post: 07-09-2012, 07:29 PM
  3. Headlight and FogLight Upgrade (to upgrade to HID or not?) Please Help???
    By Michigan04GrandPrix in forum Visual/Body Modifications
    Replies: 23
    Last Post: 04-20-2012, 12:53 PM
  4. alternator
    By Goldberg07 in forum General Tech Discussion
    Replies: 11
    Last Post: 07-13-2011, 03:31 PM
Bookmarks
Bookmarks
Posting Permissions
  • You may not post new threads
  • You may not post replies
  • You may not post attachments
  • You may not edit your posts
  •