Okay guys here it is, my first writeup, i will be adding pictures as i go along, as i am not yet finished myself. the final touches and all.
This writeup is for those people who bought one of those huge universal head unit adapters at the store and hate how far it sticks out.
I know you could just go and buy a humount, but this is free (if you have the tools) or less than $40 if you dont. Lets get started:
Required items:
-Files of varying sizes
-A blowtorch, or plumbers torch
-A putty knife that you arent worried about permanently getting plastic onto
-one of those stupid universal HU adapters
I will add pics to these first few steps tomorrow, didnt think about taking photos at first
1:
Have your universal head unit out of your car with the radio taken out, mark about half an inch from the front of it and mark where you will cut it on the back part also.
--Reserved for picture--
2: Start the torch up and hold the putty knife to the flame, allow it to heat up to being red hot, that is the only time its useful. the plastic will not stick to the knife while it is super hot, but if it cools down you will have a mess of melty plastic.

3: press the red hot putty knife into the plastic HU where you marked it off, trying to keep as straight as possible (can be corrected later though). i recommend cutting through the front before the back part. You could use a saw for this part too, but i didnt have a nice sharp one lol
--reserved for pic--
4: after cutting through those pieces you should have a nice flat back piece, and a front that is 1/2 inch or less.
-reserved for pic-
5: there should be a part of the plastic that looks sort of like this now, keep that and set it aside we will need it
]
6: now file the front part as flat as you can, i filed mine down to where it is even with the other part inside of it ( you will understand when i get the picture lol) and file the back down nice and flat also.
--reserved for pic--
7: now looking at those there is a few ways you can put them together, you could take spare plastic and melt it in between the two pieces like solder, or you can do what i did. make sure the front is straight on there before you do anything though. i heated up the putty knife, stuck it between the two pieces until they got melty, and then slipped the putty knife out and pressed down on the two pieces.
--reserved for pic--
8: I took some of the spare plastic and melted it down into the back of the adapter for extra support, you can do this by using the flat end of the putty knife and pressing onto the plastic so it looks like this.
9: after doing that and making sure they are aligned you should have a product that looks like this. (mine looks like h3ll i know lol)

10: here comes the really annoying part, filing and fitting the radio in. i had lots of extra gunky plastic on the outside that need to be filed down, you might have the same thing, who knows, so you take your trusty file and get busy

11: now as you're filing you may hit a moment where you go "OH NOES I FILED TOO MUCH OFF AND THERE IS A HOOOLLEEEEEEEEEEEEEE!" do not fear, that spare plastic we had from earlier will come in handy again.
Here is an example of a hole you might encounter

12: i found the easiest way to fix this is to take your spare plastic and cut a small part of it out, and press it into the adapter like you did with the other support braces. if it got melty enough it should come through the front side and be flat or may even need to be filed, fixing the hole
-Reserved for pic-
13: now here is the part that matters, putting in your head unit, mostly the corners will be where the problems are, but it may be different for you. now instead of making individual steps, here is a bunch of photos of the process.

clearly we dont have the magic here...

Everything about this is awkward, but you get the point, file file file.
....
....
....
after doing all of that... it should fit like so. ( i didnt have and of the head unit case tightened, thats why it sticks out at the bottom)

RESERVED FOR FINISHING STEPS
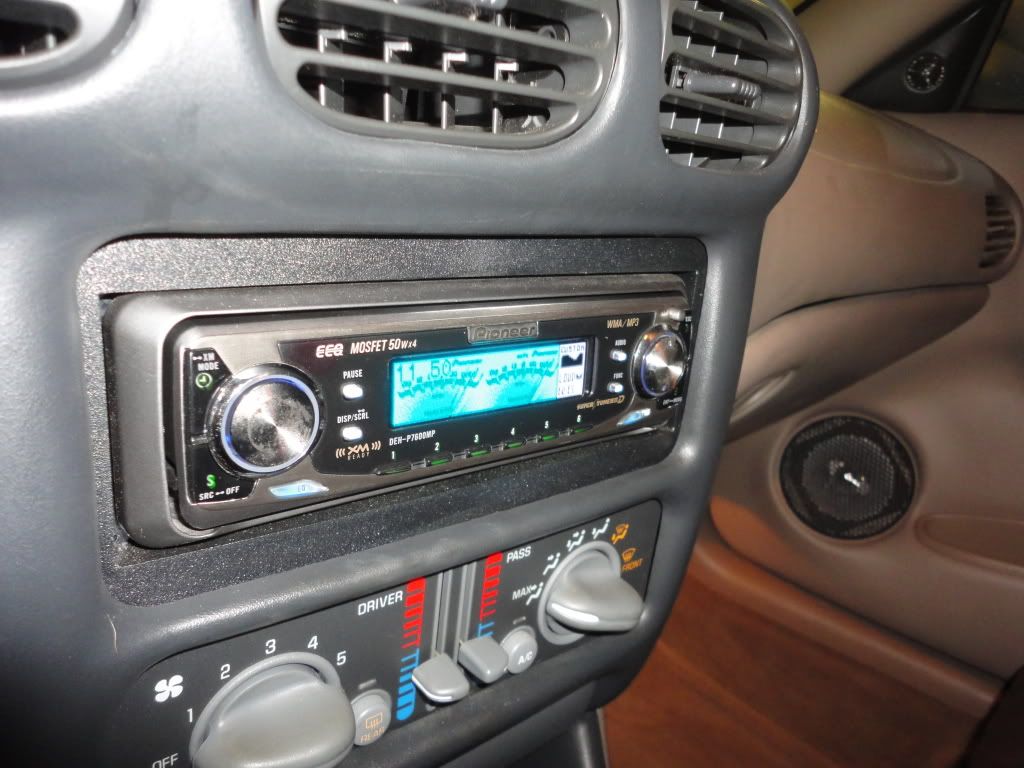
I will do the finishing steps tomorrow, but today i just ran it in my car as is, and so you guys could see how it looks once installed.
Here is a nice angle shot so you can see how flush it is in comparison to the Universal adapter
Universal:

After our little modifications and toying around:

mine is a little warped cause i used the blowtorch directly on it, to figure out the best way to melt the plastic for you guys. i didnt put that in the writeup cause i learned from my mistakes
Thanks for reading and let me know if you have any questions or comments or just wanna be sarcastic about how a humount is better, whatever you want guys!

")