Thread: Finalized LIM gasket plans

Page 1 of 14 12311 ... LastLast
Results 1 to 20 of 273
  1. #1 Finalized LIM gasket plans 
    Who is this guy? SubwayGuy's Avatar
    Join Date
    Apr 2015
    Location
    Wisconsin
    Posts
    2,295
    Thanks (Received)
    0
    Likes (Received)
    2
    Dislikes (Received)
    0
    I've bought the Fel-Pro gasket set as well as a rear VC gasket if I'm gonna have the tensioner assembly off. I've made a write up and saw the ones people made on here for doing this job. Still having a few concerns. This is my first major repair so I'm being super cautious. Now my UIM was replaced less than 4000 miles ago so will that gasket still be ok to use? I have metal coolant elbows already in so no need to change those. I'm planning on not taking my TB off while I do this to avoid less work. From your guys' experience, what is the most difficult part or thing to be most careful of? Please give me any other tips to avoid screwing anything up. I'm planning to give myself 2 days to do this incase something breaks or can't get something off. Thanks a lot guys!

    Oh and does anybody know the torque specs of the UIM? I know the LIM is 11ft lbs. Is there anything else that needs to be torqued other than the LIM and UIM?
    Reply With Quote  
     

  2. #2 Re: Finalized LIM gasket plans 
    GTP Level Member Impala131's Avatar
    Join Date
    Feb 2012
    Location
    Knoxville, TN
    Posts
    709
    Thanks (Received)
    0
    Likes (Received)
    1
    Dislikes (Received)
    0
    Just did my 5th LIM job last weekend (in addition to Gen V S/C swap) and here is what I would tell you:

    While you are down there, replace the water pump also. It's not expensive for a new one, and it's just one more step for you. Once I replaced a LIM and my water pump was leaking only weeks later.... I was ticked.

    You should be able to re-use the metal elbows, but ensure that the O-rings are still in good shape, or you will have a leak.

    I suggest you do the coolant plug mod to the LIM once you have it out. There is a write-up on here that shows how to do this. This eliminates the possibility of coolant filling up the UIM, in the event that the UIM fails. No side effects for the majority of people. The UIM gasket is pretty sturdy, I would re-use it if there is little wear.
    2003 Grand Prix GTP.... the journey begins again....
    E85 Self Tune with HPT, 80# Injectors, Gen V 3.4 pulley, SD Headers, AL605 Plugs
    Reply With Quote  
     

  3. #3 Re: Finalized LIM gasket plans 
    Killa Bee Scottydoggs's Avatar
    Join Date
    Aug 2010
    Location
    new jersey
    Posts
    39,997
    Thanks (Received)
    63
    Likes (Received)
    166
    Dislikes (Received)
    5
    theres no need to take the alt bracket off to remove the rear valve cover. remove the alt, then just loosen the 3 bolts to the bracket, the cover will come right off.


    water pumps are super easy, but your taking a lot more stuff to change it, like the p/s pump and lower sc idler pulley. its not a just take it off deal.

    your lim kit should come with new o rings for the elbow there, swap the o rings on that top elbow and its over and done for the upper elbow.

    also pull both dog bones, then pull the lower rad hose off the engine, then rock the engine and hold it one way, then pull it the other till no more coolant comes out the lower hose port. then take the lim off, doing this will help drain the lim of coolant so very little to no coolant spills in the engine.

    i broke my upper elbow, plastic, and then did what i said up there, then lifted the lim off as level as can be. not a drop fell inside the engine, and i didnt even do a oil change when i was done.

    you should be able to pop the lim free and then pull the lim off the elbow.

    98 Buick Regal GS, F body brakes, Caddy STS wheels, tinted tails L36 bottom end, lightly ported heads, 1.95 roller rockers, headers, gen 5 N* 3.0 pulley, FSIC, 42 lb injectors, a BrandonHall rebuilt trans, DHP tuned and AEM water/Meth injection https://goo.gl/gpV5kW
    Reply With Quote  
     

  4. #4 Re: Finalized LIM gasket plans 
    Who is this guy? SubwayGuy's Avatar
    Join Date
    Apr 2015
    Location
    Wisconsin
    Posts
    2,295
    Thanks (Received)
    0
    Likes (Received)
    2
    Dislikes (Received)
    0
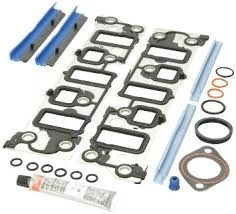
    This is the Fel-Pro set I bought.


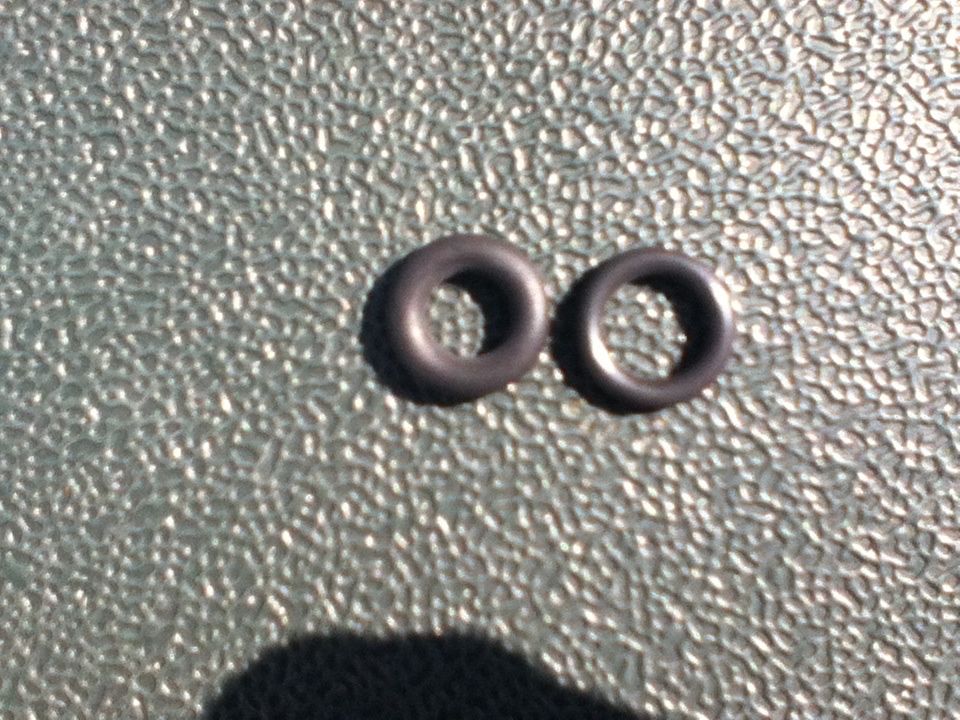
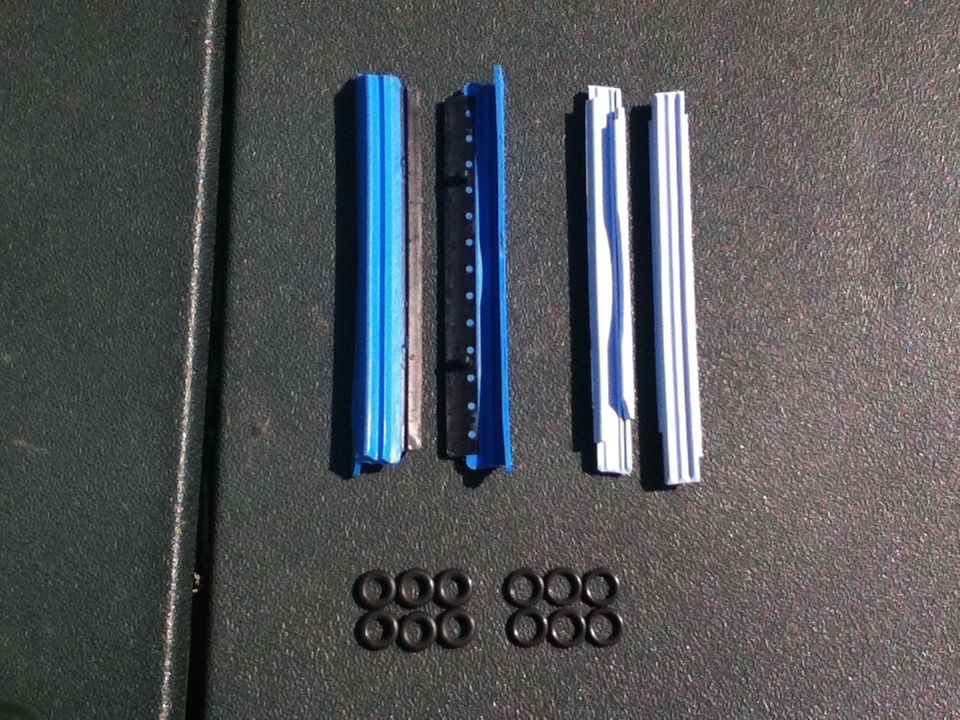
    The problem I have is what are the orange o-rings for, and the 2 black ones next to the orange ones are different sizes and thicknesses. My set also came with 6 extra o-rings that are thicker than the o-rings included in the picture. Also which end seal do I use?? My current one has the black plastic rail on it like the dark blue one in the pic, so then whats the light blue one for???? I'm getting stressed out by this!
    Last edited by SubwayGuy; 07-23-2015 at 04:57 PM.
    Reply With Quote  
     

  5. #5 Re: Finalized LIM gasket plans 
    Who is this guy? SubwayGuy's Avatar
    Join Date
    Apr 2015
    Location
    Wisconsin
    Posts
    2,295
    Thanks (Received)
    0
    Likes (Received)
    2
    Dislikes (Received)
    0
    Quote Originally Posted by ScottyDoggs View Post
    theres no need to take the alt bracket off to remove the rear valve cover. remove the alt, then just loosen the 3 bolts to the bracket, the cover will come right off.


    water pumps are super easy, but your taking a lot more stuff to change it, like the p/s pump and lower sc idler pulley. its not a just take it off deal.

    your lim kit should come with new o rings for the elbow there, swap the o rings on that top elbow and its over and done for the upper elbow.

    also pull both dog bones, then pull the lower rad hose off the engine, then rock the engine and hold it one way, then pull it the other till no more coolant comes out the lower hose port. then take the lim off, doing this will help drain the lim of coolant so very little to no coolant spills in the engine.

    i broke my upper elbow, plastic, and then did what i said up there, then lifted the lim off as level as can be. not a drop fell inside the engine, and i didnt even do a oil change when i was done.

    you should be able to pop the lim free and then pull the lim off the elbow.
    I was just gonna pull the tensioner assembly and let the coolant drain that way. Wouldn't all the stuff in the LIM then come out?
    Reply With Quote  
     

  6. #6 Re: Finalized LIM gasket plans 
    Killa Bee Scottydoggs's Avatar
    Join Date
    Aug 2010
    Location
    new jersey
    Posts
    39,997
    Thanks (Received)
    63
    Likes (Received)
    166
    Dislikes (Received)
    5
    why take it off when you can take one hose off?

    if you take the bracket off buy new elbows, id not re use the o rings on them.

    98 Buick Regal GS, F body brakes, Caddy STS wheels, tinted tails L36 bottom end, lightly ported heads, 1.95 roller rockers, headers, gen 5 N* 3.0 pulley, FSIC, 42 lb injectors, a BrandonHall rebuilt trans, DHP tuned and AEM water/Meth injection https://goo.gl/gpV5kW
    Reply With Quote  
     

  7. #7 Re: Finalized LIM gasket plans 
    Who is this guy? SubwayGuy's Avatar
    Join Date
    Apr 2015
    Location
    Wisconsin
    Posts
    2,295
    Thanks (Received)
    0
    Likes (Received)
    2
    Dislikes (Received)
    0
    Well I'd only replace the two ends that come out of the LIM and I bet a set of o-rings comes with 4.
    Reply With Quote  
     

  8. #8 Re: Finalized LIM gasket plans 
    Who is this guy? SubwayGuy's Avatar
    Join Date
    Apr 2015
    Location
    Wisconsin
    Posts
    2,295
    Thanks (Received)
    0
    Likes (Received)
    2
    Dislikes (Received)
    0
    The left one is thicker than the right one. There are 6 of each o-ring, so 12 little o-rings total.


    And then I don't know which end seal to use, dark blue or light blue?
    Reply With Quote  
     

  9. #9 Re: Finalized LIM gasket plans 
    GT Level Member JamesIvey24's Avatar
    Join Date
    May 2011
    Location
    Illinois
    Posts
    499
    Thanks (Received)
    0
    Likes (Received)
    0
    Dislikes (Received)
    0
    the kit has both of the end seals for supercharged or na lim's, na doesnt have the casting holes for those locating pins. as for the orings, there are technically two orings on an injector upper and lower...very few take the injectors out of the upper rail. big ones on bottom, smaller ones go up top.
    Reply With Quote  
     

  10. #10 Re: Finalized LIM gasket plans 
    GT Level Member JamesIvey24's Avatar
    Join Date
    May 2011
    Location
    Illinois
    Posts
    499
    Thanks (Received)
    0
    Likes (Received)
    0
    Dislikes (Received)
    0
    i would guess the other four o-rings are probably the replacements for the coolant elbows ..as they are diff sized on two ends, and two are alike. ...or maybe lim supercharger orings? - but i doubt.
    Reply With Quote  
     

  11. #11 Re: Finalized LIM gasket plans 
    Who is this guy? SubwayGuy's Avatar
    Join Date
    Apr 2015
    Location
    Wisconsin
    Posts
    2,295
    Thanks (Received)
    0
    Likes (Received)
    2
    Dislikes (Received)
    0
    Quote Originally Posted by JamesIvey24 View Post
    i would guess the other four o-rings are probably the replacements for the coolant elbows ..as they are diff sized on two ends, and two are alike. ...or maybe lim supercharger orings? - but i doubt.
    This is why you make a set specifically for your engine and not a universal set. Ughhhh. So the thick little o-rings go on top which probably won't be replaced and the skinnier little o-rings actually go on the end of the injectors? That's one thing cleared up, thank you. And now I use the light blue end seals? I looked at the ends and one end has a little cut away from it and he other end is flat an such. Does it matter which end goes into the engine? If you look at the above photo the first light blue end seal, you can see the right side of it has that cut away while the other one is normal. Does the cut away go in the engine?
    Reply With Quote  
     

  12. #12 Re: Finalized LIM gasket plans 
    GT Level Member JamesIvey24's Avatar
    Join Date
    May 2011
    Location
    Illinois
    Posts
    499
    Thanks (Received)
    0
    Likes (Received)
    0
    Dislikes (Received)
    0
    no, vice versa for the injector orings, the big thick ones go on the exposed end, the smaller ones go up top in the rail itself.
    Reply With Quote  
     

  13. #13 Re: Finalized LIM gasket plans 
    GT Level Member JamesIvey24's Avatar
    Join Date
    May 2011
    Location
    Illinois
    Posts
    499
    Thanks (Received)
    0
    Likes (Received)
    0
    Dislikes (Received)
    0
    use the same type of seals you take off (have you dissasembled yet?) ..the cut aways in the seals are for the balancer shaft casing, it will become clear when you take your old off. i thought scott posted a video?

    and remember, apply some rtv between the end seals and the lim gaskets themselves
    Reply With Quote  
     

  14. #14 Re: Finalized LIM gasket plans 
    Who is this guy? SubwayGuy's Avatar
    Join Date
    Apr 2015
    Location
    Wisconsin
    Posts
    2,295
    Thanks (Received)
    0
    Likes (Received)
    2
    Dislikes (Received)
    0
    Ok so the thick little -rings go on the end in the LIM and the little ones go up on top, got it, thanks for clearing that up. My current seals have the black plastic part on the end just like the dark blue ones in the picture. No I haven't taken this apart yet, I'm just getting everything cleared up before I tear into it. Now the two orange o-rings in the picture, are those for the upper intake manifold? I've read mix things... The two large black o-rings are also different thicknesses, just like the injector ones. One is thick and one is thin. The thinner o-ring can fit in the thick one so they are slightly different sizes. Are all 4 of the coolant elbow o-rings the same size? Thanks for putting up with my rambling.
    Reply With Quote  
     

  15. #15 Re: Finalized LIM gasket plans 
    GT Level Member JamesIvey24's Avatar
    Join Date
    May 2011
    Location
    Illinois
    Posts
    499
    Thanks (Received)
    0
    Likes (Received)
    0
    Dislikes (Received)
    0
    all 4 of the coolant elbows are not the same size. two should be, and the two two should be different. typically the two orange/yellow orings are for the upperintake near what people call the "stovepipe" closest to the throttlebody. since you are NA, I high suggest looking at these threads, and blocking off those coolant ports. but a little work has to be done to benefit the most from it. http://www.grandprixforums.net/threa...w-to-Mod-a-LIM

    http://www.grandprixforums.net/threa...36-UIM-Failure
    Reply With Quote  
     

  16. #16 Re: Finalized LIM gasket plans 
    Who is this guy? SubwayGuy's Avatar
    Join Date
    Apr 2015
    Location
    Wisconsin
    Posts
    2,295
    Thanks (Received)
    0
    Likes (Received)
    2
    Dislikes (Received)
    0
    I'm sure a lot of people should do this and it seem like a good idea, but like I said before, my UIM was replaced less than 4000 miles ago. It took 120000 miles before the original one went bad so I'm not too concerned. Also it's not that hard of a job replacing the UIM. I appreciate the effort to find those threads though. Thank you for all your help, you really saved me a lot of time and frustration trying to google all of this. one more thing, the UIM is supposed to be torques to 89in lb. which is 7.4ft lb. Can I just do 8ft lb. on the UIM? I don't have an inch pound torque wrench.
    Reply With Quote  
     

  17. #17 Re: Finalized LIM gasket plans 
    GT Level Member JamesIvey24's Avatar
    Join Date
    May 2011
    Location
    Illinois
    Posts
    499
    Thanks (Received)
    0
    Likes (Received)
    0
    Dislikes (Received)
    0
    yep, 8ftlb is fine. good luck
    Reply With Quote  
     

  18. #18 Re: Finalized LIM gasket plans 
    Who is this guy? SubwayGuy's Avatar
    Join Date
    Apr 2015
    Location
    Wisconsin
    Posts
    2,295
    Thanks (Received)
    0
    Likes (Received)
    2
    Dislikes (Received)
    0
    Quote Originally Posted by JamesIvey24 View Post
    yep, 8ftlb is fine. good luck
    Thank you! I will let everyone know how it goes when I start it. Thanks again for your help!!
    Reply With Quote  
     

  19. #19 Re: Finalized LIM gasket plans 
    GTP Level Member Impala131's Avatar
    Join Date
    Feb 2012
    Location
    Knoxville, TN
    Posts
    709
    Thanks (Received)
    0
    Likes (Received)
    1
    Dislikes (Received)
    0
    water pumps are super easy, but your taking a lot more stuff to change it, like the p/s pump and lower sc idler pulley. its not a just take it off deal.
    I should have been more detailed. 1 bolt for the idler, 2 bolts for the P/S pump, 4 bolts for the WP pulley, and 8 bolts for the water pump itself. Scrape off old gasket and put new one on. Thread sealant on WP bolts. Easy peace of mind.
    2003 Grand Prix GTP.... the journey begins again....
    E85 Self Tune with HPT, 80# Injectors, Gen V 3.4 pulley, SD Headers, AL605 Plugs
    Reply With Quote  
     

  20. #20 Re: Finalized LIM gasket plans 
    Who is this guy? SubwayGuy's Avatar
    Join Date
    Apr 2015
    Location
    Wisconsin
    Posts
    2,295
    Thanks (Received)
    0
    Likes (Received)
    2
    Dislikes (Received)
    0
    This is the write-up I made for doing the gasket change. Anything I missed?


    LIM GASKET PROCEDURE (L36)


    1. Remove Serpentine Belt


    2. Disconnect negative battery cable


    3. Remove alternator


    4. Remove tensioner assembly


    5. Remove intake tube


    6. Disconnect fuel injectors


    7. Slide evap canister off bracket


    8. Disconnect MAP sensor


    9. Slide oil pressure line connector off rail


    9.5 Disconnect all other wiring harnesses including on the TB


    10. Unhook rear wiring harness


    11. Remove vacuum line from fuel pressure regulator


    12. Remove 4 nuts holding fuel rail and injectors down


    13. Clean around fuel injector ports


    14. GENTLY pry up on fuel rail to remove fuel line and injectors (make sure o-rings come off with
    injectors)


    15. Remove UIM bolts


    16. Remove EGR shield


    17. Remove power brake booster vacuum line from brake booster


    18. Take off UIM


    19. Remove EGR hose


    20. Remove upper radiator hose from thermostat housing


    21. Disconnect the coolant temperature sensor


    22. Remove bracket from back of LIM


    23. Remove LIM bolts


    24. Remove LIM


    25. Cover up area where LIM sits with shop towels


    26. Remove old gaskets


    27. Scrape off remaining gasket with razor blade to ensure tight seal


    27.5 Clean LIM


    28. Lie down new LIM gasket


    29. Put on new fuel injector o-rings, MAP sensor o-ring, coolant elbow o-rings.


    30. With LIM gasket on, apply 4 small dabs of RTV in 4 corners


    31. Lie down LIGHT BLUE end seals (make sure cut away goes into the engine)


    32. Apply 4 more small dabs of RTV in 4 corners


    32. Lie down cleaned LIM (make sure gaskets did not move around and everything is seated properly)


    33. Installation is reverse of removal


    34. Refer to diagrams for tightening and torque specs
    Reply With Quote  
     

Page 1 of 14 12311 ... LastLast

Similar Threads

  1. Help With Mod Plans
    By Konvinced89 in forum 3.8L V6 Supercharged (L67)(L32)
    Replies: 18
    Last Post: 06-24-2015, 10:27 PM
  2. my plans
    By BlackGT97 in forum Off Topic Discussion
    Replies: 2
    Last Post: 08-10-2011, 12:36 AM
  3. HELP!!! Big Plans...
    By m17davis in forum General Tech Discussion
    Replies: 12
    Last Post: 10-22-2010, 04:16 PM
  4. MY PLANS for the GT
    By offroadfury6 in forum Off Topic Discussion
    Replies: 4
    Last Post: 10-28-2009, 11:47 AM
  5. Some new plans for the car.
    By 2000GTP in forum Off Topic Discussion
    Replies: 0
    Last Post: 10-22-2009, 12:03 AM
Bookmarks
Bookmarks
Posting Permissions
  • You may not post new threads
  • You may not post replies
  • You may not post attachments
  • You may not edit your posts
  •