Thread: Fixing suspension geometry

Results 1 to 5 of 5
  1. #1 Fixing suspension geometry 
    SE Level Member 95naSTA's Avatar
    Join Date
    Dec 2007
    Location
    Philly
    Posts
    99
    Thanks (Received)
    0
    Likes (Received)
    0
    Dislikes (Received)
    0
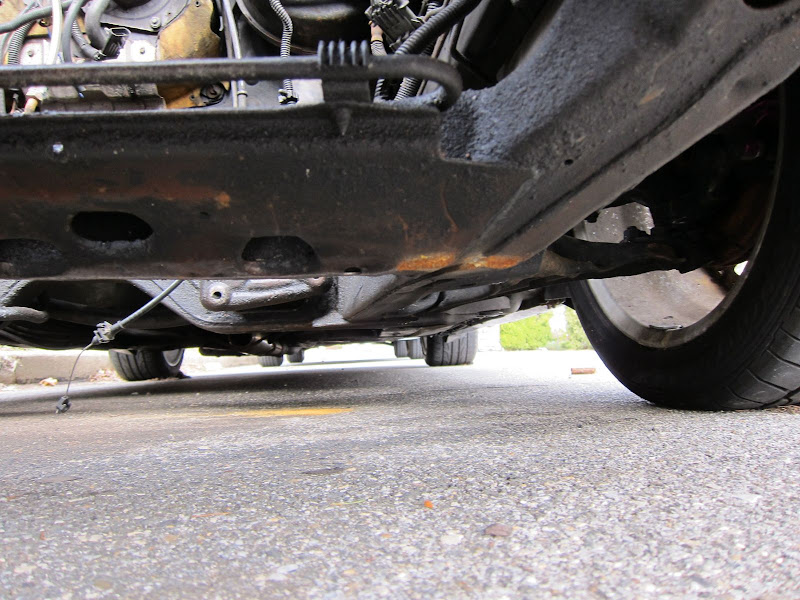
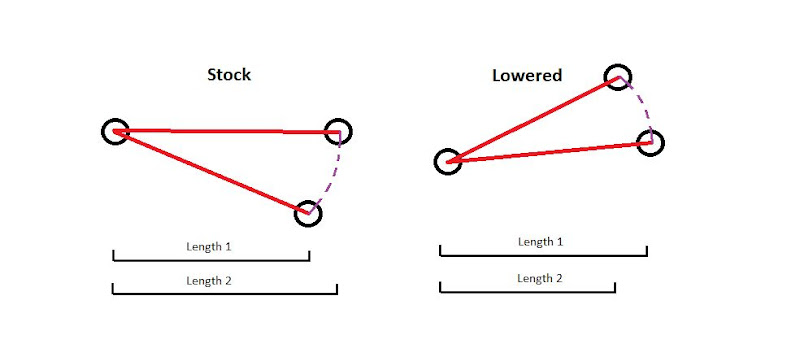
    Hello lowered people wanting to improve their ruined geometry and roll center.

    I've been slowly working on a custom ball joint solution for my Bonneville which could be done in the same way on a W-body.

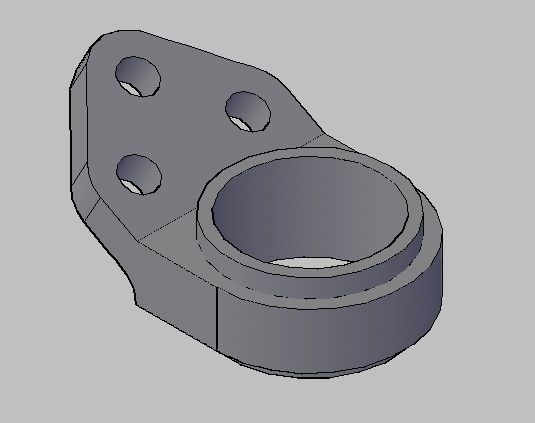
    I'm working with a Chrysler 727 screw in style ball joint with adjustable studs from Howe Racing. I modeled a carrier for a threaded sleeve for the ball joint so it bolts to the stock control arm similar to how your W-body's LCAs are.
    I originally made a 3d version of the carrier, went hunting for someone to cnc it for me, and no one would.. 2 planes at a weird angle and too much setup time.
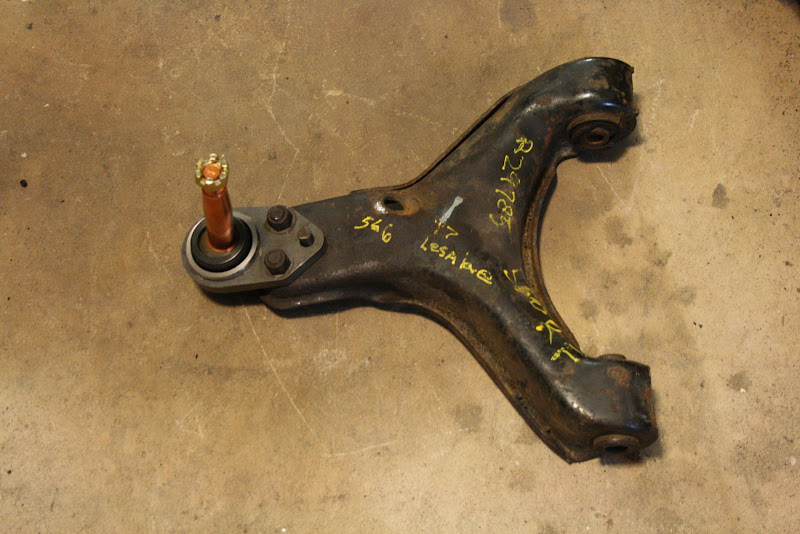
    I went to a 2D version considering how my LCAs were just above neutral anyways. I had my knuckles reamed out with a 10* reamer and the tie rod locations flipped via bushings also. When I went to bolt it up the stud did not have the range of motion needed to bolt the strut to the knuckle. It's the angle of the ball joint stud through the knuckle and the large diameter + low range of motion stud that I didn't account for. That angle the ball joint goes through the knuckle is the killer..
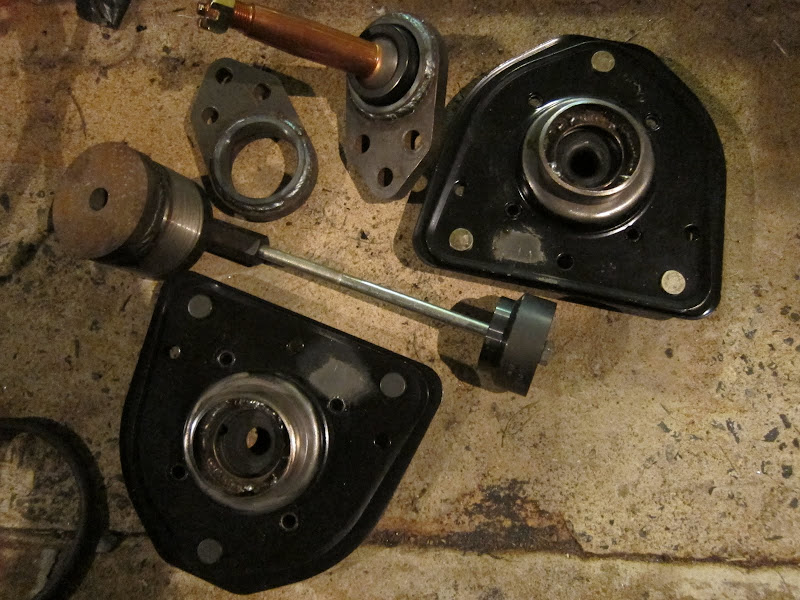
    After that I was actually able to find someone willing to machine the carrier for me and use a 3D printer to give me a prototype to test. I have that prototype now and a few different length of stud to test out.

    The two main problems with something like this is:
    1: rotor clearance
    2: pushing knuckle in via extended stud and fixed angle of it through the knuckle

    The second can be remedied via a longer ball joint carrier, but then it adds to the first.
    Ideally I would like to fit all this under a 16x8 x-lace wheel and 12" F-body setup. (that combo already works) So the sweet spot is spacing the ball joint below the rotor but not too far.

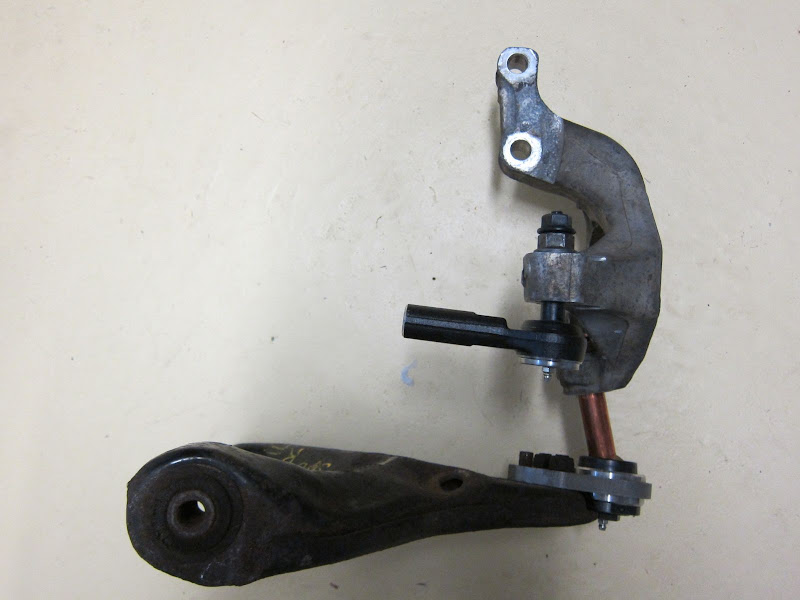
    Here's the original:


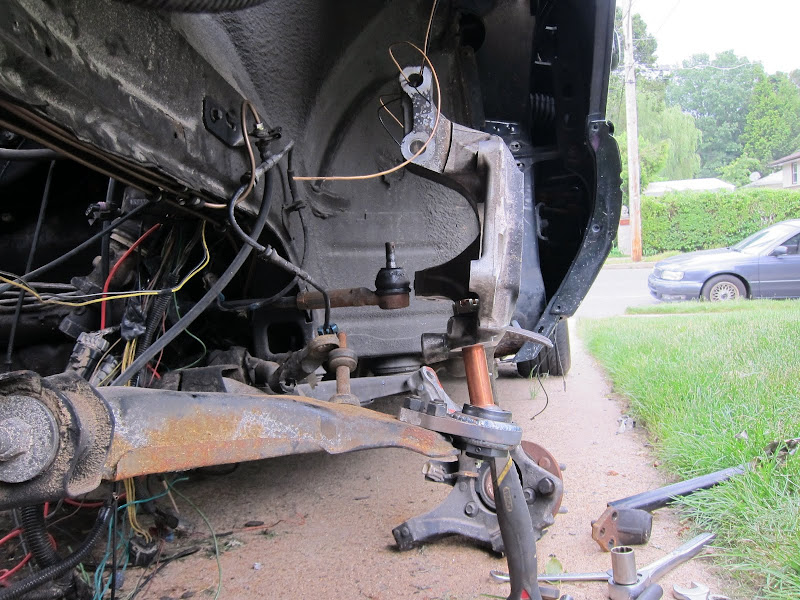
    Here's some pics of the progress:


    Progress has been and will be slow but I wanted to kick this up on here to maybe motivate others to do similar.
    Reply With Quote  
     

  2. #2 Re: Fixing suspension geometry 
    I live here. SlowNA06's Avatar
    Join Date
    Mar 2010
    Location
    Pennsylvania
    Posts
    5,928
    Thanks (Received)
    0
    Likes (Received)
    0
    Dislikes (Received)
    0
    Awesome work! I had been checking in when you started on this... got a lot further since then. Keep up the good work! Wish we could get someone cool like WBS in on this.
    Irridium spark plugs last 100k mi and work just as well as copper. Copper is a waste on N/A and only lasts 15k mi. Don't use Platinum.
    Use 195* tstat unless you can thoroughly explain why not; 99.9% don't need a lower temp.
    Almost any oil filter, ever, is of higher quality than ACDelco. Spend $6+.
    Reply With Quote  
     

  3. #3 Re: Fixing suspension geometry 
    DUI BABY Bio248's Avatar
    Join Date
    Jan 2008
    Location
    MILWAUKEE
    Posts
    31,340
    Thanks (Received)
    0
    Likes (Received)
    1
    Dislikes (Received)
    0
    i will move this somewhere later, for now it stays put.

    good contribution. you're a master of your craft.
    Reply With Quote  
     

  4. #4 Re: Fixing suspension geometry 
    GT Level Member jmoore4294's Avatar
    Join Date
    Aug 2009
    Location
    ::/128
    Posts
    338
    Thanks (Received)
    0
    Likes (Received)
    0
    Dislikes (Received)
    0
    So help me out here.....what exactly would this do for those of us who are lowered?
    2004 Pontiac Grand Prix GT2 -Wizaired-DHP Tune-180° Thermostat-GMPP STB w/brackets F/R-Bilstein HD Struts w/SSC-Projector Retro-Black SPO Grilles and Spoiler-ZZP Volt. Booster & Alt Rewire
    Reply With Quote  
     

  5. #5 Re: Fixing suspension geometry 
    SE Level Member 95naSTA's Avatar
    Join Date
    Dec 2007
    Location
    Philly
    Posts
    99
    Thanks (Received)
    0
    Likes (Received)
    0
    Dislikes (Received)
    0
    The bottom of this page explains roll center better than I can:
    SpeedDirect.com - More Control Arm Tech Info

    When you lower the car, you change where the pivot points are in relation to on another and lower the roll center.

    Stock, lower control arms point slightly down and away from the car. When the suspension compresses, the outer end of the control arm swings upward in the path of an arc. As the control arm travels along this path, the horizontal distance from the inside pivot point (control arm bushing) of the control arm to the outside pivot point (ball joint) increases. Think of the strut as a pendulum with the fixed top of the string being the fixed top of the strut. As the control arm travels up, the bottom of the pendulum gets pushed out. This is a good thing. In heavy cornering when the suspension is compressed, this creates negative camber, which is when the bottom of the tire sticks out farther than the top. This actually gives more grip.

    On an extremely lowered car, the lower control arms are past neutral and then point even more upward under suspension flex. Thinking of it as a pendulum again, the bottom of the pendulum is being pulled in when the control arm moves up because the horizontal distance between the inner pivot point and the outer decreases. This creates positive camber, where the top of the tire sticks out father then the bottom, and less grip.

    A pic to illustrate:


    There are two basic ways to remedy this on a lowered car.

    1. Drop spindles/knuckles. These are re-worked so that the point at which the ball joint bolts is lower in relation to the strut mounting point. Lowering the ball joint mounting point puts the outer pivot point of the lower control arm at a lower angle and closer to stock.

    I'm not comfortable with re-working cast aluminum so that option is a no for me.

    2. Use a ball joint with a longer stud so that the pivot point is pushed down along with the outer end of the control arm. This will also help restore stock lower control arm and ball joint angles.

    This is what I'm doing. There are no longer ball joints that bolt up. So, I found a few longer studed ball joints, picked one, and I'm adapting it to use with my suspension.
    Reply With Quote  
     

Similar Threads

  1. Fixing dents.
    By Odi in forum How To Write-Ups/Tech Tips
    Replies: 15
    Last Post: 09-18-2011, 09:41 PM
  2. i need help fixing this problem i have thanks
    By sca555 in forum General Tech Discussion
    Replies: 4
    Last Post: 09-06-2010, 01:26 PM
  3. Finally fixing up the gp...need some help
    By BwolfGT in forum 3.8L V6 Supercharged (L67)(L32)
    Replies: 17
    Last Post: 08-16-2010, 03:46 PM
  4. Energy Suspension Suspension Parts
    By GeddyLee in forum Brakes/Suspension/Chassis
    Replies: 3
    Last Post: 03-09-2009, 10:25 PM
  5. fixing hud???
    By blowfishRus6 in forum General Tech Discussion
    Replies: 13
    Last Post: 12-23-2008, 10:45 AM
Tags for this Thread

View Tag Cloud

Bookmarks
Bookmarks
Posting Permissions
  • You may not post new threads
  • You may not post replies
  • You may not post attachments
  • You may not edit your posts
  •