Intro:
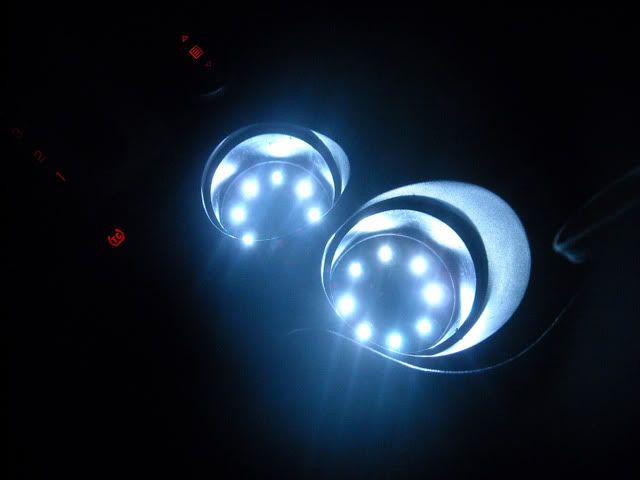
My mod was inspired by Abrasive's lighted cupholders, however I opted for a more intricate solution because I have a 2004 with recessed cupholders. I cut two acrylic discs and drilled holes to insert the LEDs into the bottom in a circular array. Here is the end result:

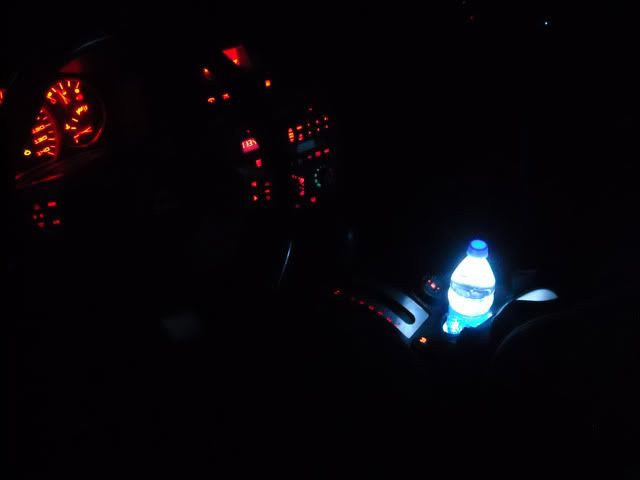
(The picture makes the bottle look like it glows more than it really does, and I even set the exposure adjustment to -2 on my camera.)
The LEDs are 17k mcd white -- 8 in each cupholder, each with 4 series of 2 LEDs and 3 100 ohm resistors arranged in parallel. I wired the +12v source into the traction control illumination wire (gray, aka the corner pin) so they only light up when the dash lights come on -- they also fade with the rest of the dash lights if I choose to turn them down. I also wired in a switch, placed in my ash tray next to the switch for my radar detector in case I want to just turn them off.
Update: I have since upgraded to RGB LEDs and am able to change each LED color individually. There is no reason for this and it's a horse**** design. Though it works fine, I'll be redoing my cupholders in a far more epic fashion when I do ambient lighting for the rest of the car. The color will be the same throughout and it will be computer-controlled via my soon-coming custom carputer infotainment system. Be prepared to get raped by technology.
Required Items:
Tools:
-Soldering iron
-Drill with 3/16" bit and 2 1/2" hole saw (I would like to have used a drill press but I don't have one or have access to one)
-RotoZip or similar tool
-Bench grinder
-Sandpaper or file
-Knife
-Black Sharpie
Materials:
-Clear acrylic: enough to cut two circles with ~3" diameter (should be 3/8" thick, or 1/2" thick if not using black plastic bottoms) or get precut discs from TAP Plastics
-Silicone waterproof sealant
-Printable drill template for marking holes: downloadable as png or psd
-Black spray paint or black plastic: enough to paint/cut two circles with ~3" diameter (plastic should be 1/8" thick)
-If using paint, these are also required:-Goof Off or similar paint remover
-More time
-Lots of Q-tips
-Paper towels
-Patience
-Solder (duh?)
-16 white LEDs (5mm, 3.4v, 20mA)
-8 x 270 ohms worth of resistors (I used 300 ohms because all I had were 100s and 470s)
-2 5mm x 7mm pieces of breadboard (PCB)
Instructions:
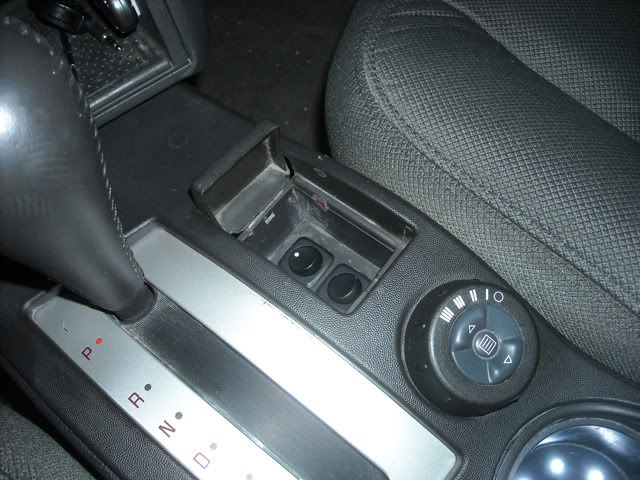
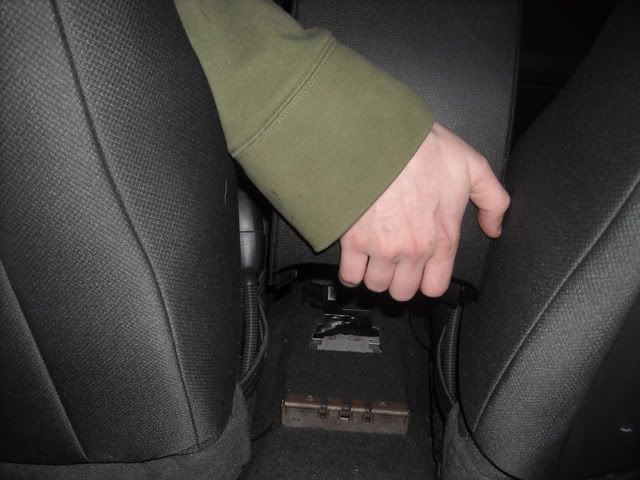
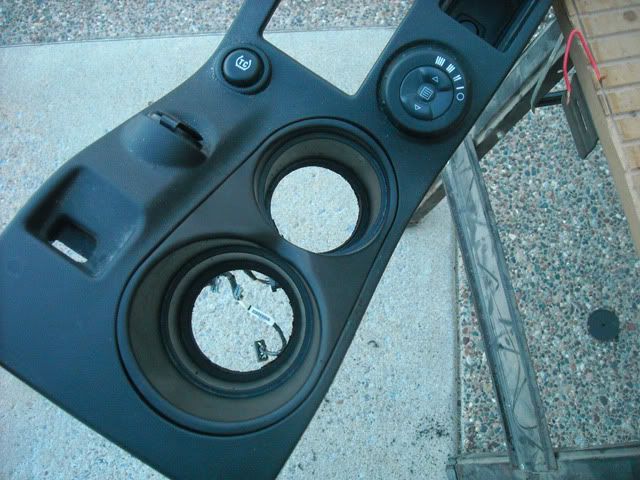
Step 1 - Remove the center console from your car
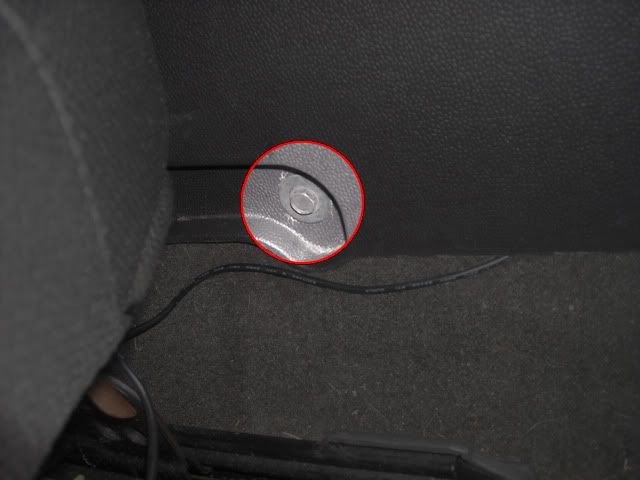
It's pretty much useless trying to do this with it still in, plus it'll allow you to wash it and clean underneath. There are 4 bolts, 2 on each side of the center console (10mm).
With the car off, remove these bolts, engage the parking brake and shift the car into 3.
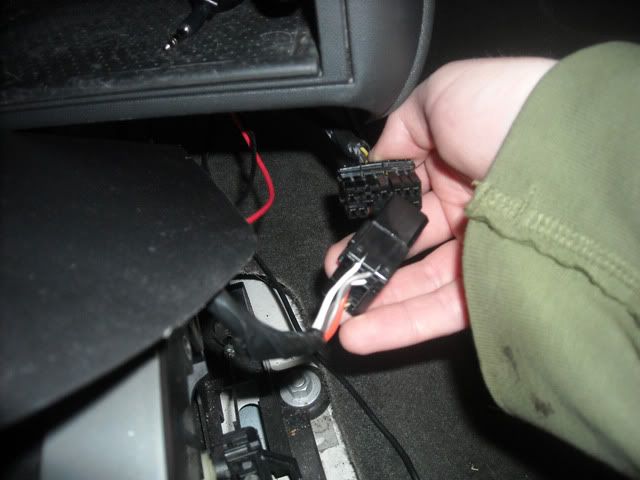
Pull up on the back of the center console. It's held in by the same clip system as the fuse box cover.
Then just unplug the harness and you're good to go.
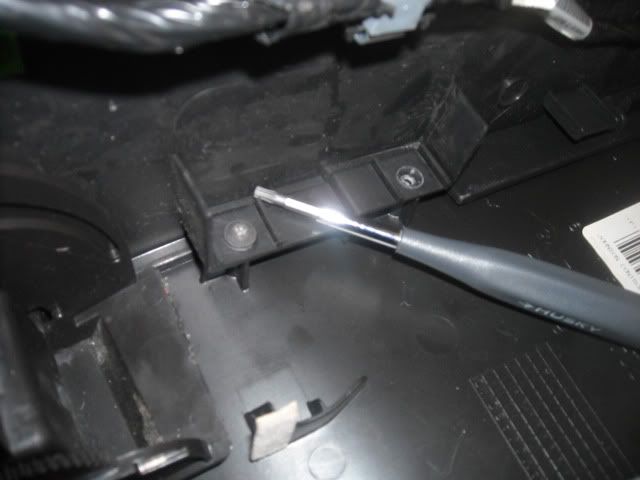
Step 2 - Disassemble the center console
It will make it a billion times easier to work on this. There are torx screws all along both sides underneath the center console. Flip it upside-down and remove them all, they are torx size T-15.
Step 3 - Cut out the bottoms of the cupholders
Now the real work begins. Using the 2 1/2" hole saw, cut out a circle in the center of both cupholders, leaving approximately 1/4" lip to hold the acrylic insert. This hole is for the electronic components that go underneath the insert.
Step 4 - Cut out the acrylic discs
The approximate diameter of the disc inserts is 2.95" -- I used a can of spray paint to trace because it fit perfectly inside the cupholders, and marked with a Sharpie. Then, using the RotoZip, cut out the discs making sure not to go too slow so you don't burn the edges of the acrylic.
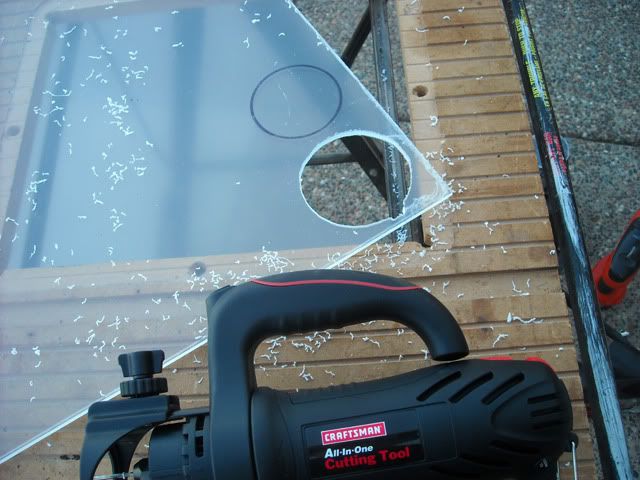
Use the bench grinder to carefully sand the edges for a perfect fit. You'll want the discs so that they fall almost all the way down to the bottom of the cupholder without any force, but should be snug at the bottom (removing the cupholder insert from the top center console piece helps during this process).
Step 5 - Create a dark underside for the acrylic inserts
Once you have your fancy-shmancy acrylic inserts custom cut to your cupholders, you need to create an opaque underside so the electronic components don't show through (you could also fog up the bottom with sandpaper I suppose). If you are opting to use plastic (which is the best way imo), then you need to repeat the process from step 4, but with the black plastic -- you may then skip to step 6a.
For all you painters, you will need to apply several coats of black spray paint to one of the sides of the acrylic inserts, then proceed to step 6b.
Step 6 - Drill holes for the LEDs
A) Plastic:Line up the drill template that you should've printed at this point (if you haven't done so, then do it now) and use a screw or other sharp pointy object to make dots on the black plastic -- this is where you will drill the holes. Then, place the black plastic insert on top of an acrylic insert and secure them so they don't move around, but keep in mind that you need to drill these things. Once you have them so they won't move, proceed to drill a hole at each mark using the 3/16" drill bit, and also using an LED as a depth measurement. The bottom (lead side) should not submerge into the plastic; it should either be flush or have the lip resting around the hole. Remember, these holes do not go all the way through the acrylic.
B) Paint:Since you chose to paint, I hope you chose 1/2" thick acrylic or you'll have to be a lot more careful when drilling to make sure you don't go all the way through. Line up the drill template that you should've printed at this point (if you haven't done so, then do it now) and use a screw or other sharp pointy object to make dots in the black paint -- this is where you will drill the holes. Use an LED as a depth measurement, gauged against the side of the acrylic and marked with a Sharpie. Proceed to drill a hole at each marking with the 3/16" drill bit. Remember, these holes do not go all the way through the acrylic.
Step 7 - Assemble the LED array
It is time to assemble the LED array. However you do it, just make sure you place the LEDs correctly before soldering -- nothing would piss you off more than to have to redo the whole thing. Here is the recommended configuration:
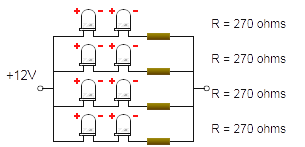
You will need to make two of these, one for each cupholder. Make sure there's about 6 inches of slack wire for each positive and ground lead so you can comfortably connect them after they're installed, and also make sure that they are not secured directly at or very near the edge of the acrylic or you will have difficulties getting them into the cupholders.
Step 8 - Assembling the Cupholders
It's finally time to see your plan come to fruition. If you opted for the recommended method of using black plastic bottoms, insert those into the cupholders first. Then insert the clear acrylic into the bottom of the cupholders (hole side down of course). They should be snug enough to stay in place while allowing you to flip the whole console upside-down (don't worry if they're not, you'll need to hold them in place anyways). You then take the LED array and position it so the LEDs are in the holes, and hot glue (or otherwise attach) it to the underside of the cupholder. Repeat the process for the second cupholder. Now just wire up the common leads together, and tap into one of the cigarette lighter sockets for ground, and into the corner pin (illumination pin) on the traction control button for the positive feed. It's usually recommended that you split the ground for the switch, but in this case it really doesn't make any difference. Now just flip the console back so it's right-side up, and apply the silicon sealant to the edges of the clear acrylic. Make sure to get it nice and smooth to give it a polished finish -- no need to half-ass things now.
Step 9 - Reinstall Console
All that's left to do now is reassemble and reinstall the center console and plug in the wiring harness. No need to worry about the cupholder wiring as it's all self-contained (as long as you secured it properly so it doesn't flop all over the place). See the instructions for disassembling for more intricate details, just do them in the reverse order.
Complete
Congratulations, you now have lighted cupholders! Enjoy your finished product by putting a lightly colored (or clear) beverage with a clear (or near clear) container in the cupholder and light it up.


 Could you please elaborate on your methodology?


