There are 2 guides here. The first was borrowed from GPONA written by Nitemare_05GP, The second is from atthetipwebs.com Both methods should be the same for any 2004-2008 Grand Prix Naturally Aspirated or Supercharged. If any variance in year or trim is found, let me know and I'll edit accordingly.
Guide 1:
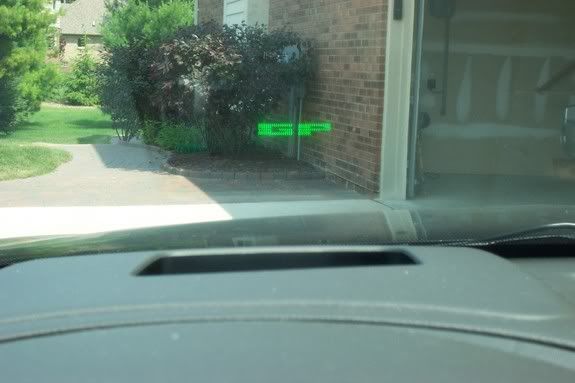
"HUD"- Head-Up Display, capable of projecting 18 different functions onto the windshield including audio system information, speed, compass, outside air temperature, PRNDL, "Stealth" mode, intermediate gear positions, performance upshift light, high beam indicator, and warning lights such as head lights suggested. 2005 cars with Nav systems the HUD will display driving directions. -courtesy of Flip and Bleen
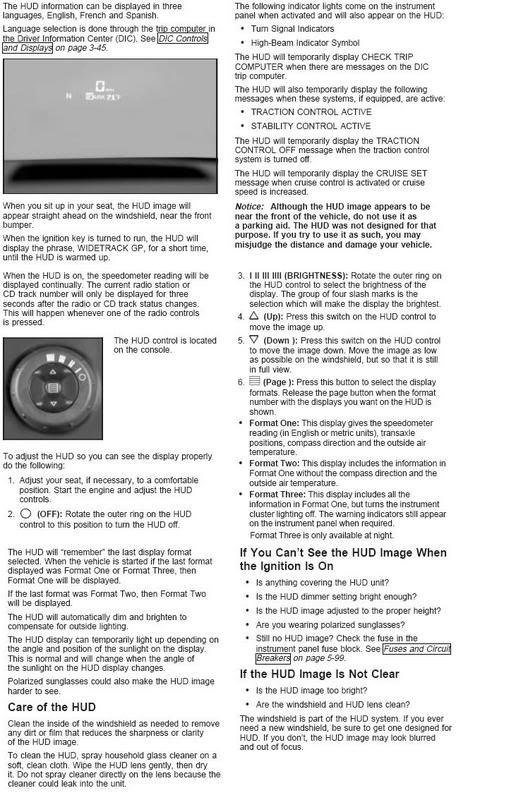
Owner's Manual HUD info:
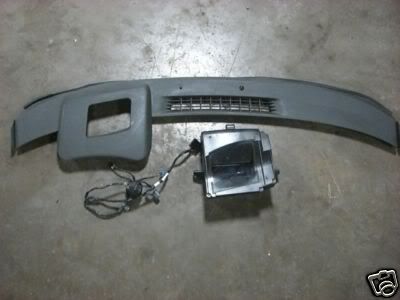
HUD components:
HUD dash trim piece (GM P/N: 10354107), HUD Display unit (GM P/N: 10387483), HUD Wiring Harness (GM P/N: still searching)
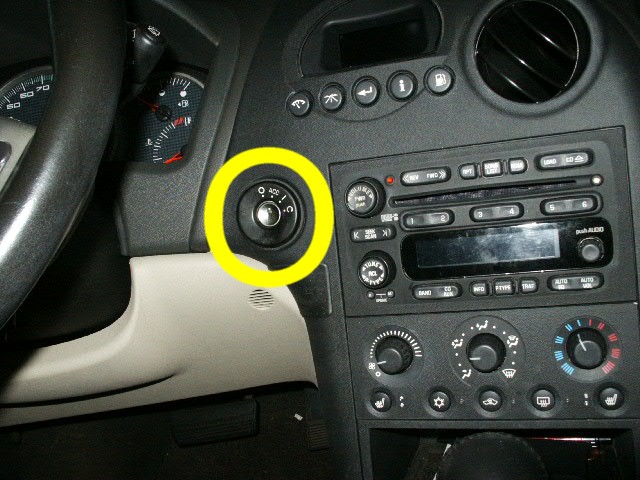
HUD adjustment switch (GM P/N: 10438819)
Compass Module (GM P/N: 15236913), Outside Air Temperature Sensor (GM P/N: still searching)
Tools needed/reccomended:
Flathead screwdriver (to remove the upper dash trim piece which is held in by plastic clips)
utility knife or razor blade (for precision while cutting the dash padding)
Dremel or some sort of rotary too with a QUALITY cutting wheel (to cut through the hard plastic dash under the dash padding)
Soldering tool or electrical tape (to conceal exposed, spliced wires)
18/5 (18 gauge/5 wire) Thermostat wire to wire the HUD to the adjustment switch (it's color coded and keeps eveything bundled together neatly)
18/3 (18 gauge/3 wire) Thermostat wire to tap into the DIC if you choose to go that route rather than tap into the IP
Electrical Wiring
-I would strongly suggest taking care of the wiring first, especially if you're electrically retarded like me. I was lucky enough to obtain a wiring harness for the HUD and adjustment switch, so fortunately it was all just plug n' play after I wired everything together correctly. If you don't have a wiring harness, then definitely wire everything together first. One, to avoid any mishaps later in the project and two, you're obviously not going to able to fit your hands inside the dash to do the wiring unless you have the whole dash taken out of the interior of the vehicle. :mrgreen:
-The wiring harness will have multiple plastic connectors or "clips" that the wires lead to, kind of like a plug at the end of an electrical cord. But instead of one fat cord, in this instance you will see many tiny electrical wires leading to a clip. Each one of these clips or plugs will have eight wires leading to it, all of which are color coded to represent the information that each individual wire sends to/from the vehicle. Duane 9586 came up with a good representation, shown below:
Top of one of these "clips"
1 2 3 4
5 6 7 8
HUD harness
Wire # color what is it?
1-brown/yellow-data
2-yellow-up control
3-brown-down control
4-black/white-ground
5-white-illumination
6-orange-12V
7-brown-switch signal
8-white-low referance
Switch harness
Wire # color what is it?
1-grey-switch illumination
2-black-ground
3-white-low referance
4-brown-down control
5-brown switch signal
6-white-illumination
7-yellow-up control
8-blank
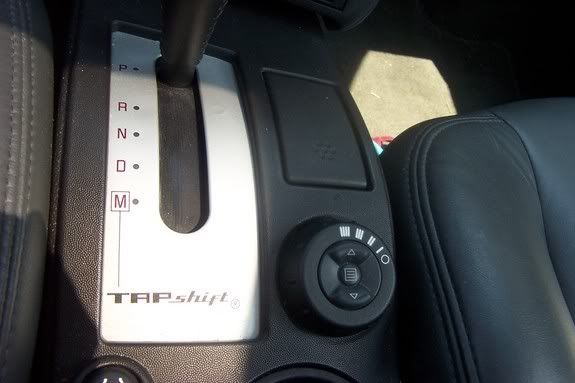
"As you can hopefully see the HUD and switch harnesses share 5 wires minus the ground wire. These 5 (low referance, down and up controls, switch signal, and illumination) are the wires that will be directly hooked up. The two remaining wires on the switch (switch illumination and ground) I simply tapped into the traction control wires to provide the ground and red illumination. [NOTE: My GP did NOT come with Traction Control, so I will come back to this... -Nitemare_05GP]
The remaining 3 on the HUD harness (12v, ground, and data) I tapped into the IP cluster. You could use the DIC also but the IP is right there and made a logical choice.
(I have to check the following when I get home to make sure I have the correct colors matched up)
The brown/white DATA wire goes with the gray IP (Instrument Panel info) wire
The black ground remains the same color along with the orange 12v." -courtesy of duane9586
Scott(chethammer) has informed me that when Ryan did the HUD install he had the dash nearly taken apart so it was much easier for him to access the wiring in the IP area than it would be for me. So he advised me to tap into the wiring harness for the DIC, which recieves the same information as the IP. I will update this portion of the write-up as I do my own version of the HUD install, using the DIC wiring harness.
Dash Modification
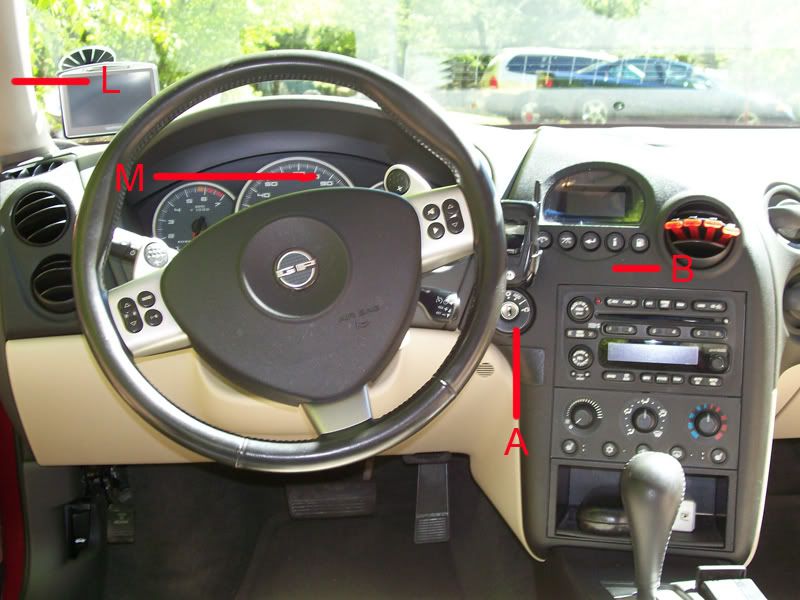
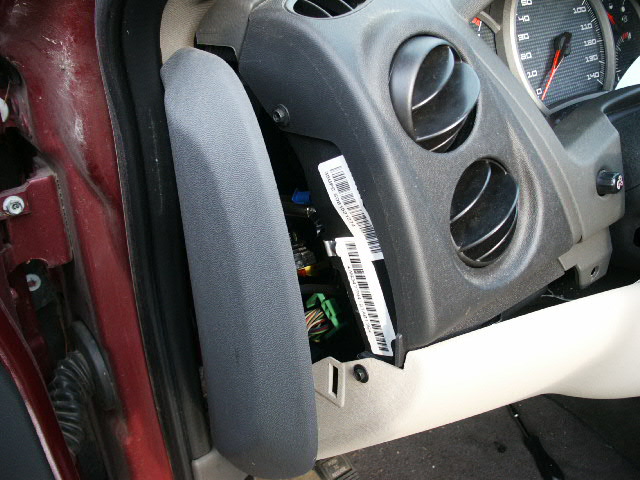
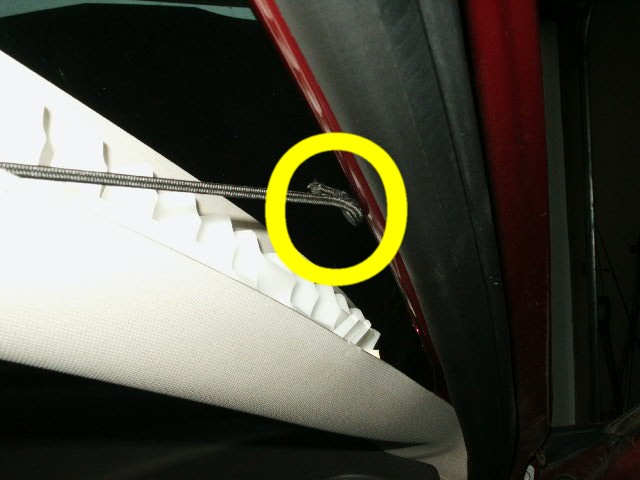
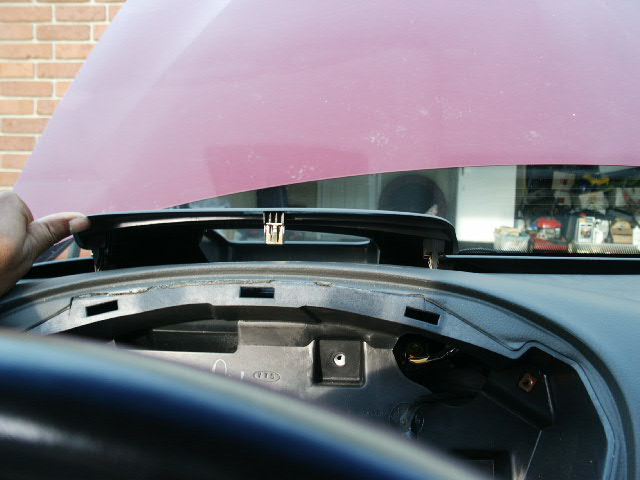
Step 1: Take off both A pillar covers (L). Start at the top and pull towards the center of the car. They're held in by clips, so no tools required.
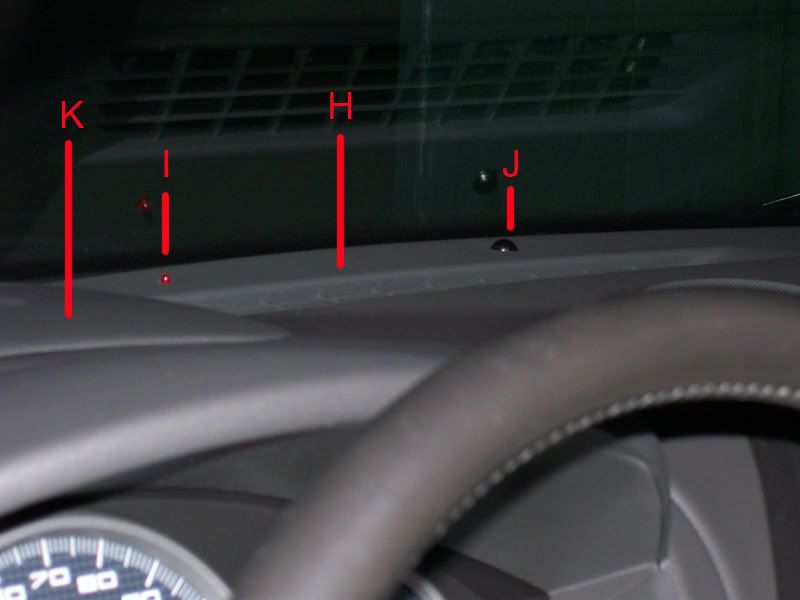
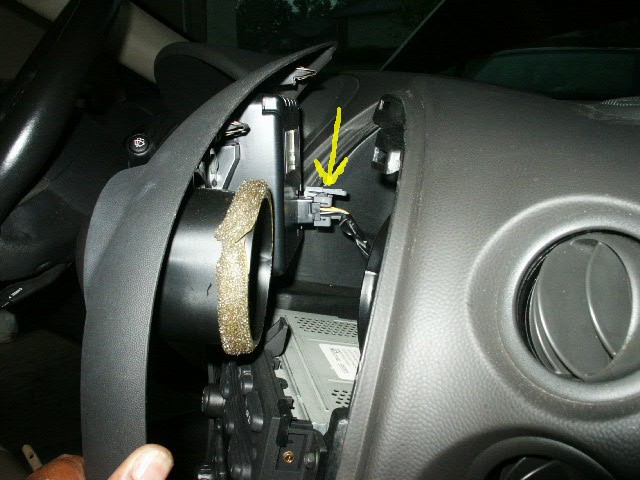
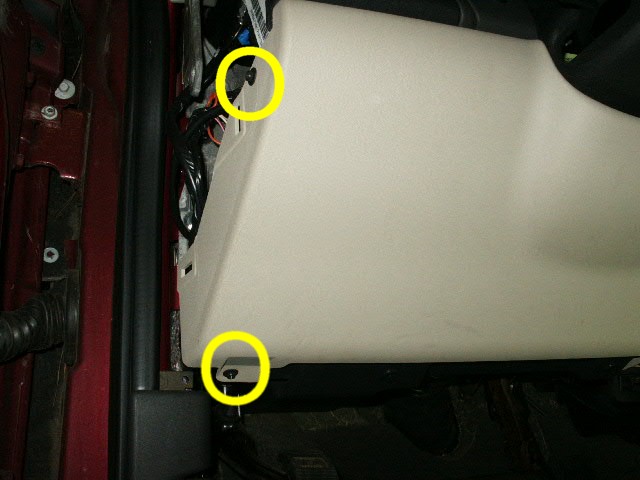
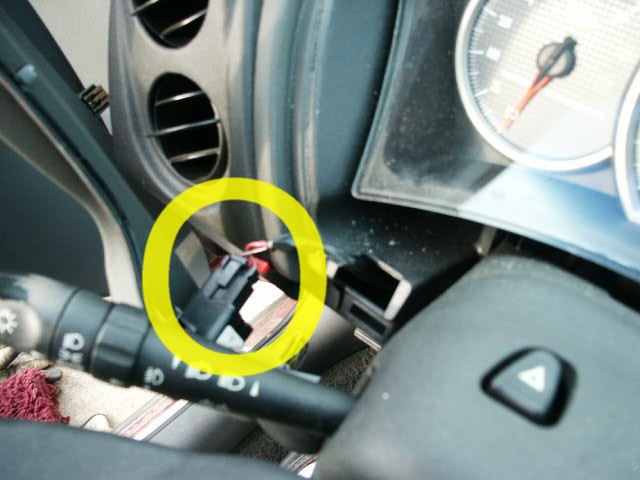
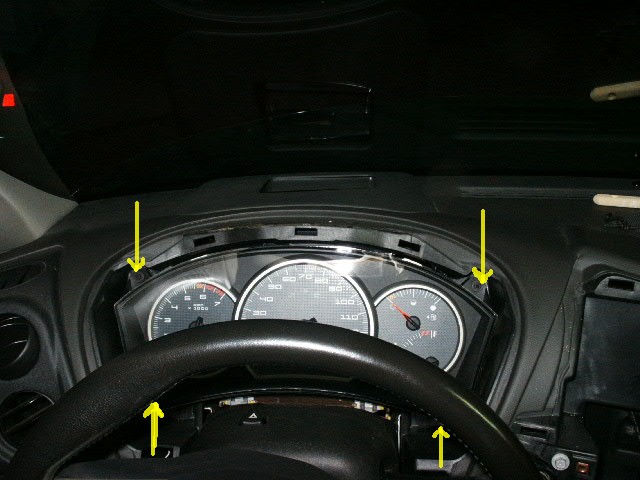
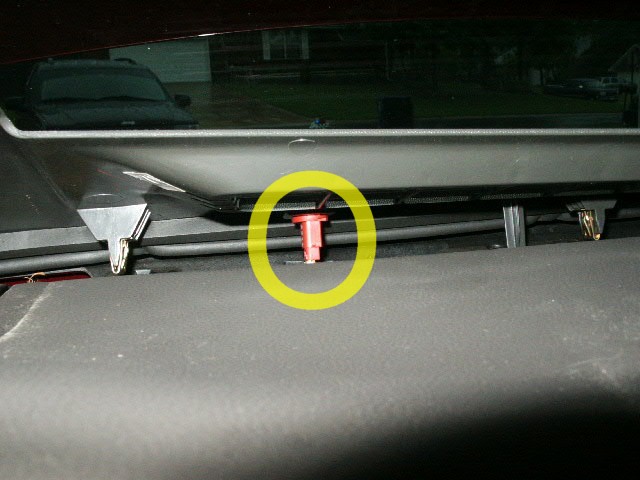
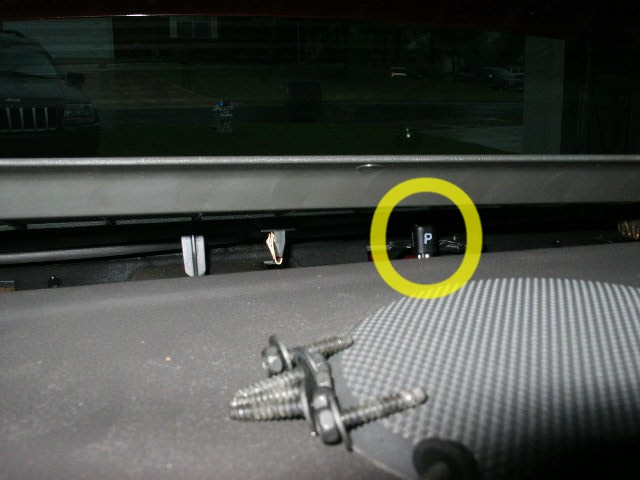
Step 2: "Take off the dash trim piece (H), commonly referred to as a 'cowl.' Start by the driver's side and work it out. Again, it's held in by clips, so just pull straight up (as possible). I had to work from both sides of the car, pulling a couple of clips at a time until everything released. There is a light sensor (J) and a theft-device LED (I) attached to the cowl. Scott recommended that I disassemble the units but, in my case, twisting the body counterclockwise from the bottom released the entire unit in both cases. A quarter turn was all it took, then the cowl was out. Pretty easy." -courtesy of unstable
This "cowl" is removed a) to prepare the area of the dash where the HUD will be housed in for cutting and b)to make room for the new HUD style cowl which you will lay down on top of the dash as template for cutting the dash.
Step 3: It is easiest to remove the clips from the new HUD dash piece before you set it on top of the dash to trace around the outer edges of it. This is is the part where you have be PRECISE: you don't want to cut too wide of a hole in your dash because you traced too wide of a line around the HUD trim piece. Tape off about a 1/4 inch inside your line on all three sides to prevent any mishaps. You only have one chance, really, and after you start cutting into your dash there's no going back so you want to be sure to do it right the first time. You can use chalk or dry erase marker, as long as it's something that easily seen and easily removable.
-pics courtesy of Ryan
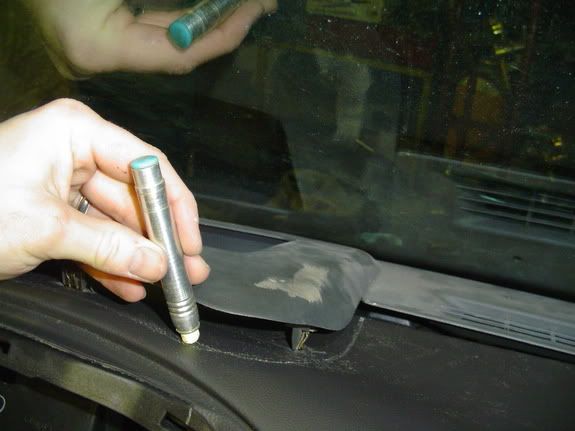
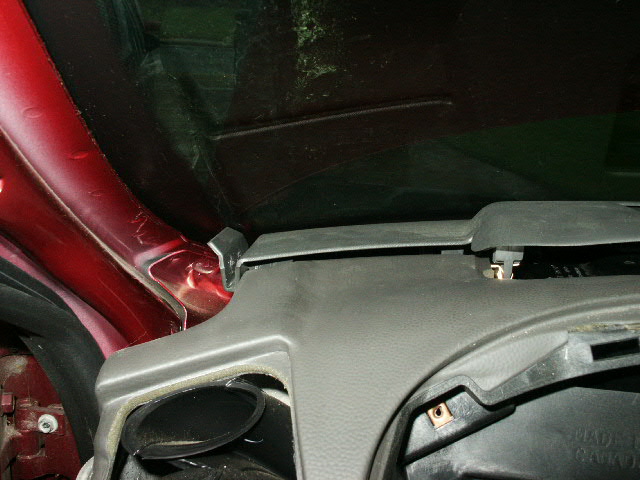
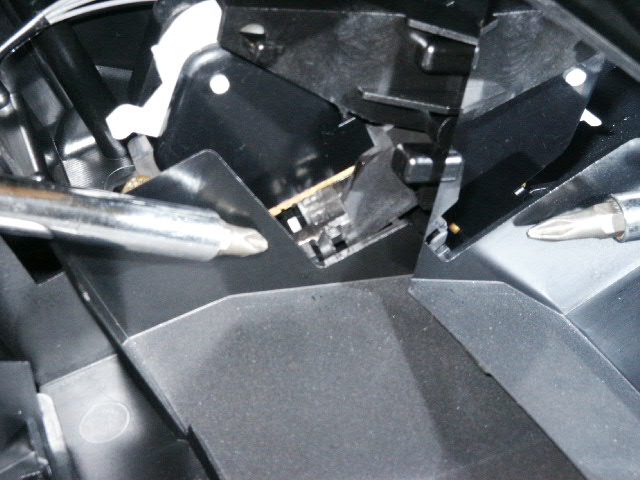
Before proceeding any further, it is HIGHLY recommended that you protect your windshield with duct tape or blanket, or something. Or tape cardboard up against your windshield. The area between the windshield and the dash where you will be cutting is a tight space and it would be easy to nick the glass and create a nice lil scar. "You WILL cut all the way back to the firewall near the windshield and then across. The HUD goes all the way back to the back. It doesn't look like it will but it does." As you can see in the picture below
-photo courtesy of Ryan
Step 4: